
Connect Billing
Connect Billing automates invoicing for application fees so you no longer need to invoice your submerchants manually.
Once configured, Mollie sends monthly invoices on your behalf to submerchants and provides them with timely records for the bookkeeping purposes.
Connect Billing is currently in beta.
How Connect Billing works
Connect Billing can be set up and activated per OAuth app. After you activate it and connect your merchants to the OAuth app, Mollie generates monthly invoices on the 2nd of every month and sends them automatically to your submerchants using the contact data Mollie has for each client.
Connect Billing invoices include Application fees charged through the OAuth app in the previous calendar month, based on CE(S)T. The invoice amount includes Application fees charged through the API or Resell Pricing, showing in your primary balance currency.
If you charge application fees in a currency that differs from your primary balance currency, Connect Billing does not include those fees in the invoice amount. You still need to invoice those application fees manually.
Connect Billing sends invoices only to submerchants that meet the listed conditions (at the time of creation):
- The client status is set to
active. - The client has a total application fee amount higher than
0. - Connect billing toggle is turned on for that OAuth app.
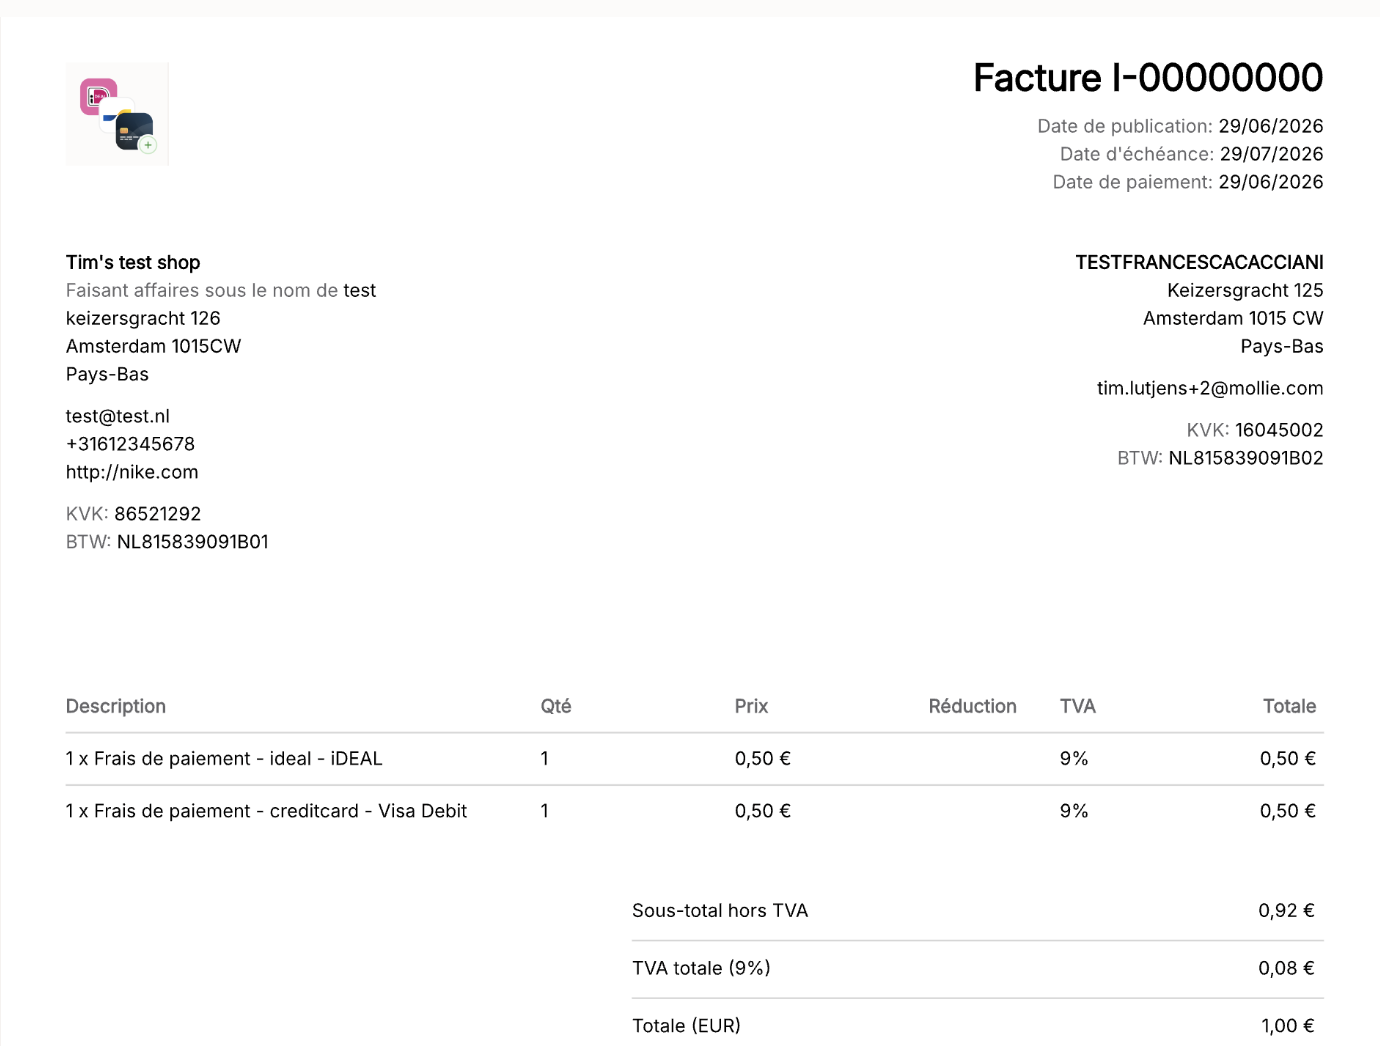
Each generated invoice contains:
- Invoice creation date and number
- Partner information
- Submerchant information
- Total application fee (broken down by payment method and submethod) for the previous month
- VAT rate and amount
- Total amount, including subtotal and total VAT
You can retrieve generated invoices in the Invoicing dashboard or through the Sales Invoices API.
To inspect application fees charged per client, go to your Mollie Web app > Transaction Margin Report, and generate a report for the relevant time range.
Prerequisites
Before you activate Connect Billing, check the client information, partner information, and Mollie Invoicing terms using the checklists in the sections below.
Client information
To send invoices, Mollie needs enough information about your clients (submerchants).
Connect Billing adds these recipient details to each invoice (and hence needs to have this data saved in your Mollie account):
- Organization name
- Organization address: street, city, postal code, and country
- VAT number
- Chamber of Commerce number
- Phone number
- Email address
Through the usual onboarding flow, Mollie collects all this information except the VAT number. We recommend looping in your submerchants to check whether they added their VAT number (if the number is missing, Mollie still sends the invoice, but without the VAT included).
To check if you have all the relevant client information, call the Get organization endpoint:
{
  "resource": "organization",
  "id": "org_xxx",
  "name": "Steyns Socks",
  "email": "[email protected]",
  "locale": "en_US",
  "address": {
    "streetAndNumber": "Keizersgracht 126",
    "postalCode": "1015JW",
    "city": "Amsterdam",
    "country": "NL"
  },
  "registrationNumber": "xxxx",
  "vatNumber": null
}
For organizations without a VAT number, use one of these options:
- Redirect your submerchant to this article: How do I add or change my VAT number?
- Link your submerchant to their organization settings in the Mollie Web app so they could fill it in: Organization settings
If you use Client Link onboarding, make sure all new accounts provide the required invoice information during the onboarding.
Partner information
Connect Billing adds the same sender details to each invoice.
Check your Mollie Web app and make sure your own Organization has the following details:
- Organization name
- Organization address: street, city, postal code, and country
- VAT number
- Chamber of Commerce number
- Phone number
- Email address
Mollie Invoicing
Connect Billing extends Mollie Invoicing. To use Connect Billing, you need to first sign the Mollie Invoicing terms and conditions. To sign them, open the Invoicing tab in your Mollie Dashboard and follow the instructions on the page.
Connect Billing configurations
After Mollie enables Connect Billing for your organization, go to Settings > Invoicing and configure Connect Billing for each connected account via the OAuth app.
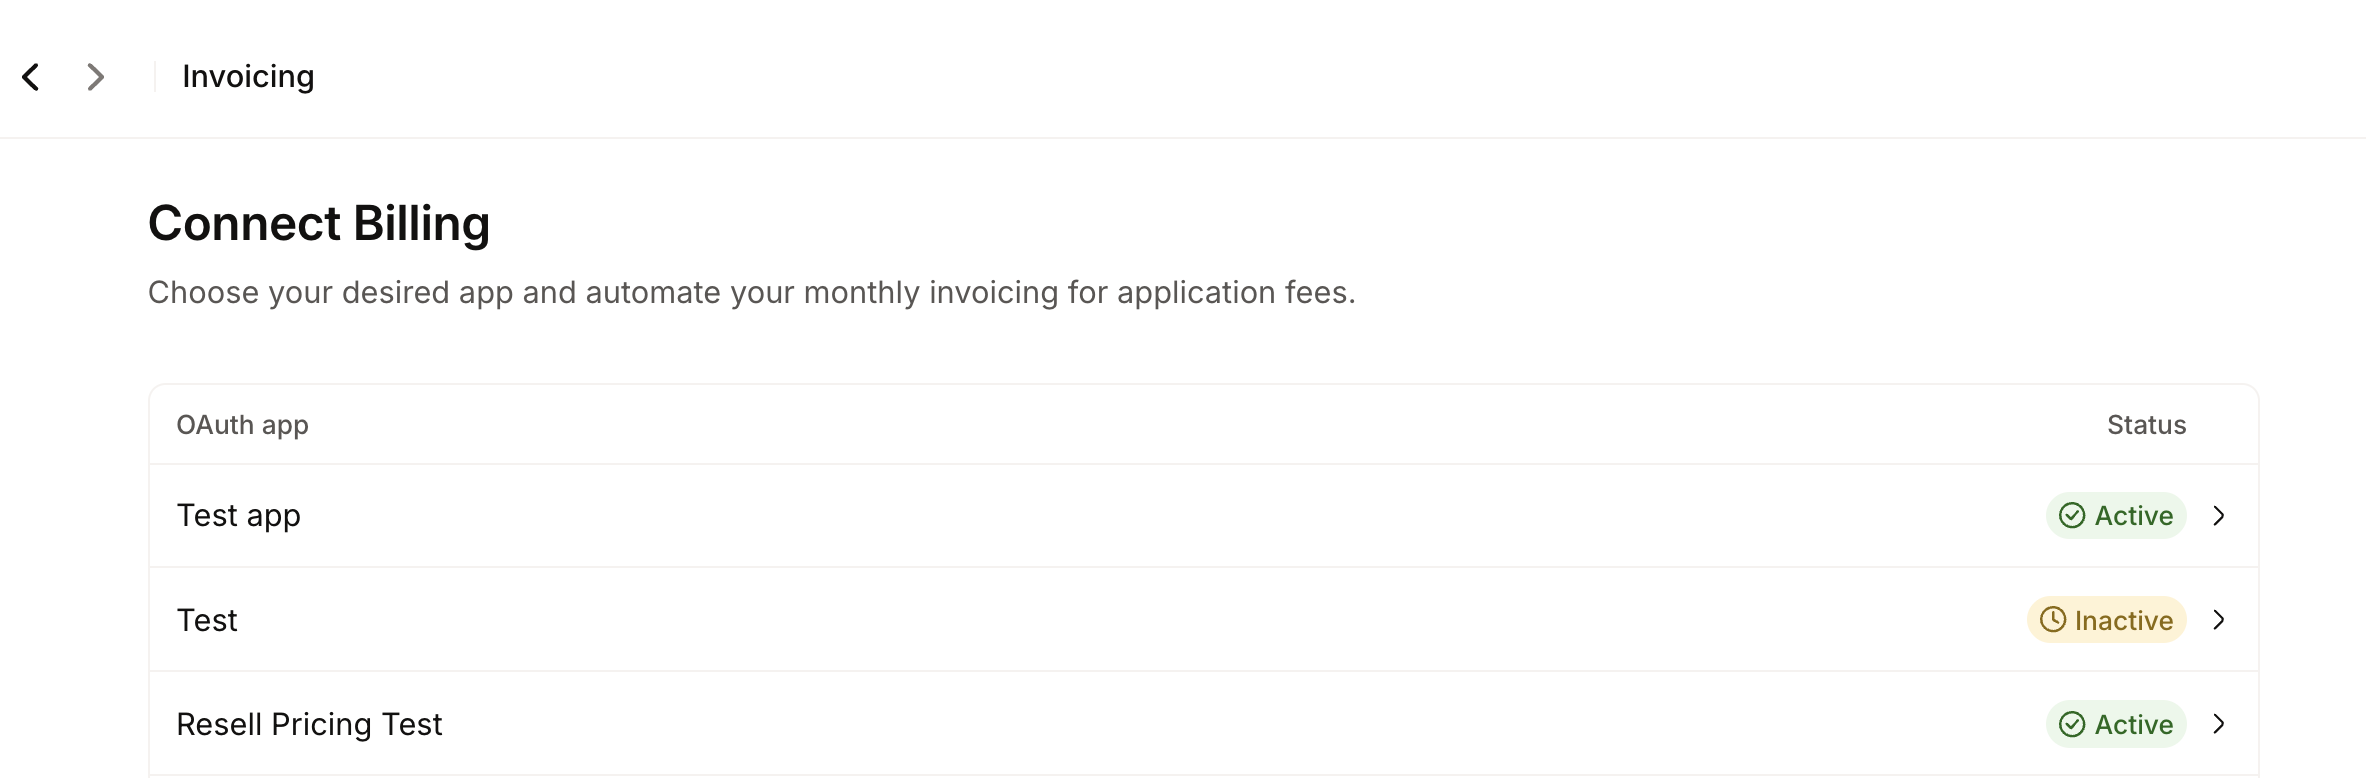
You can define Connect Billing configurations at two levels:
| Level | Description |
|---|---|
| Countries | Shows the countries where you have at least one active client. Country-level settings are default and apply to all submerchants in that country unless client-specific configurations exist (see below). |
| Clients | Shows the clients connected to the OAuth app. Client-level configurations override country-level configurations. |
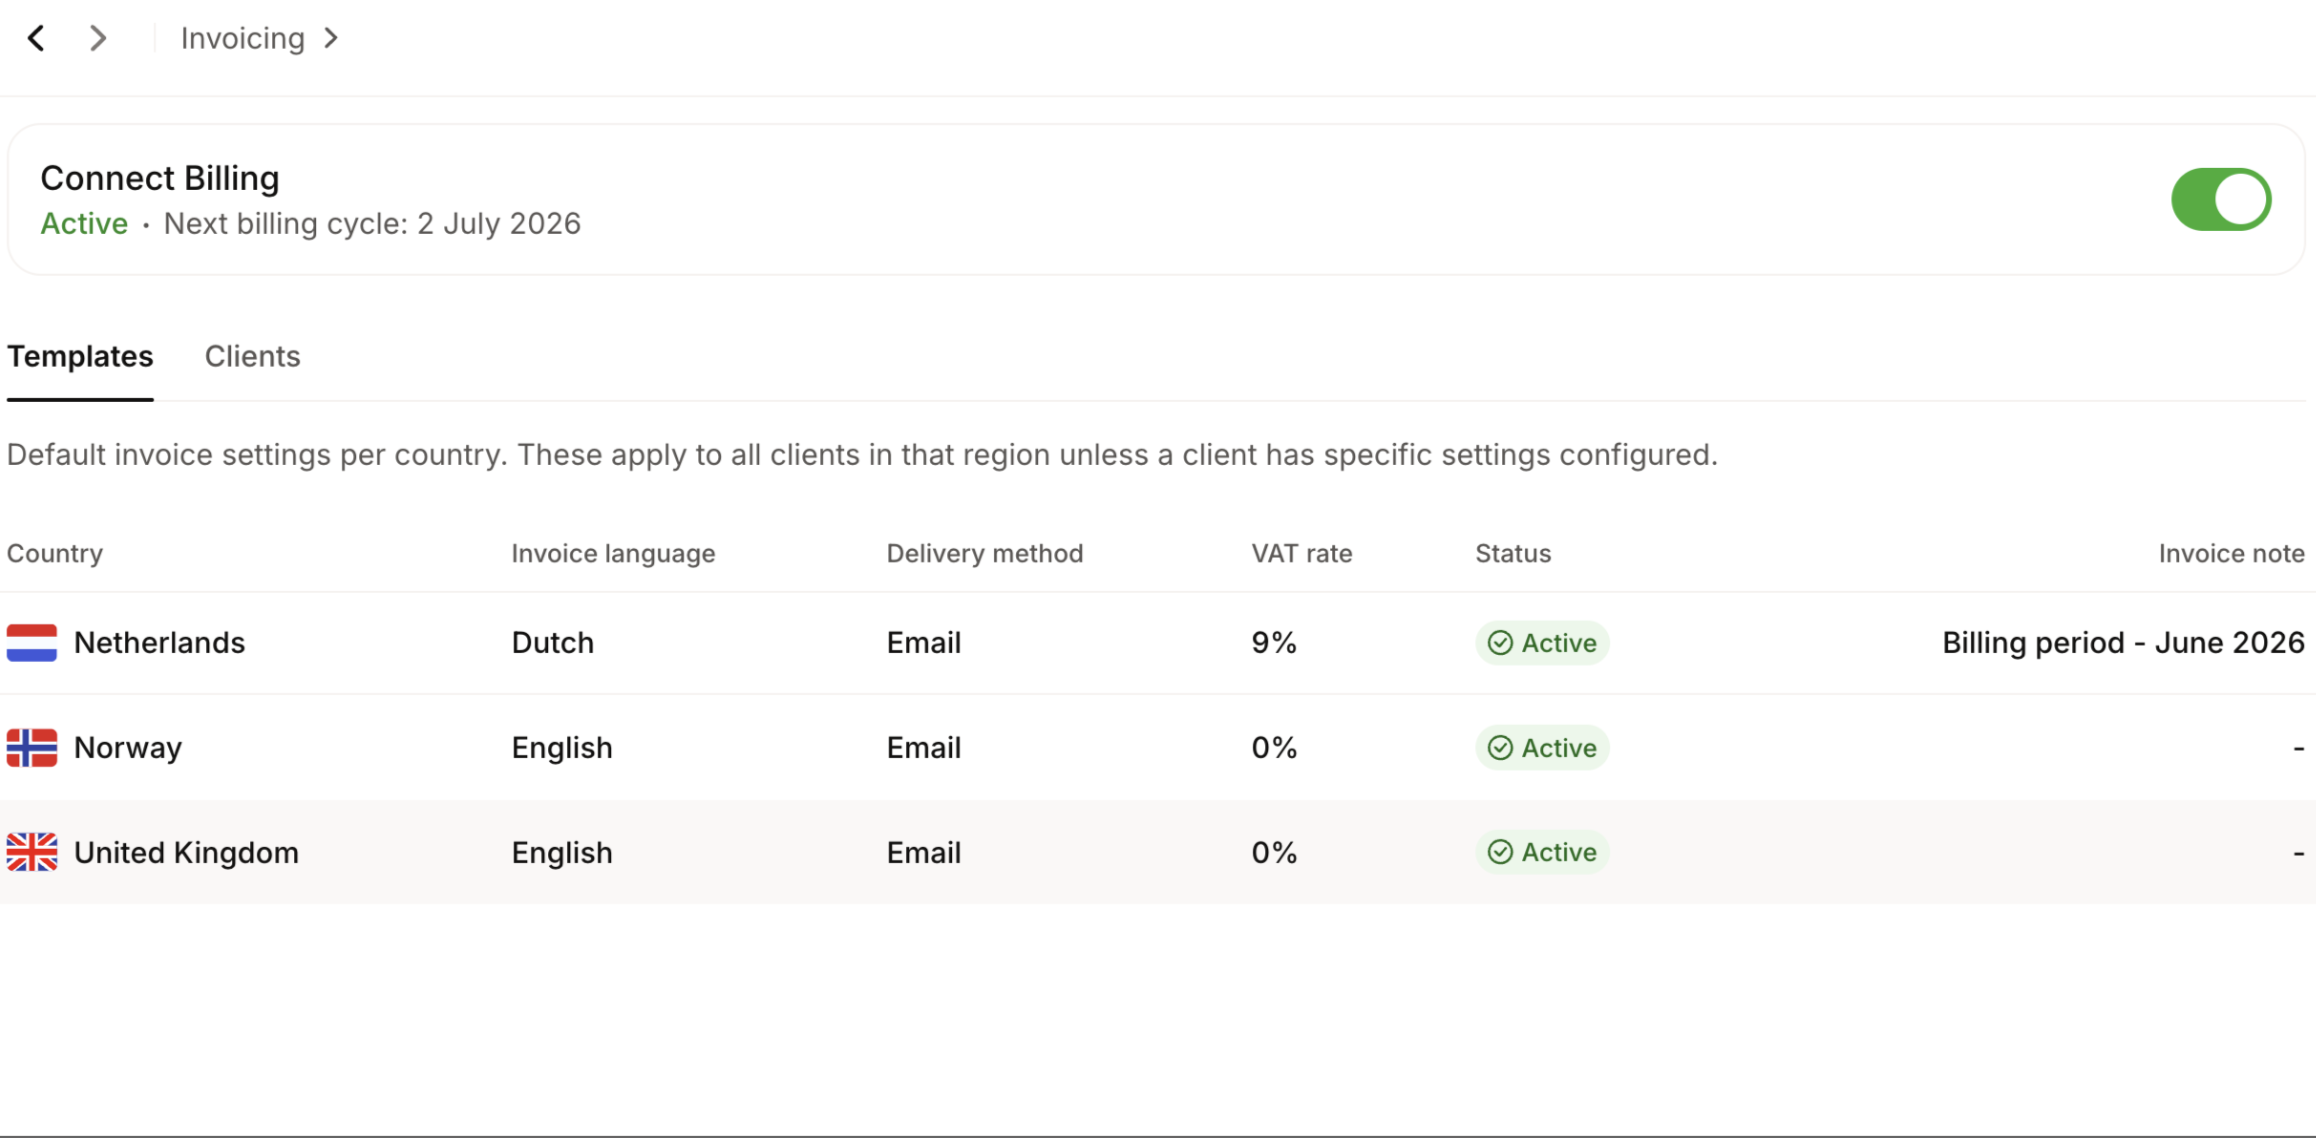
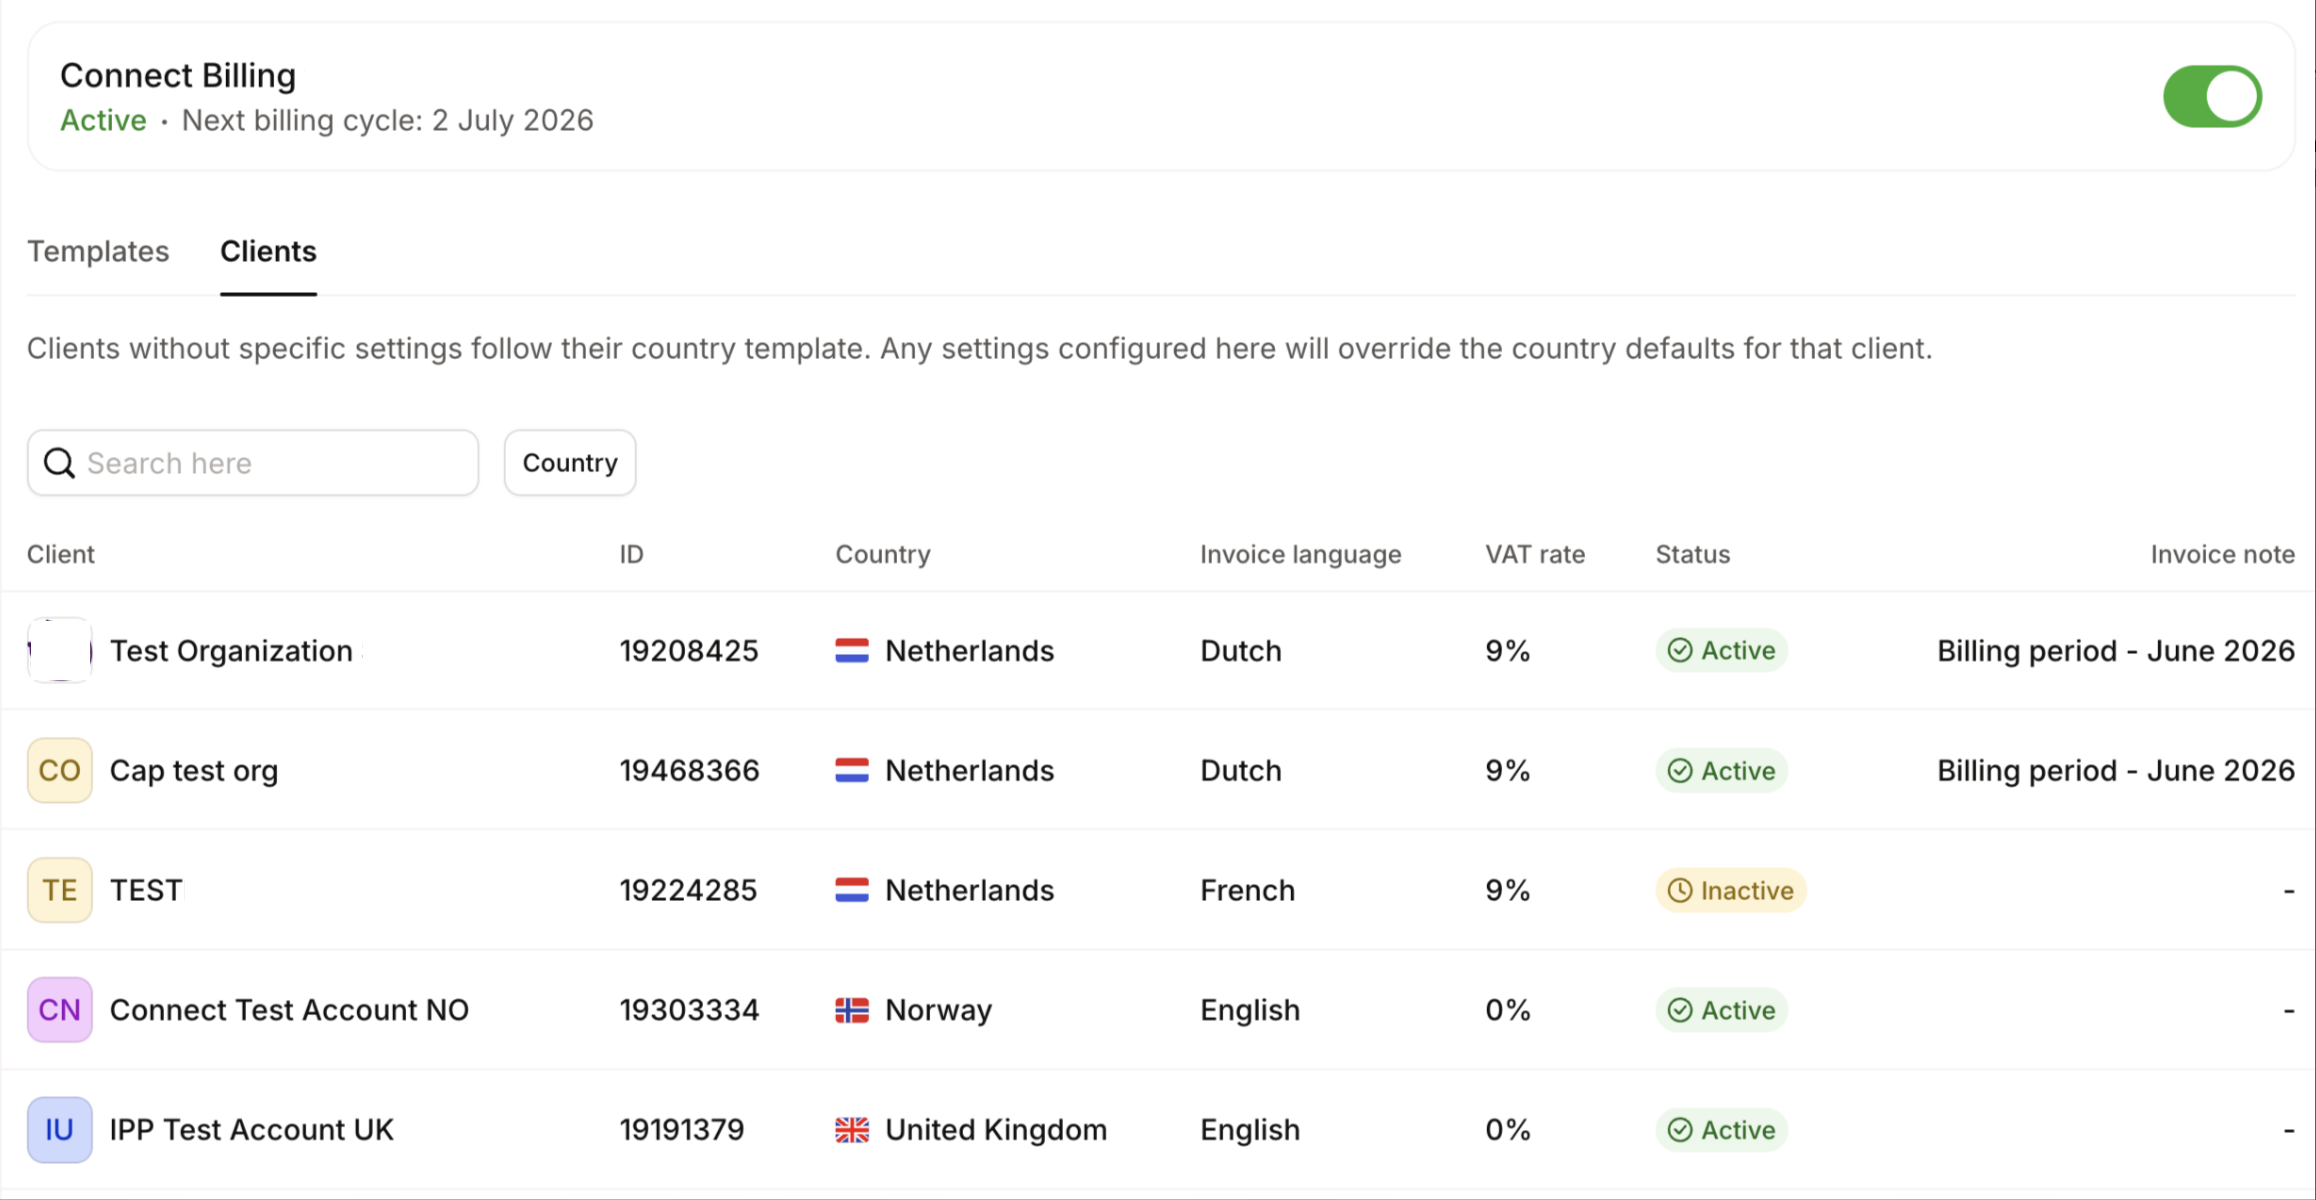
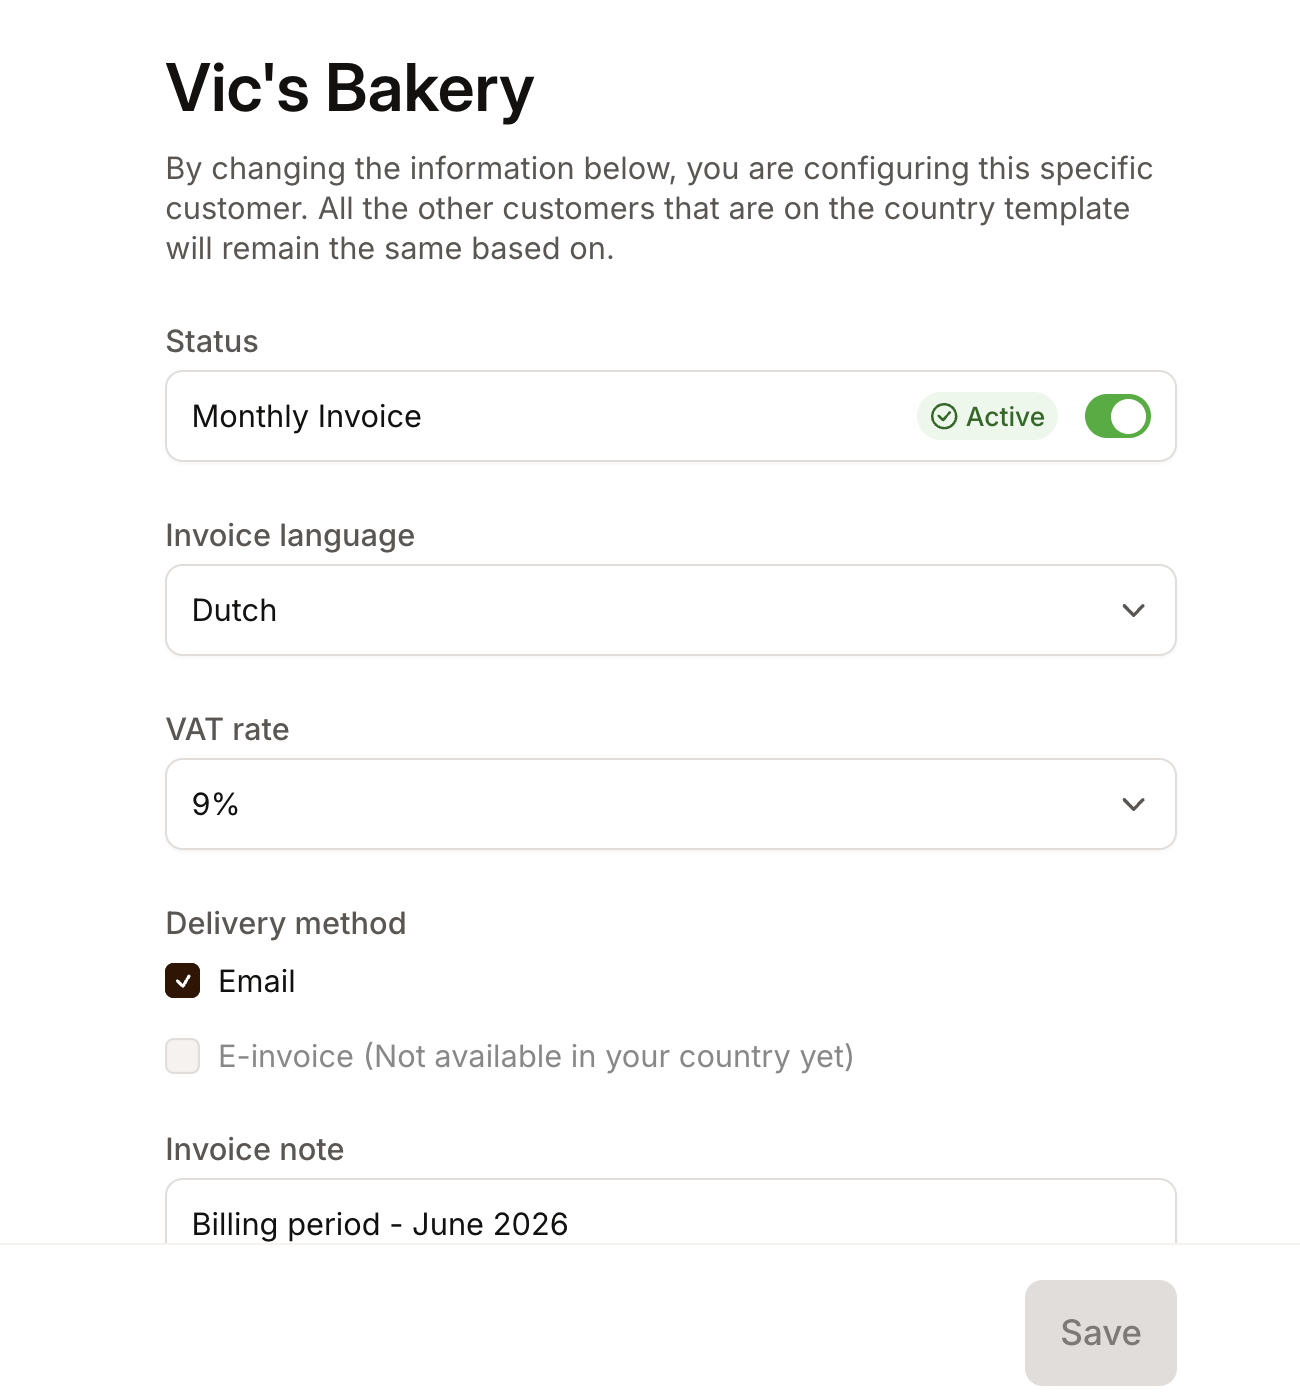
For client-level configurations, you can choose to override only the invoice settings or override both invoice settings and status.
Clients with custom invoice settings do not inherit changes made to country-level invoice settings. If they do not have a custom status, they still inherit changes made to the country-level status.
For both countries and clients, you can define the following settings:
| Setting | Description |
|---|---|
| VAT rate | Choose one of the valid VAT rates for the country where you are based |
| Invoice language | Choose English, Dutch, French, or German |
| Invoice memo | Add a free text that you want to display on the invoice |
| Delivery method | If you are a partner based in Belgium configuring Belgian clients, choose E-invoicing or Mail + E-invoicing. All other cases currently support only Mail |
| Status | Choose active or inactive. Mollie invoices all clients with the active status on the 2nd of the month and does not invoice any inactive accounts |
Activating Connect Billing
After you complete the prerequisites and configure the product, you need to activate Connect Billing for the relevant OAuth app.
To activate Connect Billing, enable the Connect Billing toggle at the top of the page for the specific app.

From that moment, Mollie runs invoicing on the 2nd of every month. Mollie invoices all submerchants with status active where the total application fee amount is higher than 0.
Viewing sent invoices
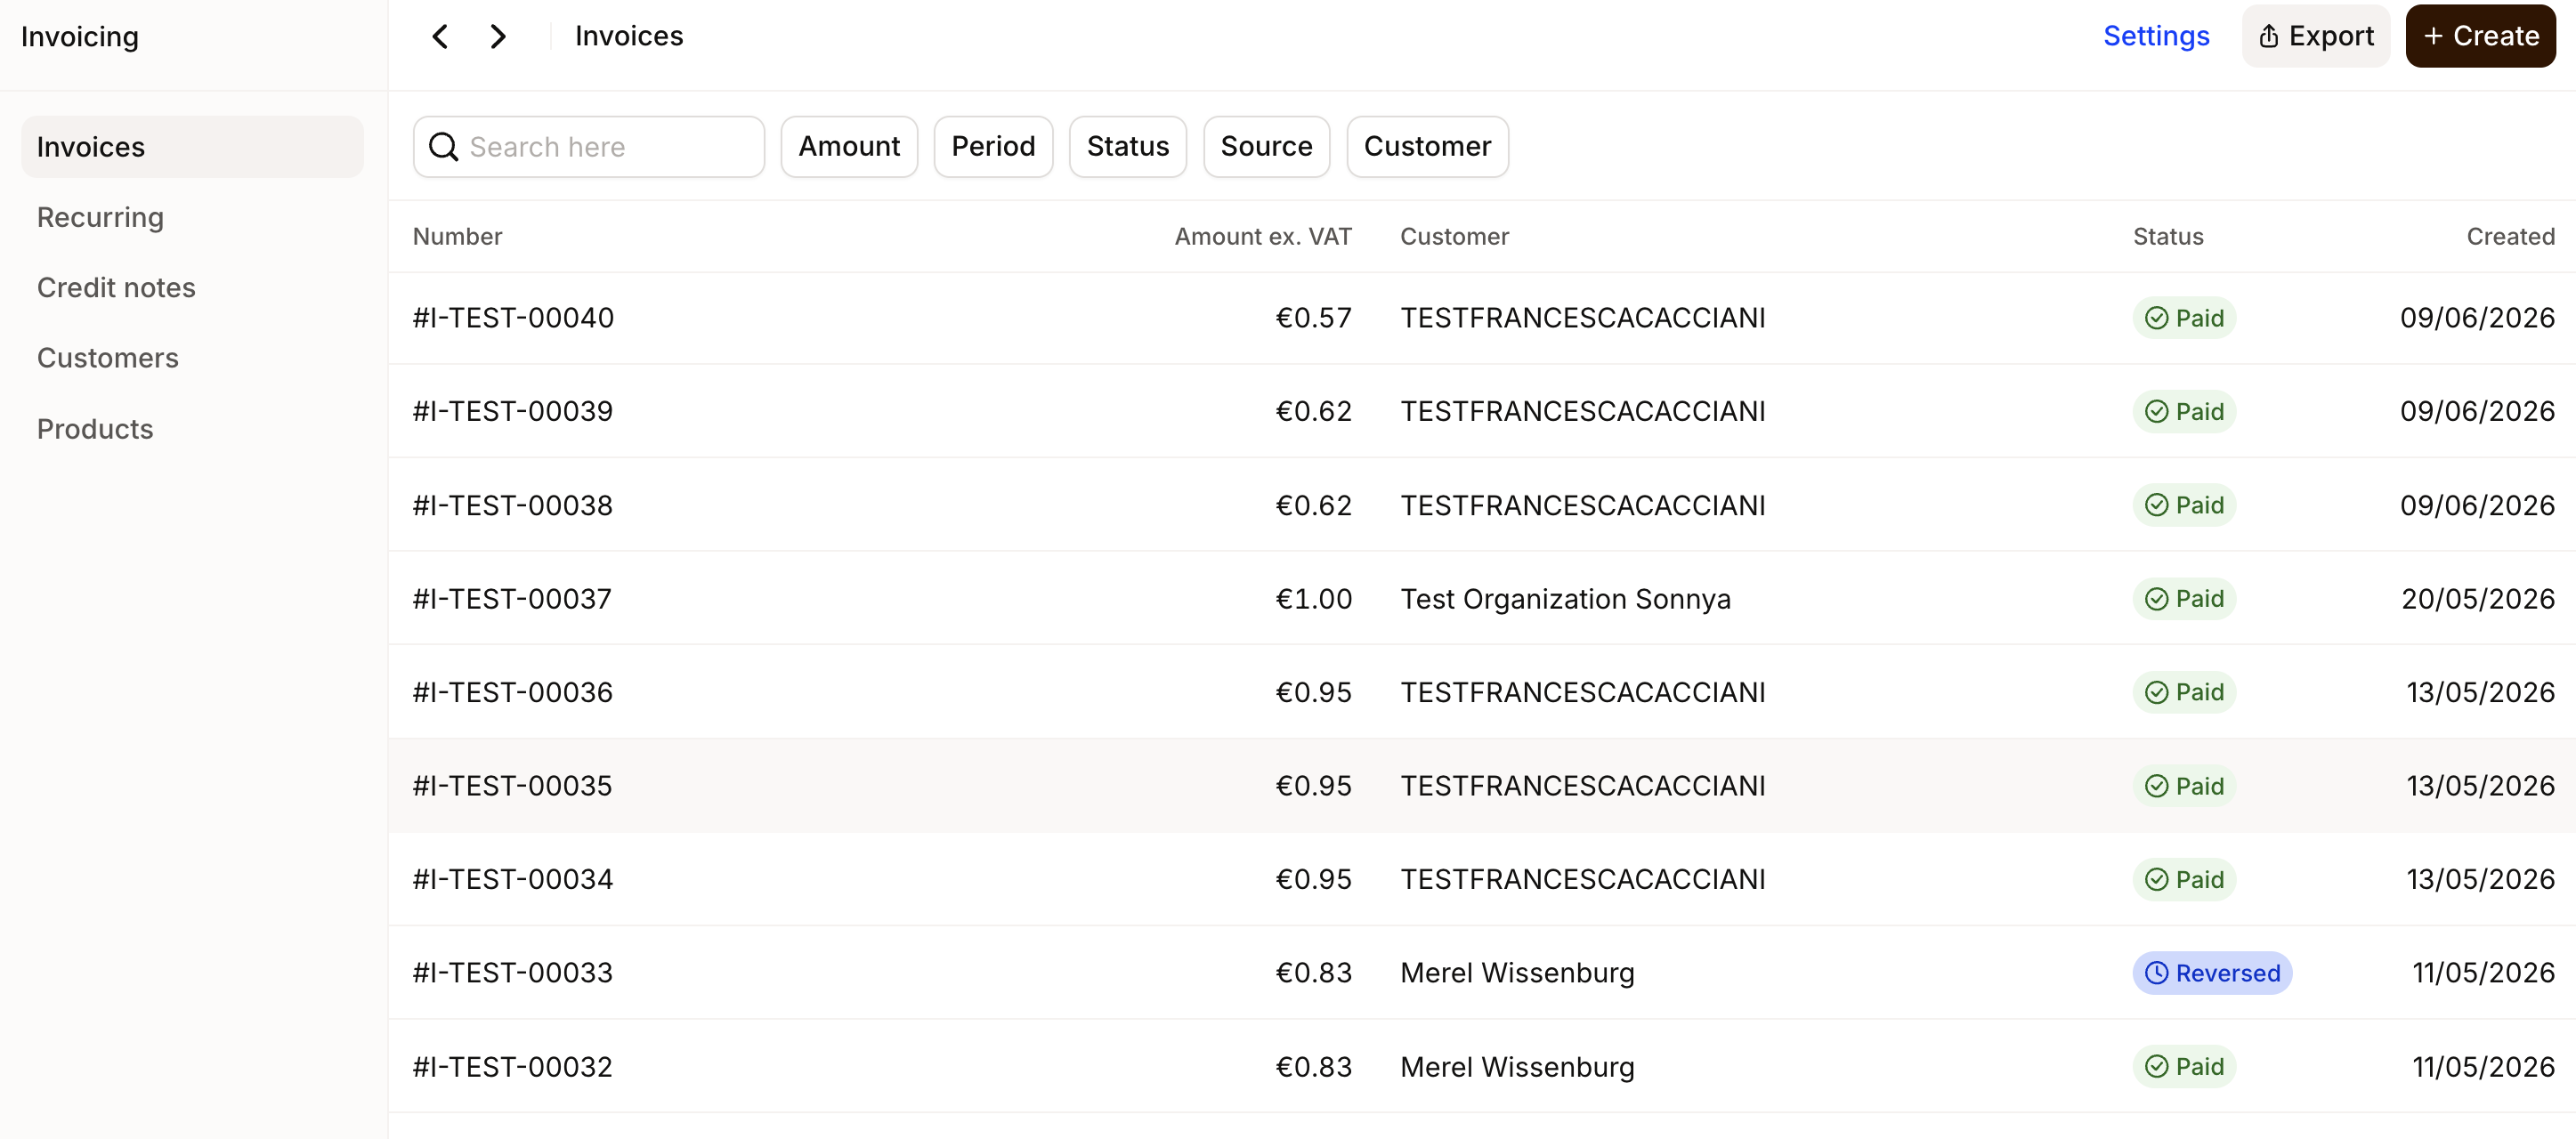
You can find sent Connect Billing invoices in the Mollie Web app under Invoicing.
To find Connect Billing invoices faster, filter by source = Connect Billing.
Adding a BCC to your invoice emails
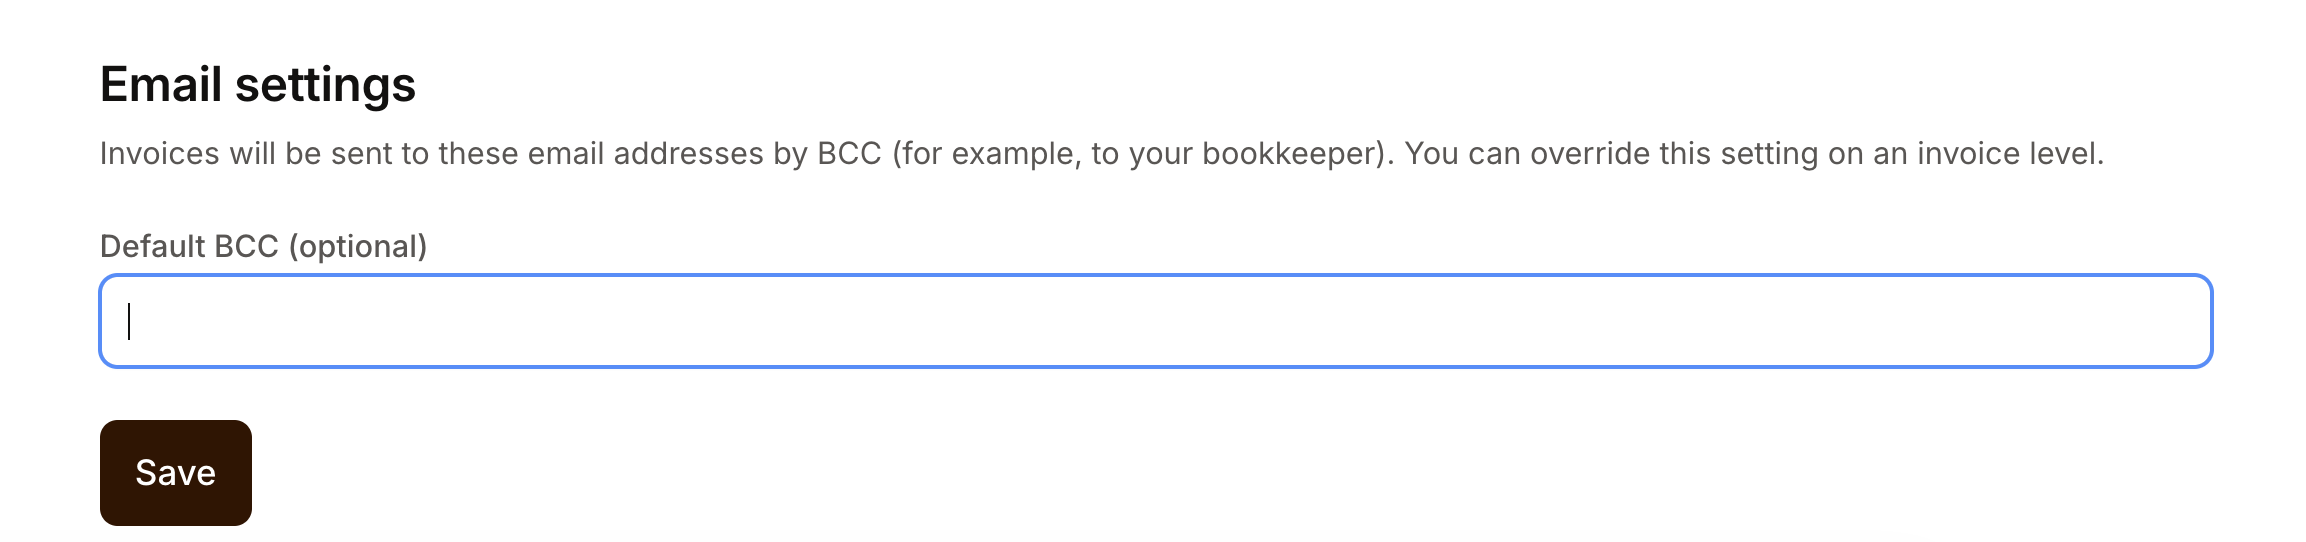
You can use BCC when sending invoices so your bookkeeping team or any other relevant parties can receive copies while keeping their email addresses confidential.
The BCC email address receives every invoice generated from your account.
To add a BCC email address:
- Go to Invoicing.
- Open Settings.
- Add the email address in Email Settings.
Customizing your invoices
Mollie Invoicing lets you customize invoices to align them with your brand and operational needs.
You can:
- Add your company logo
- Adjust the invoice numbering format to match your accounting system or local requirements
To customize your invoices, go to your Mollie Web app > Account settings > Invoicing.
Example invoice
After Mollie generates a Connect Billing invoice, you can view it in the Invoicing Dashboard or retrieve its PDF through the pdfLink returned by the Sales Invoices API.
Sales Invoices API and Webhooks
Sales Invoices API
You can retrieve Connect Billing invoices through the Sales Invoices API: use this API to list invoices, retrieve invoice details, and download PDFs.
The endpoints most relevant for Connect Billing are:
| Endpoint | Description |
|---|---|
GET /v2/sales-invoices | List all invoices. Filter by status to narrow the results. |
GET /v2/sales-invoices/{id} | Retrieve a single invoice and its full details. |
The invoice response includes a pdfLink in _links for downloading the invoice as a PDF.
Connect Billing invoices are issued in
paidstatus. Mollie has already collected the application fees, so your submerchant has no outstanding balance.
Webhooks
Use webhooks for the Sales Invoices API to react to Connect Billing invoice events in real time.
Setting up webhooks
To create a webhook that listens to Invoicing events:
- Go to Developers > Webhooks
- Click Create webhook
- Enter a Name to identify the webhook
- Enter the Webhook URL where Mollie should send events
- Choose the Payload style:
- Snapshot — Mollie includes the full invoice resource in the payload. This is the default.
- Simple — Mollie sends a notification that a resource changed status. Fetch the invoice through the API to get the current details.
- Expand Sales Invoice API under Event types and select the events you want to subscribe to
- Use Test button to verify your endpoint is reachable before going live
Connect Billing event types
| Event type | When it fires |
|---|---|
sales-invoice.created | A new invoice has been generated on the 2nd of the month. |
sales-invoice.issued | The invoice has been sent to your submerchant. For Connect Billing invoices, the invoice is already in paid status. |
sales-invoice.cancelled | The invoice was cancelled after issuance. |
Example Snapshot payload
{
  "resource": "event",
  "id": "event_uY8qmqh6Eot3fYMW5vMRJ",
  "type": "sales-invoice.issued",
  "entityId": "invoice_EUbPsToUh6mZYJf85vMRJ",
  "createdAt": "2026-05-02T08:00:11.0Z",
  "_embedded": {
    "entity": {
      "resource": "sales-invoice",
      "id": "invoice_EUbPsToUh6mZYJf85vMRJ",
      "status": "paid",
      "currency": "EUR",
      "totalAmount": {
        "value": "124.65",
        "currency": "EUR"
      },
      "amountDue": {
        "value": "0.00",
        "currency": "EUR"
      },
      "issuedAt": "2026-05-02T08:00:07+00:00",
      "_links": {
        "self": {
          "href": "https://api.mollie.com/v2/sales-invoices/invoice_EUbPsToUh6mZYJf85vMRJ",
          "type": "application/hal+json"
        },
        "pdfLink": {
          "href": "https://api.mollie.com/v2/sales-invoices/invoice_EUbPsToUh6mZYJf85vMRJ/pdf",
          "type": "application/pdf"
        }
      }
    }
  }
}
Verify authenticity
Mollie signs webhook requests using HMAC signature. Validate the X-Mollie-Signature header on every incoming request before processing the payload. More on it in How to verify HMAC signature?.
Debug webhook deliveries
Use the webhook delivery log in Developers > Webhooks to inspect each delivery attempt, its HTTP status, and the full event payload.
The Next-gen Webhooks are currently in beta. Test your integration in test mode before going live.
Updated 8 days ago