Accepting payments
With Mollie, accepting payments is a breeze. We provide integrations for all common e-commerce platforms, such as Shopify, WooCommerce, and Magento. Simply installing the Mollie module from the platform’s module store is enough to start receiving payments.
Do you want to build an integration yourself instead? Grab the Mollie API client for your language of choice and continue reading.
Using Mollie Connect? Start accepting payments quickly and easily by following our Mollie Connect guide.
The basic payment flow
In its simplest form, setting up a payment requires only three steps: setting up the payment with our Payments API, sending the customer to our hosted checkout, and processing the webhook we send once the payment is completed.
You can also opt for a deeper integration, from offering your own payment method selection all the way to embedding credit card fields in your own checkout experience. Refer to our guide on building your own checkout to dive into how the Mollie checkout flow can be fully integrated.
Either way, from your customer’s perspective, the journey looks roughly as follows. Depending on the payment method, additional information may have to be filled out by your customer, and they may get sent to their bank or card issuer to authenticate the transaction.

Working with the Payments API
To make the basic payment flow explained above a bit more concrete, here is the same flow, step by step, from a programmer’s perspective.
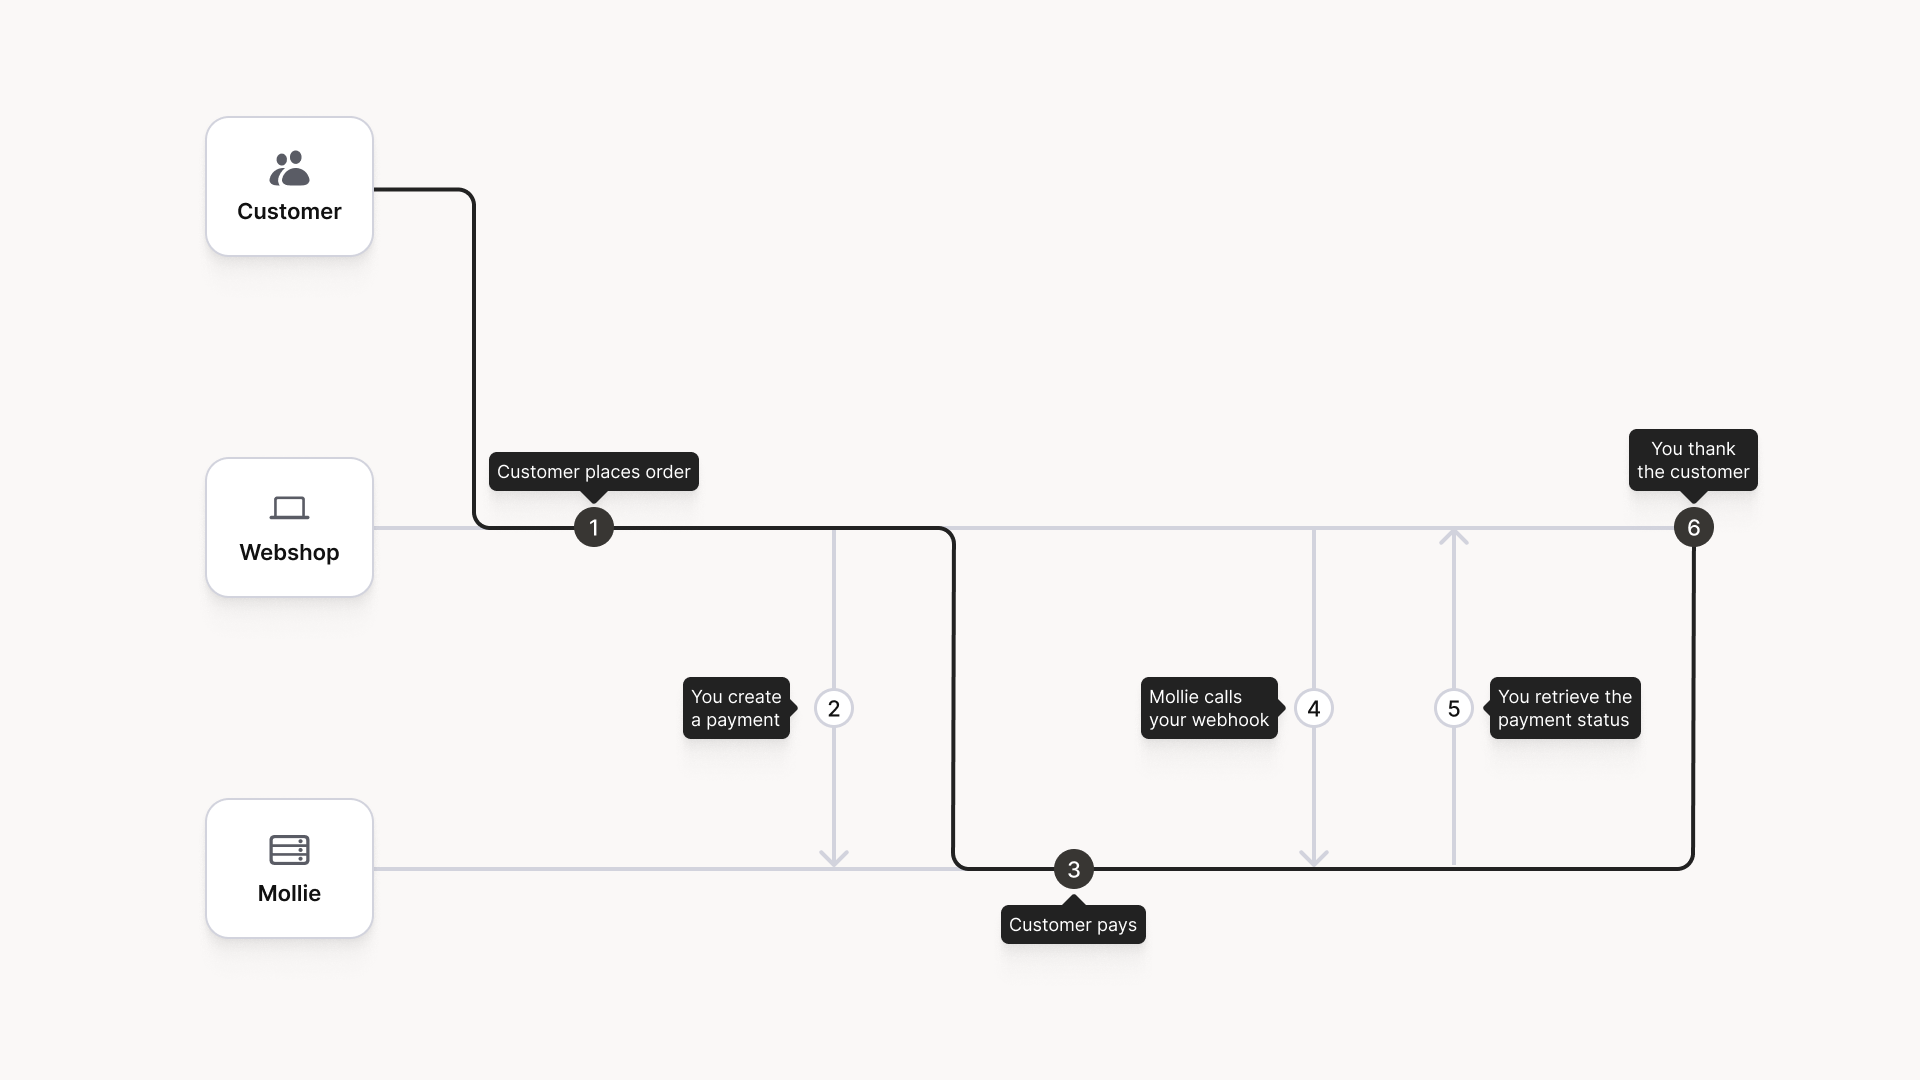
- A customer on your website decides to checkout.
- Your website creates a payment on the Mollie platform by calling the Payments API with the amount and description, and with a URL we should redirect the customer to after the payment is made.
The API responds with the unique ID and the unique checkout URL for the newly created payment. Your website stores the id, links it to the customer’s order and redirects the customer to the checkout URL (present in _links.checkout).
You should use HTTP
GETfor the redirect to the_links.checkoutURL. Using HTTPPOSTfor redirection will cause issues with some payment methods or iDEAL issuers. Use HTTP status code303 See Otherto force an HTTPGETredirect.
- The customer reaches the checkout, chooses a payment method and makes the payment. This process is entirely taken care of by Mollie. You do not have to do anything here.
- When the payment is made, Mollie will send you a webhook informing your website about the payment’s status change. You can configure the webhook URL per payment in the API request.
- In response to your webhook being called your application just needs to issue a
200 OKstatus. From that response Mollie can tell that your processing of the new status was successful – for any other response we keep trying. - When your website processes the webhook, it fetches the payment status from the Mollie API. Once the status is paid, your website can send out a confirmation email to the customer and start the order fulfilment.
- At this point Mollie returns the visitor to your website using the redirect URL specified when the payment was created. Make sure that you have received our webhook before rendering a payment status to the customer, since it happens sometimes that the webhook arrives later than the customer redirection.
Tracking your order reference
In the example above we assume you will store the unique payment id in your database. This way your website is able to lookup the order for this payment when the webhook is triggered by Mollie. Storing it yourself is the easiest way to keep a link between the Mollie payment reference and your website’s order reference.
Alternatively, we can store your order reference — or any other ‘meta data’ — for you. Simply pass along the data with the payment using the metadata field in the Payments API and we will store it with the payment. Everytime you retrieve the payment from the Mollie API, we will show the metadata field as well.
Updated 8 months ago