WooCommerce: Set up payment options
Increase conversion by offering an express payment option with enhanced security that reduces cart abandonment by speeding up checkout, and gives you access to a global market.
Display the Apple Pay button
Display the Apple Pay button on your cart, checkout, and product pages.
What you need to do in advance
- Ensure you activate credit/debit cards in your Mollie account.
- Ensure you have an Apple validation file on your webshop server.
- Log in to WooCommerce.
- Go to WooCommerce > Settings.
- Select the Mollie Settings tab.
- Select Edit next to the payment method name.
- Scroll down to the bottom of the page, and select the Enable Apple Pay Button on Cart page checkbox, the Enable Apple Pay Button on Product page checkbox, or both.
- Save the changes.
Display the PayPal Express button
NotePayPal Express is only available for digital products.
- Log in to WooCommerce.
- Go to WooCommerce > Settings.
- Select the Mollie Settings tab.
- Select Edit next to PayPal.
- Scroll down to the bottom half of the page, and select the Display on cart page checkbox, the Display on product page checkbox, or both.
- Select the button text language and colour.
- In the Minimum amount to display the button field, type in an amount.
- Below this amount, the button will not be displayed.
- The currency is your default webshop currency.
- Save the changes.
Set up credit/debit cards
What you need to do in advance
- Add credit/debit cards to your checkout.
Display selected credit/debit card issuers
Hide selected credit/debit cards to avoid higher transaction fees or regional restrictions.
- Log in to WooCommerce.
- Go to WooCommerce > Settings.
- Select the Mollie Settings tab.
- Select Edit next to credit/debit cards.
- Scroll down to Customize icons and select the Enable icons selector checkbox.
- Select the credit/debit card icons you want to display in your checkout.
- Save the changes.
Enable Mollie Components
- Log in to WooCommerce.
- Go to WooCommerce > Settings.
- Select the Mollie Settings tab.
- Select Edit next to credit/debit cards.
- Scroll down to the Enable Mollie Components checkbox and select it.
- Save the changes.
Enable one-click payments
- Log in to WooCommerce.
- Go to WooCommerce > Settings.
- Select the Mollie Settings tab.
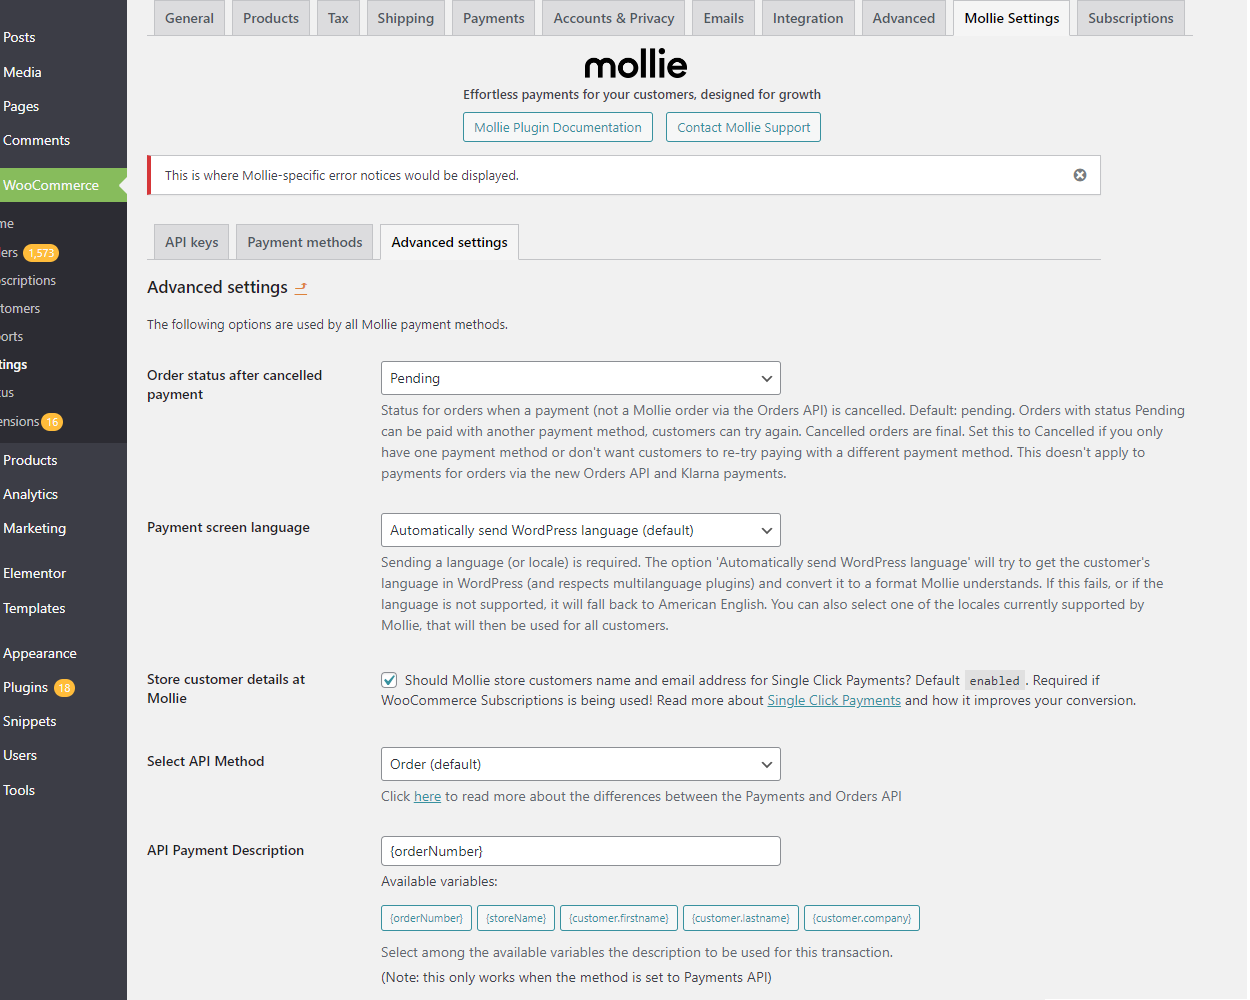
- Select Advanced settings.
- Scroll down to the Store customer details at Mollie checkbox and select it.
- Save the changes.
Split payment authorization and capture
Authorize customer payments and capture funds separately to have more control over your store's cash flow management.
- Log in to WooCommerce.
- Go to WooCommerce > Settings.
- Select the Mollie Settings tab.
- Select Advanced.
- Select Authorize payments for later capture from the Placing payments on hold drop-down menu.
- Optional: To automatically capture payments when the status of an order changes from "On hold" to "Processing" or "Completed", select the Capture or void on status change checkbox.
- Save the changes.
Set up bank transfers
Customize the time customers have to pay with a bank transfer.
NoteBy default, when using a bank transfer, they have a 14-day period (12 business days + 2 grace days) to transfer the amount.
- Log in to WooCommerce.
- Go to WooCommerce > Settings.
- Select the Mollie Settings tab.
- Select Edit next to Bank transfer.
- Select the Activate expiry time checkbox.
- Enter an expiry period in whole days in the Expiry time field.
- Save the changes.
Skip Mollie Checkout
By default, Mollie for WooCommerce redirects customers to Mollie Checkout when they pay. Instead, you can redirect them to the WooCommerce "Thank you" page where they will see how to complete the transfer.
- Log in to WooCommerce.
- Go to WooCommerce > Settings.
- Select the Mollie Settings tab.
- Select Edit next to Bank Transfer.
- Scroll down to Skip Mollie payment screen and select the Skip Mollie payment screen when Bank Transfer is selected checkbox.
- Save the changes.
Set up vouchers
You need to activate Vouchers first to enable this payment method.
Mollie lets you easily accept payments in your online shop using eco-‚ gift- and meal Vouchers - a smart choice for boosting sales and satisfying your customers.
To process an order paid with a Voucher, every item in the order needs to have a category. An order can consist of several voucher categories and you can set the default category to ("eco", "meal", "gift") for all products, for specific product categories or for specific products.
What you need to do in advance
- Activate Vouchers as a payment method.
Voucher settings
After you activated vouchers, follow these steps to navigate to the Voucher payment method settings:
-
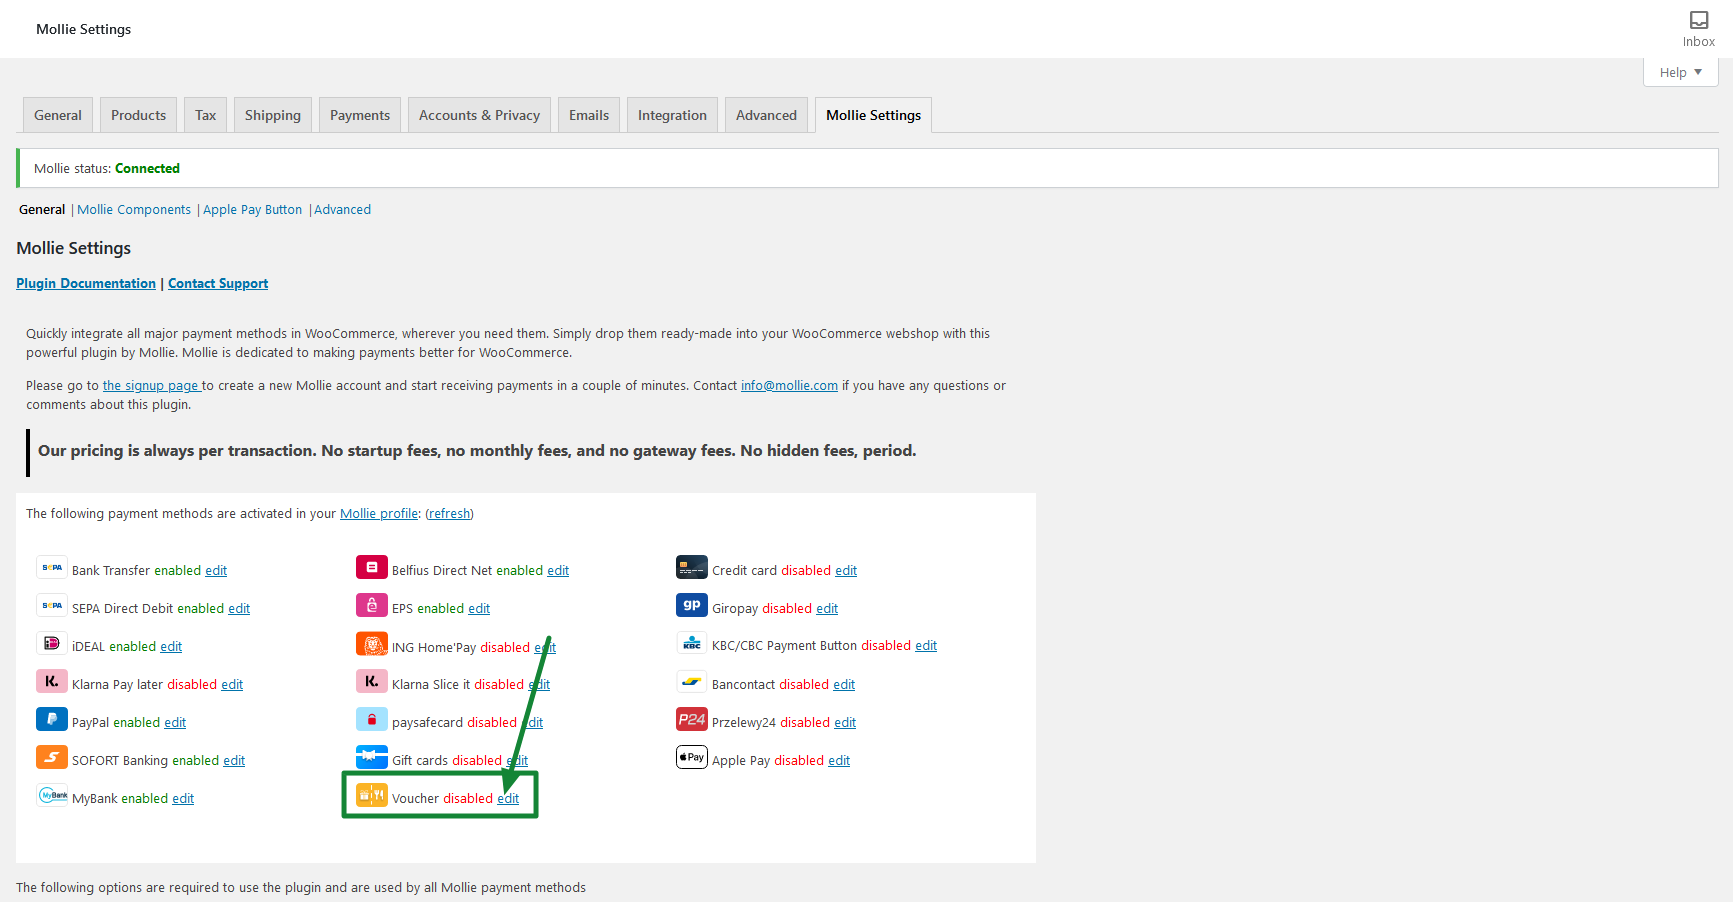
Go to WooCommerce > Settings > Mollie Settings > General.
-
Click the Voucher edit button:
-
Configure the desired settings for your Vouchers.
You can configure the following:
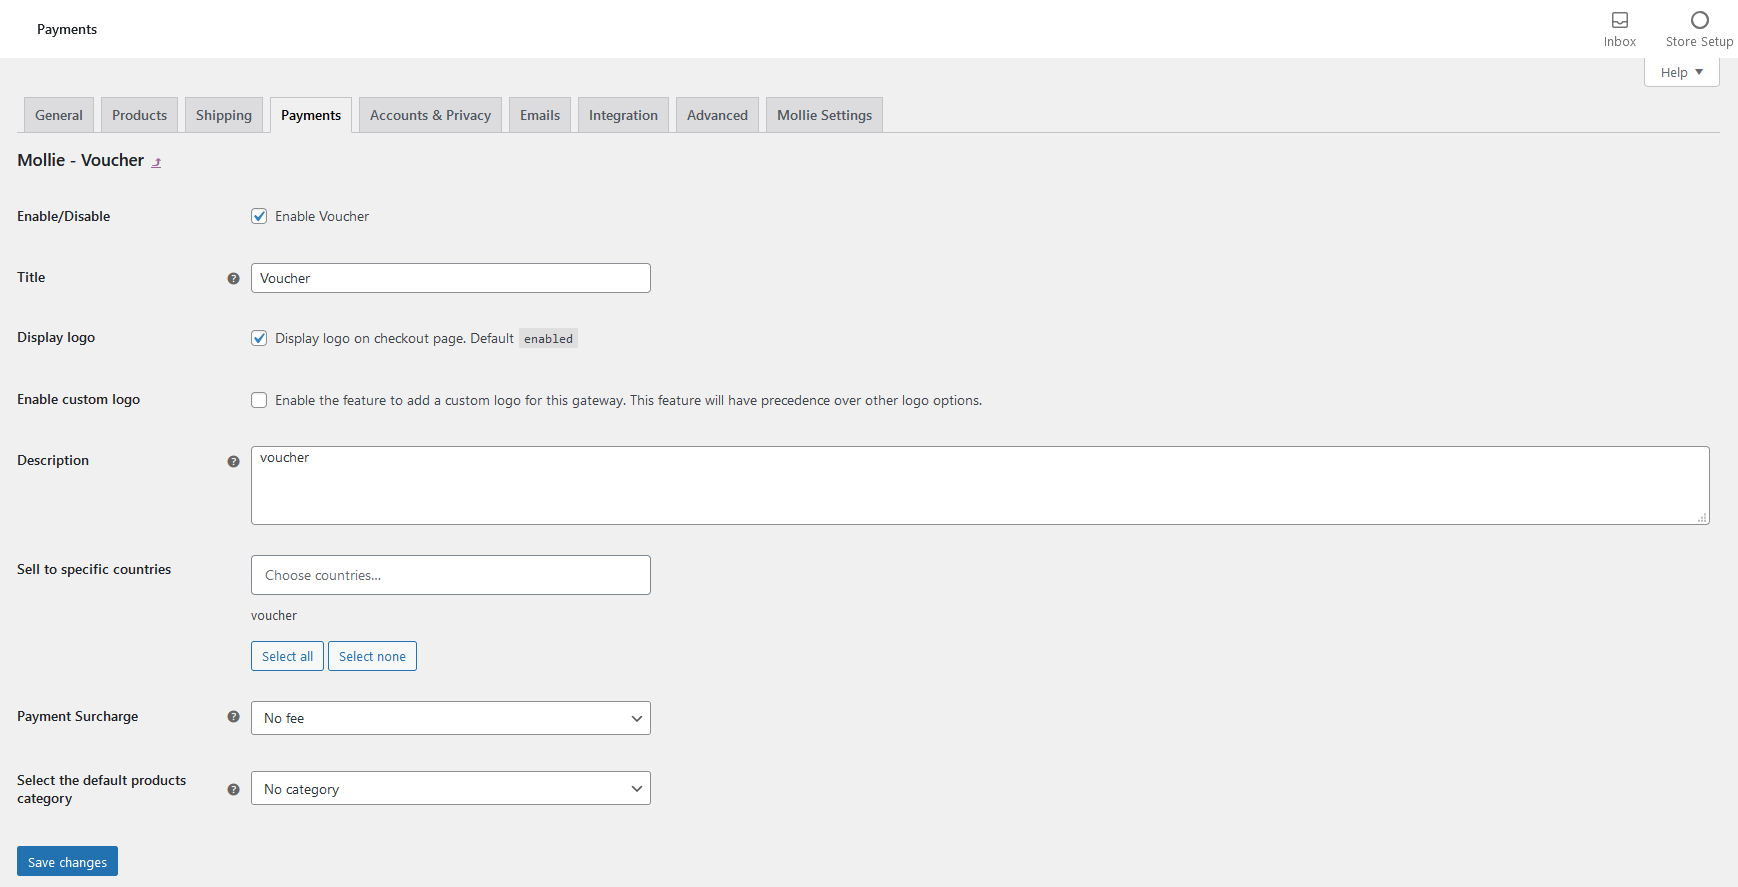
- Enable/Disable - once enabled, the Voucher option will show up in your checkout.
- Title - controls the title that the user sees during checkout (defaults to
Voucher). - Display logo - display the logo on your checkout page (defaults to
enabled). - Description - payment method description that the customer will see during checkout.
- Sell to specific countries - dropdown with all available countries.
To select the desired countries select one or several countries from the dropdown list.
To select all countries click on the Select all button, or if you wish to deselect all countries click Select none button (if the field is empty, the countries from the WooCommerce's general settings are set). - Select the default products category - choose from four options: eco-‚ gift-, meal or No category. This selector will assign the default category for all shop products (defaults to
Meal).
Assign a default category to all products
- Log in to WooCommerce.
- Go to WooCommerce > Settings.
- Select the Mollie Settings tab.
- Select Edit next to Vouchers.
- Select a voucher type from the Select the default products category drop-down menu.
- Save the changes.
Assign a default category to a product category
- Log in to WooCommerce.
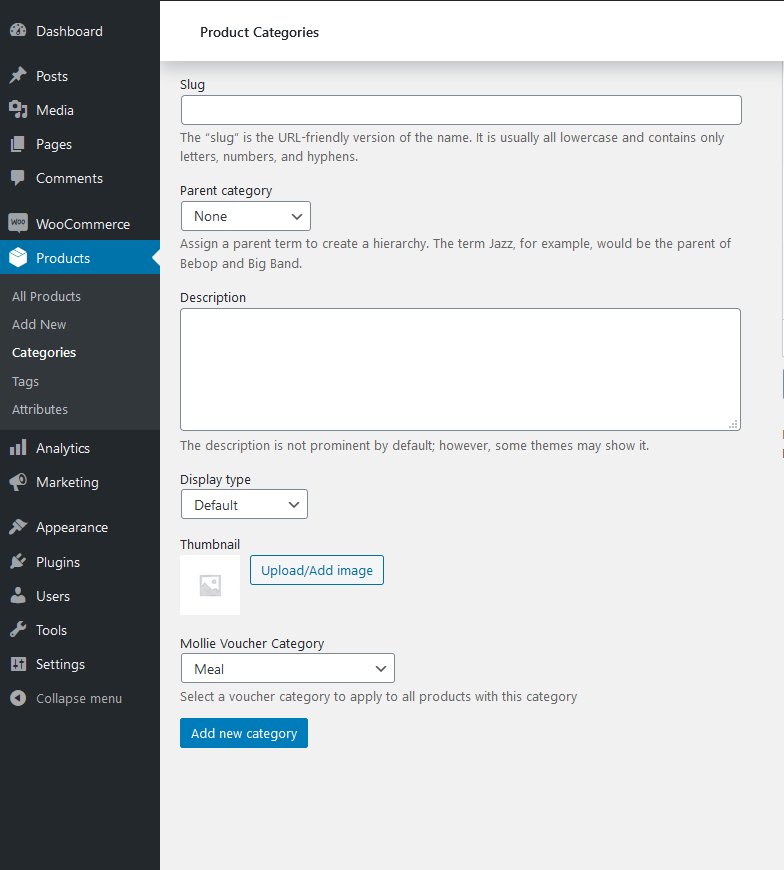
- Go to Products > Product Categories, and open the product category's settings by selecting its name from the list.
- Select a voucher type from the Mollie voucher Category drop-down menu.
- Save the settings.
Assign a category to a product
- Log in to WooCommerce.
- Go to Products, and open the product's settings by selecting its name from the list.
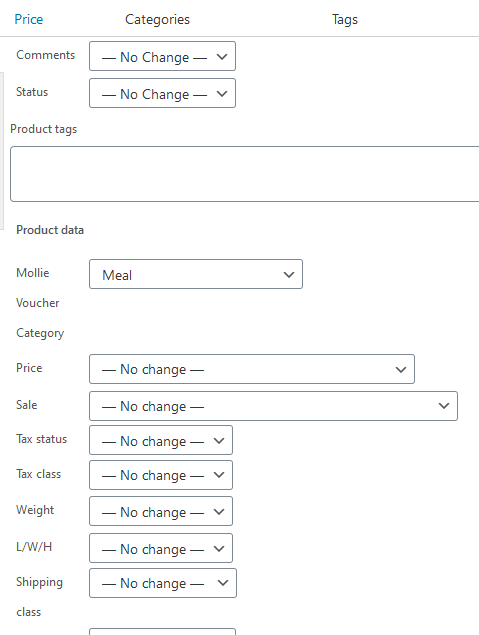
- In the Product data section, select Mollie settings.
- Select a voucher type from the Mollie voucher category drop-down menu.
- Save the settings.
Add a payment surcharge
Offset any additional costs or fees associated with processing a payment method by adding a payment surcharge.
NoteCheck your local legislation before adding a payment surcharge.
Add a fixed surcharge
Add a fixed surcharge for larger orders, where a percentage-based surcharge may become disproportionately high.
- Log in to WooCommerce.
- Go to WooCommerce > Settings.
- Select the Mollie Settings tab.
- Select Edit next to the payment method name.
- Scroll down to the Payment Surcharge drop-down menu, and select Fixed Fee.
- Enter a fixed amount in the field that appears.
- Save the changes.
Add a percentage-based surcharge
Add a percentage surcharge for smaller orders, where a fixed surcharge may be relatively high.
- Log in to WooCommerce.
- Go to WooCommerce > Settings.
- Select the Mollie Settings tab.
- Select Edit next to the payment method name.
- Scroll down to the Payment Surcharge drop-down menu, and select Percentage to charge a percentage of payment amount.
- Enter a percentage in the field that appears.
- Save the changes.
Add a combined surcharge
Add a combination of both fixed and percentage-based surcharges to cover the fixed costs associated with payment processing as well as a proportionate surcharge based on the order value.
- Log in to WooCommerce.
- Go to WooCommerce > Settings.
- Select the Mollie Settings tab.
- Select Edit next to the payment method name.
- Scroll down to the Payment Surcharge drop-down menu, and select Fixed fee and percentage to charge a combined fee that consists of both a flat rate and a percentage of the payment amount.
- Enter both a fixed amount and a percentage in the fields that appear.
- Save the changes.
Customize surcharge label in order summary
Add your own label to the surcharge's listing on the order overview of the checkout page.
- Log in to WooCommerce.
- Go to WooCommerce > Settings.
- Select the Mollie Settings tab.
- Select Advanced.
- Select the Surcharge gateway fee label checkbox.
- Enter the text that you want to display next to the surcharge in the order summary.
The default label is Fee. - Save the changes.
Updated 12 months ago