WooCommerce: Set up order management
Select an API method
Select the appropriate API method for your payment processing goals: Mollie's Payments API for simple payments or its Orders API for detailed orders.
You can select a different API method for each individual payment method except the following, which only use the Orders API:
- Klarna payment methods
- in3
- Vouchers
To select an API method, follow these steps:
-
Log in to WooCommerce.
-
Go to WooCommerce > Settings.
-
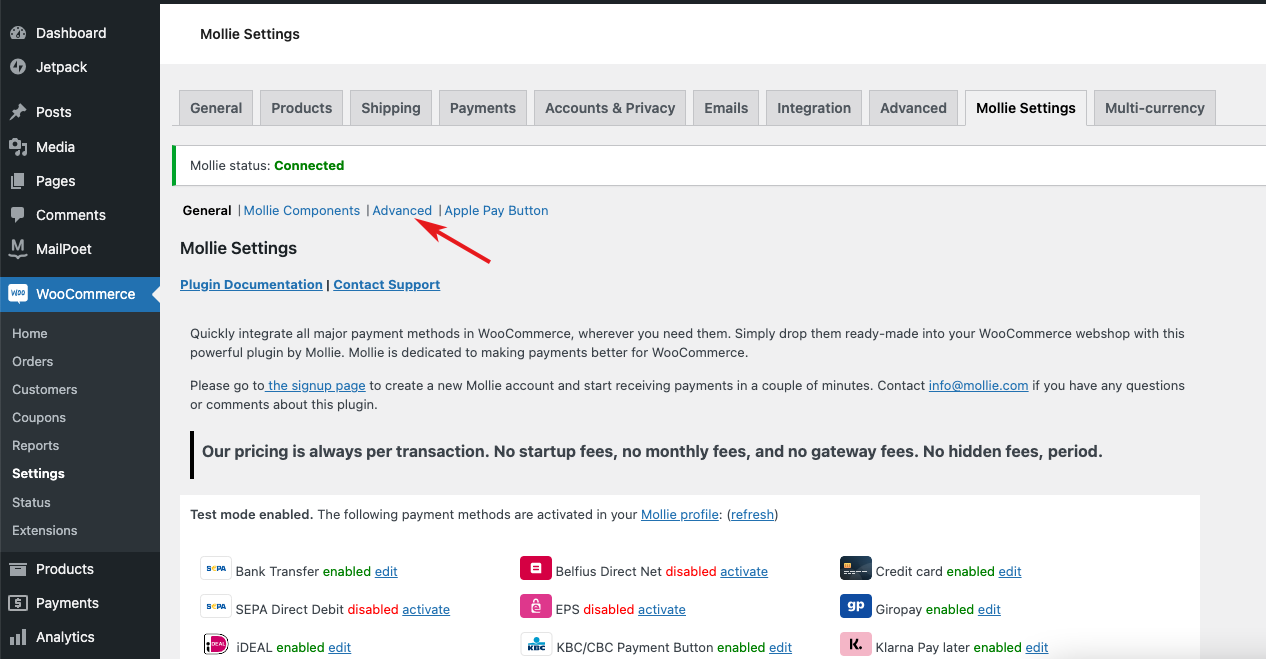
Select the Mollie Settings tab.
-
Select Advanced.
-
Scroll down to the Select API method drop-down menu and select an API method.
-
Save the changes.
Change the order expiry period
Customize the order expiry period as needed, for example, to allow customers more time to pay for their orders.
By default, customers have 28 days to pay for their orders.
You can change the order expiry period for the following payment methods if you are using the Orders API:
- in3
- Klarna
- Vouchers
Change an individual payment method's order expiry period
- Log in to WooCommerce.
- Go to WooCommerce > Settings.
- Select the Mollie Settings tab.
- Select Edit next to the payment method name.
- Select the Activate expiry time checkbox.
- Enter an expiry period in whole days in the Expiry time field.
- Save the changes.
Prevent premature order cancellation
The WooCommerce Hold stock (minutes) feature in your Web app under WooCommerce > Settings > Products lets you specify how long to hold orders with the status Pending before cancelling them.
Bank transfers usually take significantly longer than other payment methods, which is why Mollie for WooCommerce lets you give an order a different initial status in order to avoid premature cancellation.
- Log in to WooCommerce.
- Go to WooCommerce > Settings.
- Select the Mollie Settings tab.
- Select Edit next to Bank Transfer.
- Scroll down to the Initial order status drop-down menu and ensure that On hold is selected.
- Save the changes.
Customize payment descriptions
Include order details such as order number and customer name in the payment description that appear in your Mollie Web app.
All payments are listed on the Payments page of your Mollie Web app. A payment's description is displayed in its Details column. It can also appear on your customers' bank statements depending on the payment method used and the customer's bank.
By default, the payment description includes WooCommerce order ID, Mollie order status, API method used, and refund status.
NoteYou can only change the payment description for payment methods that use the Payments API.
You can combine free text and the following variables:
{orderNumber}{storeName}{customerFirstname}{customerLastname}{customerCompany}{cartNumber}
To change the payment description, follow these steps:
- Log in to WooCommerce.
- Go to WooCommerce > Settings.
- Select the Mollie Settings tab.
- Select Advanced.
- Scroll down to the API Payment Description field.
- Combine free text and variables to create a description.
- Save the changes.
ExampleTo render 'Casey Doe bought order #123456 at MegaProducts.com', combine the following text and variables:
{customerFirstname} {customerLastname} bought order #{orderNumber} at {customerCompany}
Configure Mollie statuses
Customize the default order status to prevent incorrect cancellations.
Set the initial order status
- Log in to WooCommerce.
- Go to WooCommerce > Settings.
- Select the Mollie Settings tab.
- Select Edit next to the payment method name.
- Scroll down to the Initial order status drop-down menu and ensure that On hold is selected.
- Save the changes.
Updated 5 months ago