Invoicing
With Mollie Invoicing, you can create, edit, and send fully branded invoices in minutes to help your customers pay quickly and easily. All of your invoices are managed from the Mollie Web app without writing a single line of code.
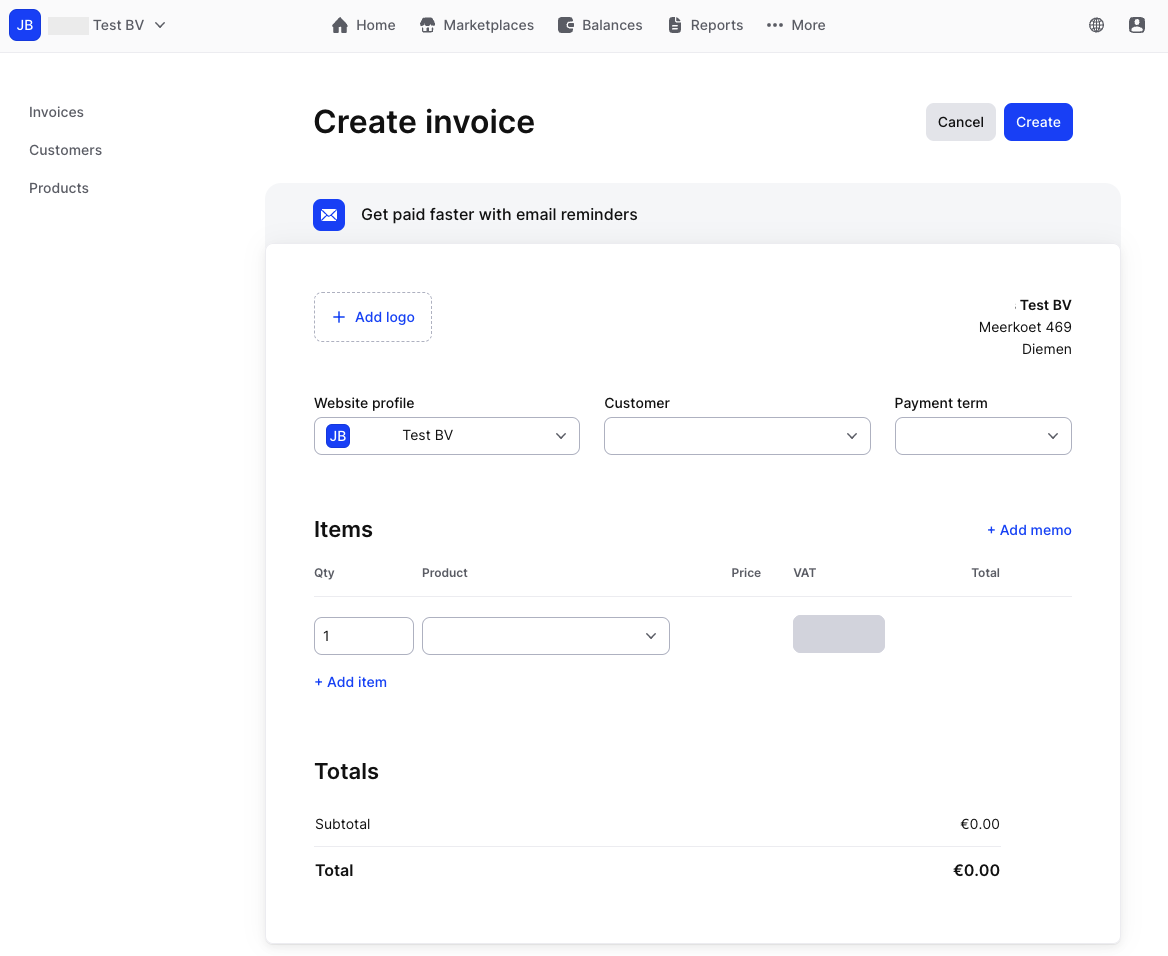
Creating an invoice
- Go to your Mollie Web app.
- In the menu bar, click More and go to Invoicing.
- Click on the Create button in the top right corner.
- Fill in the requested fields.
- Click Create.
- Add a note and send the invoice to your customer.
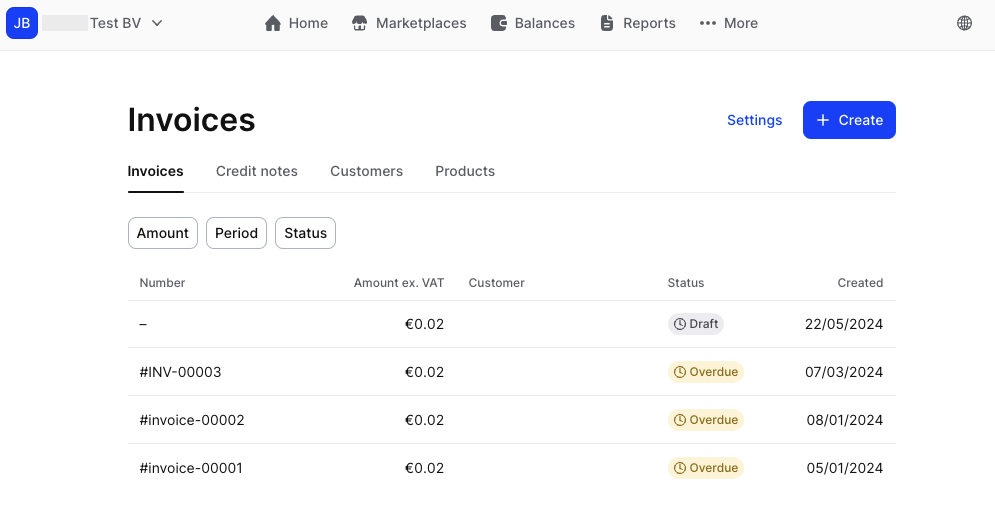
Viewing an invoice
- Go to your Mollie Web app.
- In the menu bar, click More and go to Invoicing.
- The Invoices tab shows you all of your past and current invoices.
- Click on a specific invoice to open its detailed overview, manage or re-send this invoice.
Personalizing an invoice
- Navigate to the Invoicing settings page.
- Directly via the Invoicing: Click the Invoicing in your Web app: Click the Settings button.
- Via the dropdown menu: Click your Profile button in the upper right corner and select Settings.
- Select your preferred Invoice Language.
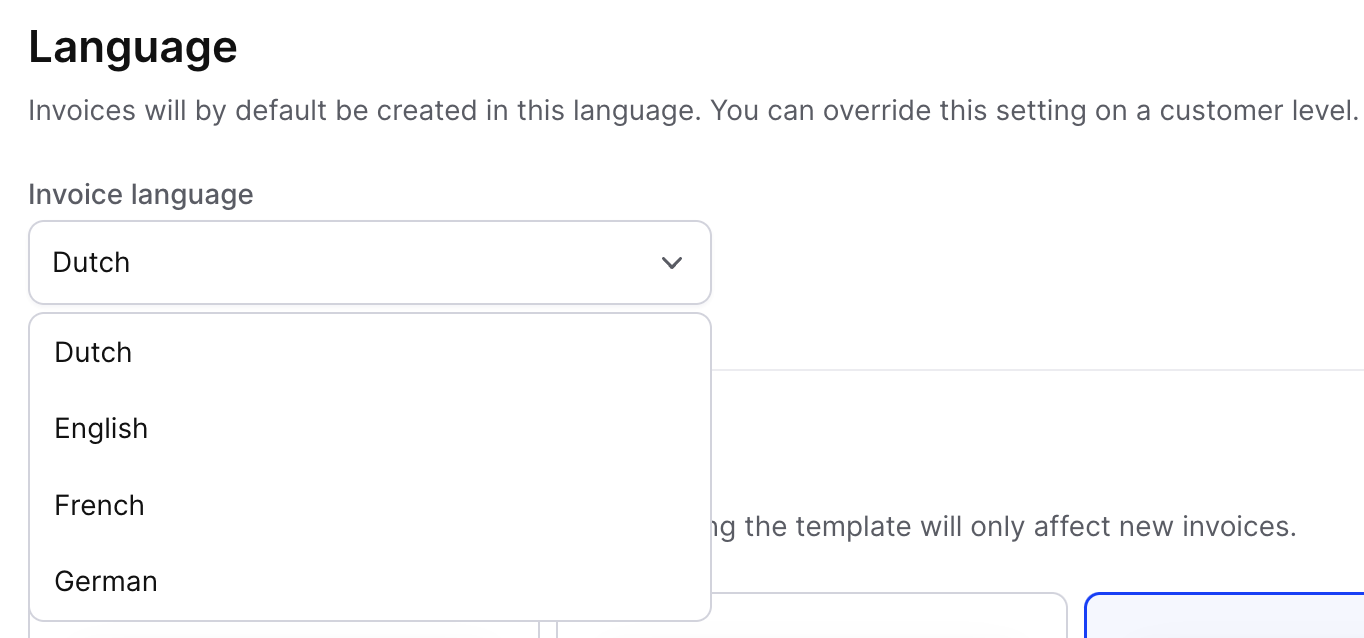
- Choose your desired Template layout.

- Enter any Prefix and decide on the Year visibility.
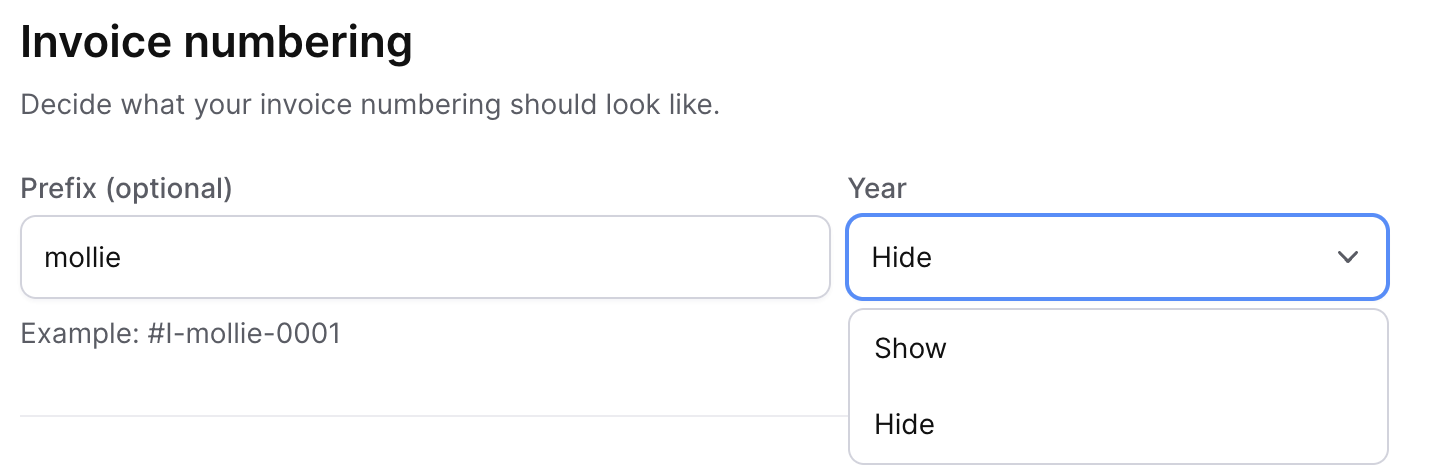
- Save changes to apply your settings to future invoices.
Changing sender details
You can create a sub-entity for an organization by creating a new profile. A profile can have their own:
- Trade name
- Website
- Email address
- Phone number
Address is on organization level. The address can be changed within the organization details page within settings and will be automatically updated on invoices that you create afterwards.
The logo on the invoice can be modified when creating an invoice with the logo image upload functionality and not via the web profile details.
Create a web profile
- Go to Settings
- Under Organization click Profiles
- Click + Create Profile
- Fill in the details and click Save
Modify existing web profile details
- Go to Settings
- Under Organization click Profiles
- Click on Web Profile that needs modification
- Click on Contact Information
- Adjust details and click Save
Modify address
- Go to Settings
- Under Organization click Organization Details
- Adjust Business Address details and click Save
- Address will be automatically updated on new invoices
Select web profile
- Go to Invoicing in menu
- Click Create
- Select preferred Website Profile with drop down menu on the left
- Upload logo by clicking on Upload Logo or ... next to existing logo
- Fill in invoice details and click Create to create draft invoice
- Click on draft invoice and click Send to issue the invoice
You can find more information on invoices on our Help Center: Invoices.
Updated 12 days ago