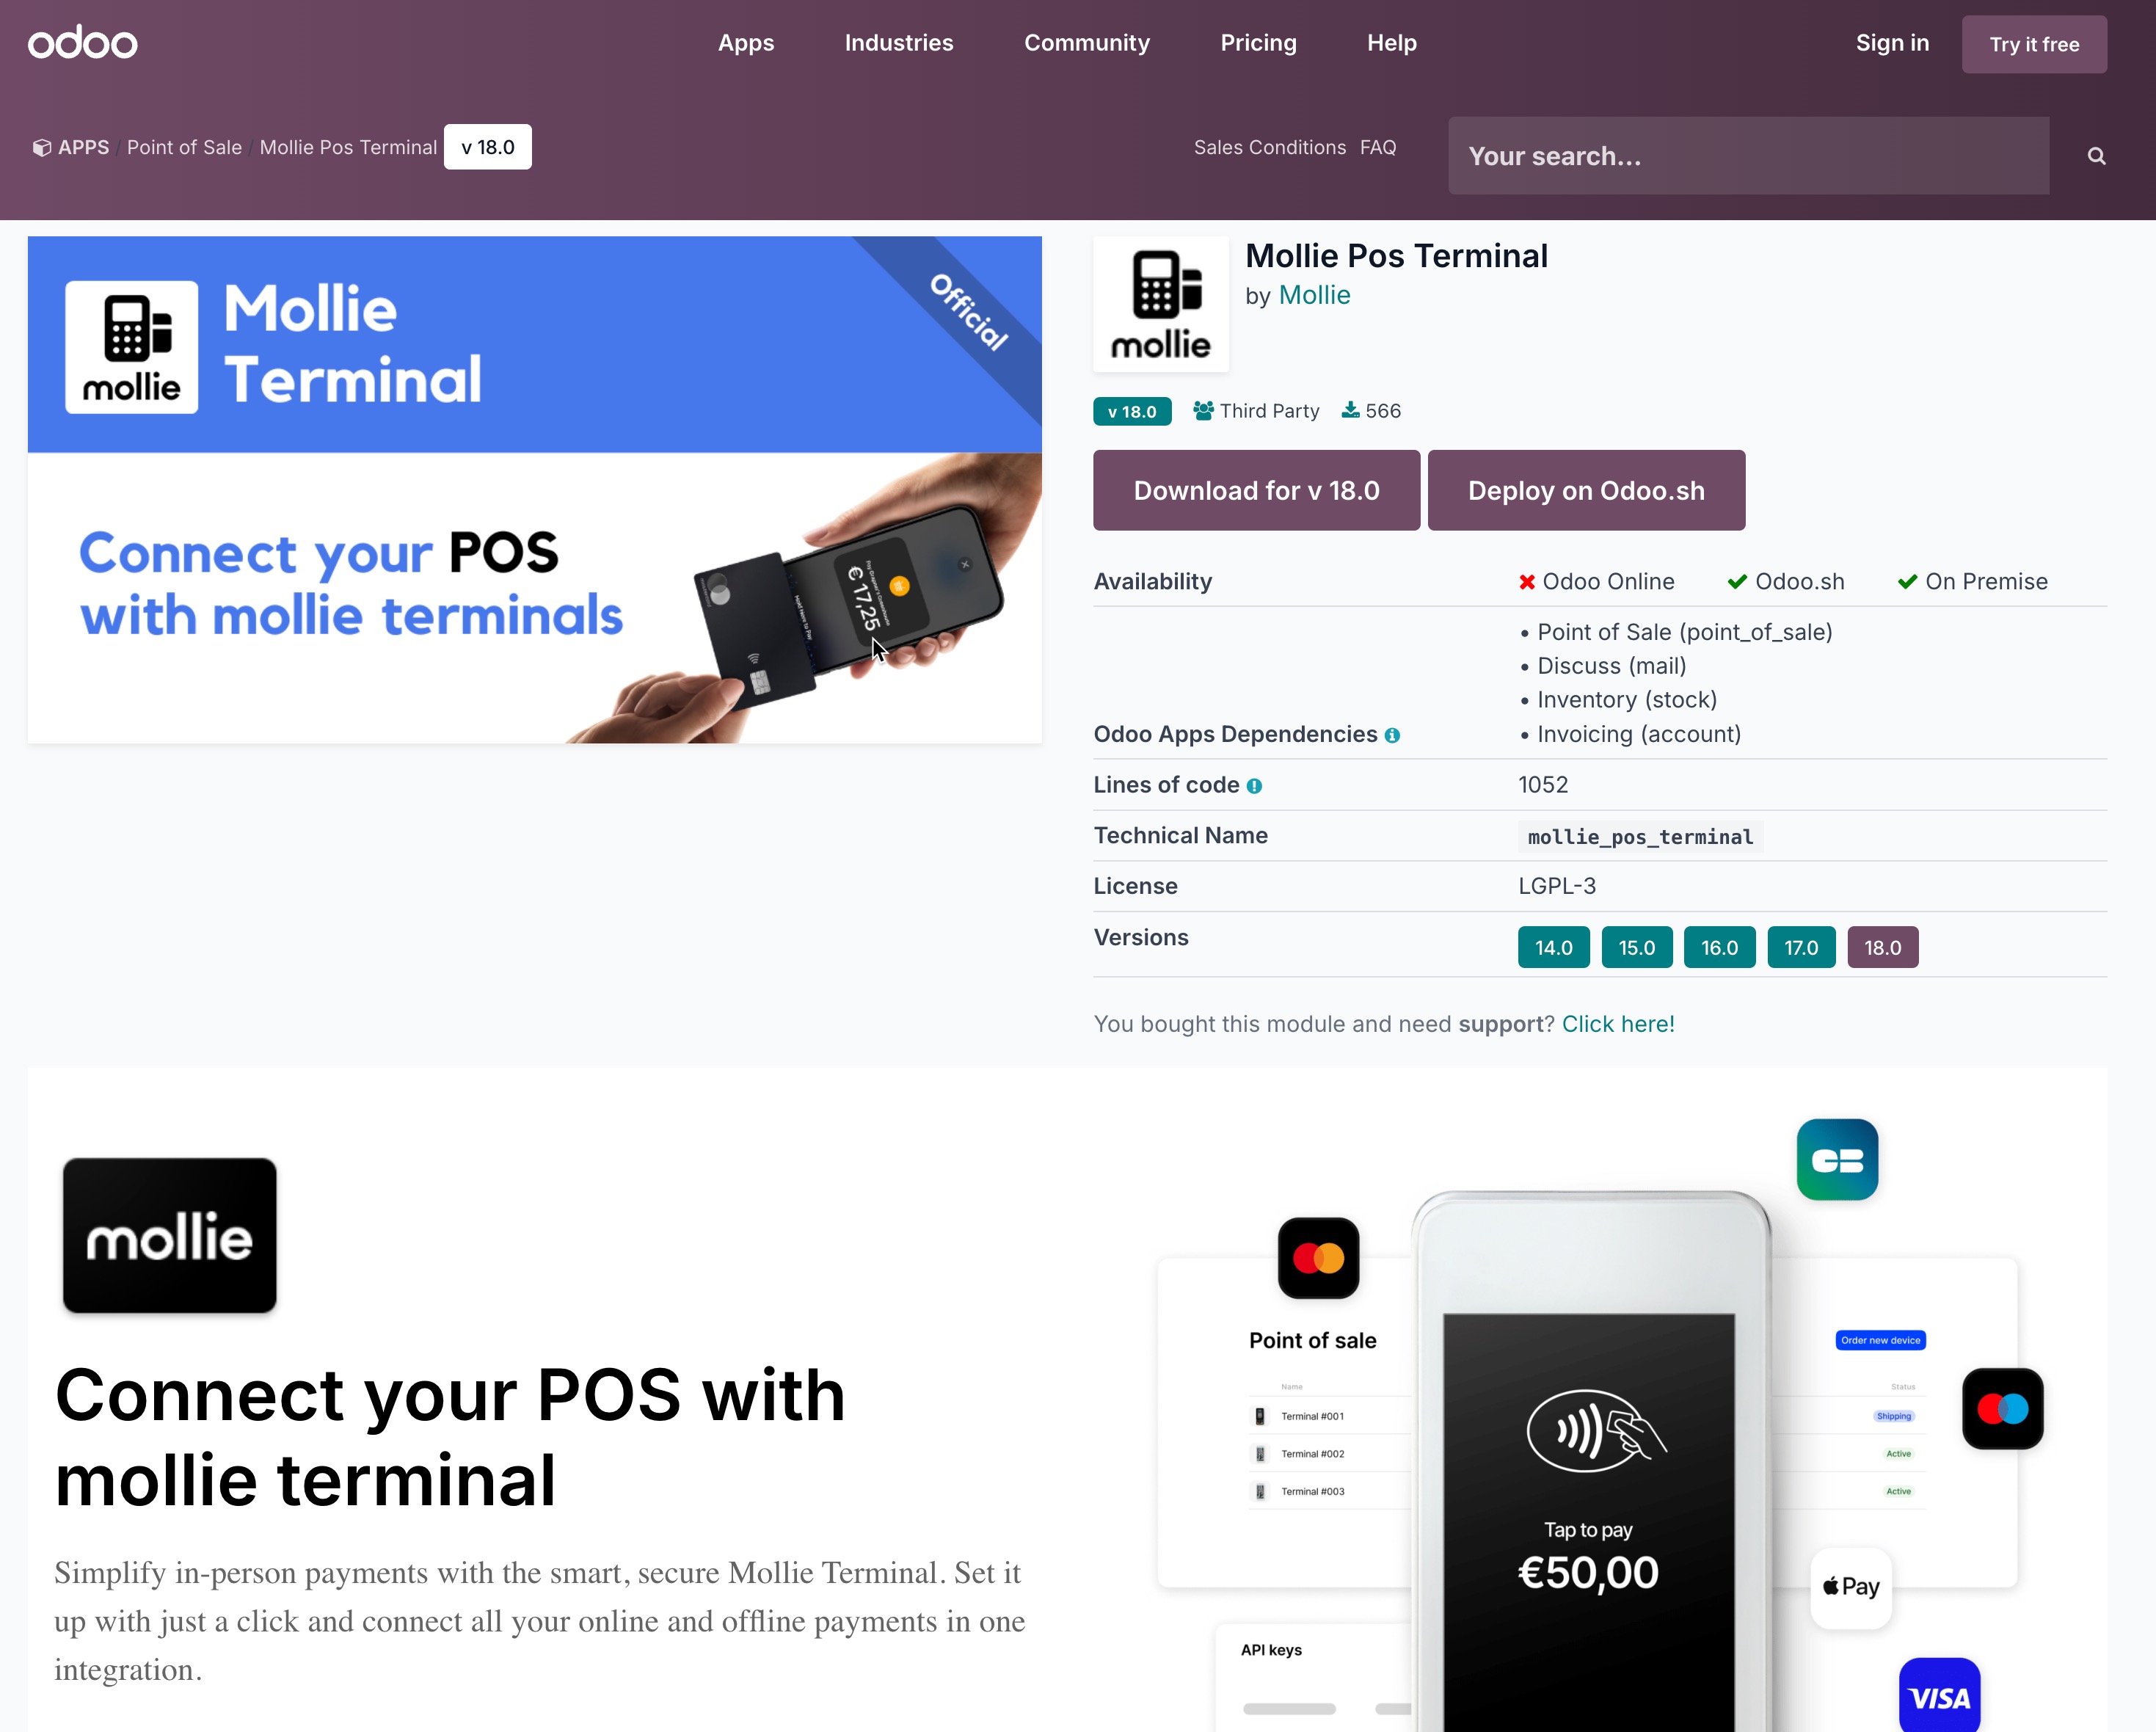
Odoo: Point of sale (POS)
Install and connect
Enhance your storefront payment options with Mollie Pos Terminal which adds several new features on top of the default module.
Install POS
- Download the Mollie Pos Terminal module and add it to your Odoo addons folder (or click the Deploy on Odoo.sh button. The name of the module is
mollie_pos_terminal.
- On Odoo.sh add the
requirements.txtfile to the root of your project to install python dependencymollie-api-pythonor install them by running the following command:
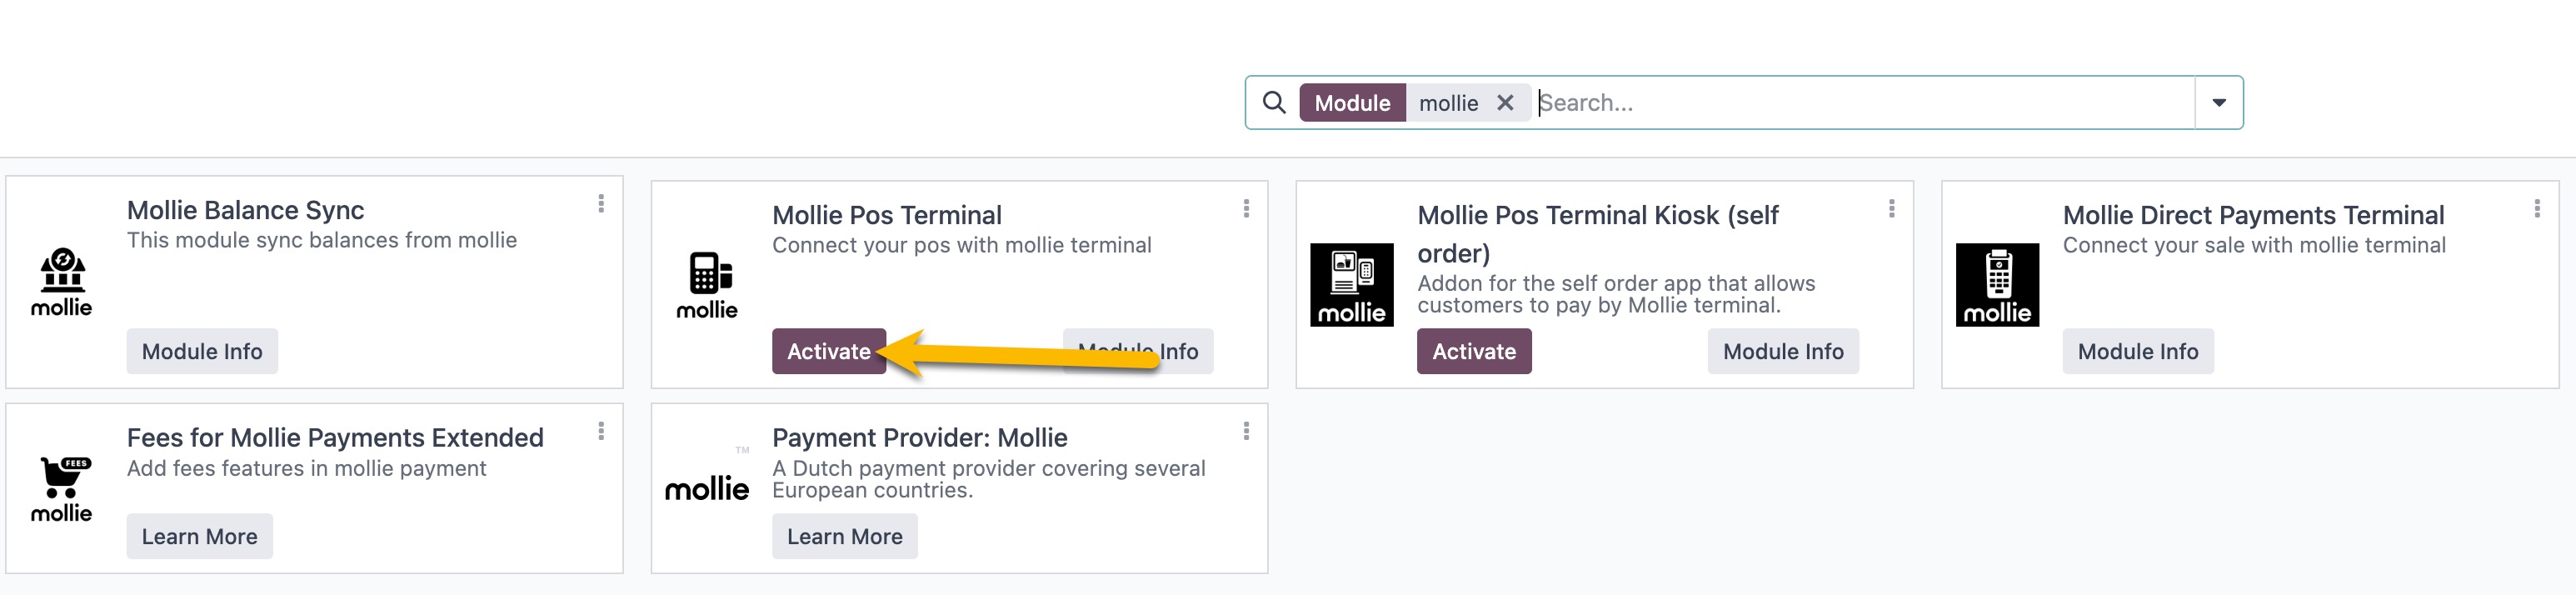
pip3 install -r requirements.txt- Log in to your Odoo server > search for the Mollie Pos Terminal module > click Activate.
NoteShould you encounter a '500 internal server error' please refer to section Manually upgrade module.
Connect your terminal
- In Odoo, open Settings > General Settings > Point of Sale.
- Scroll down to the Payment Terminals section > fill in your Test/Live API key in the Mollie field.
You can find your API keys in your Mollie Web app under theDevelopers tab.
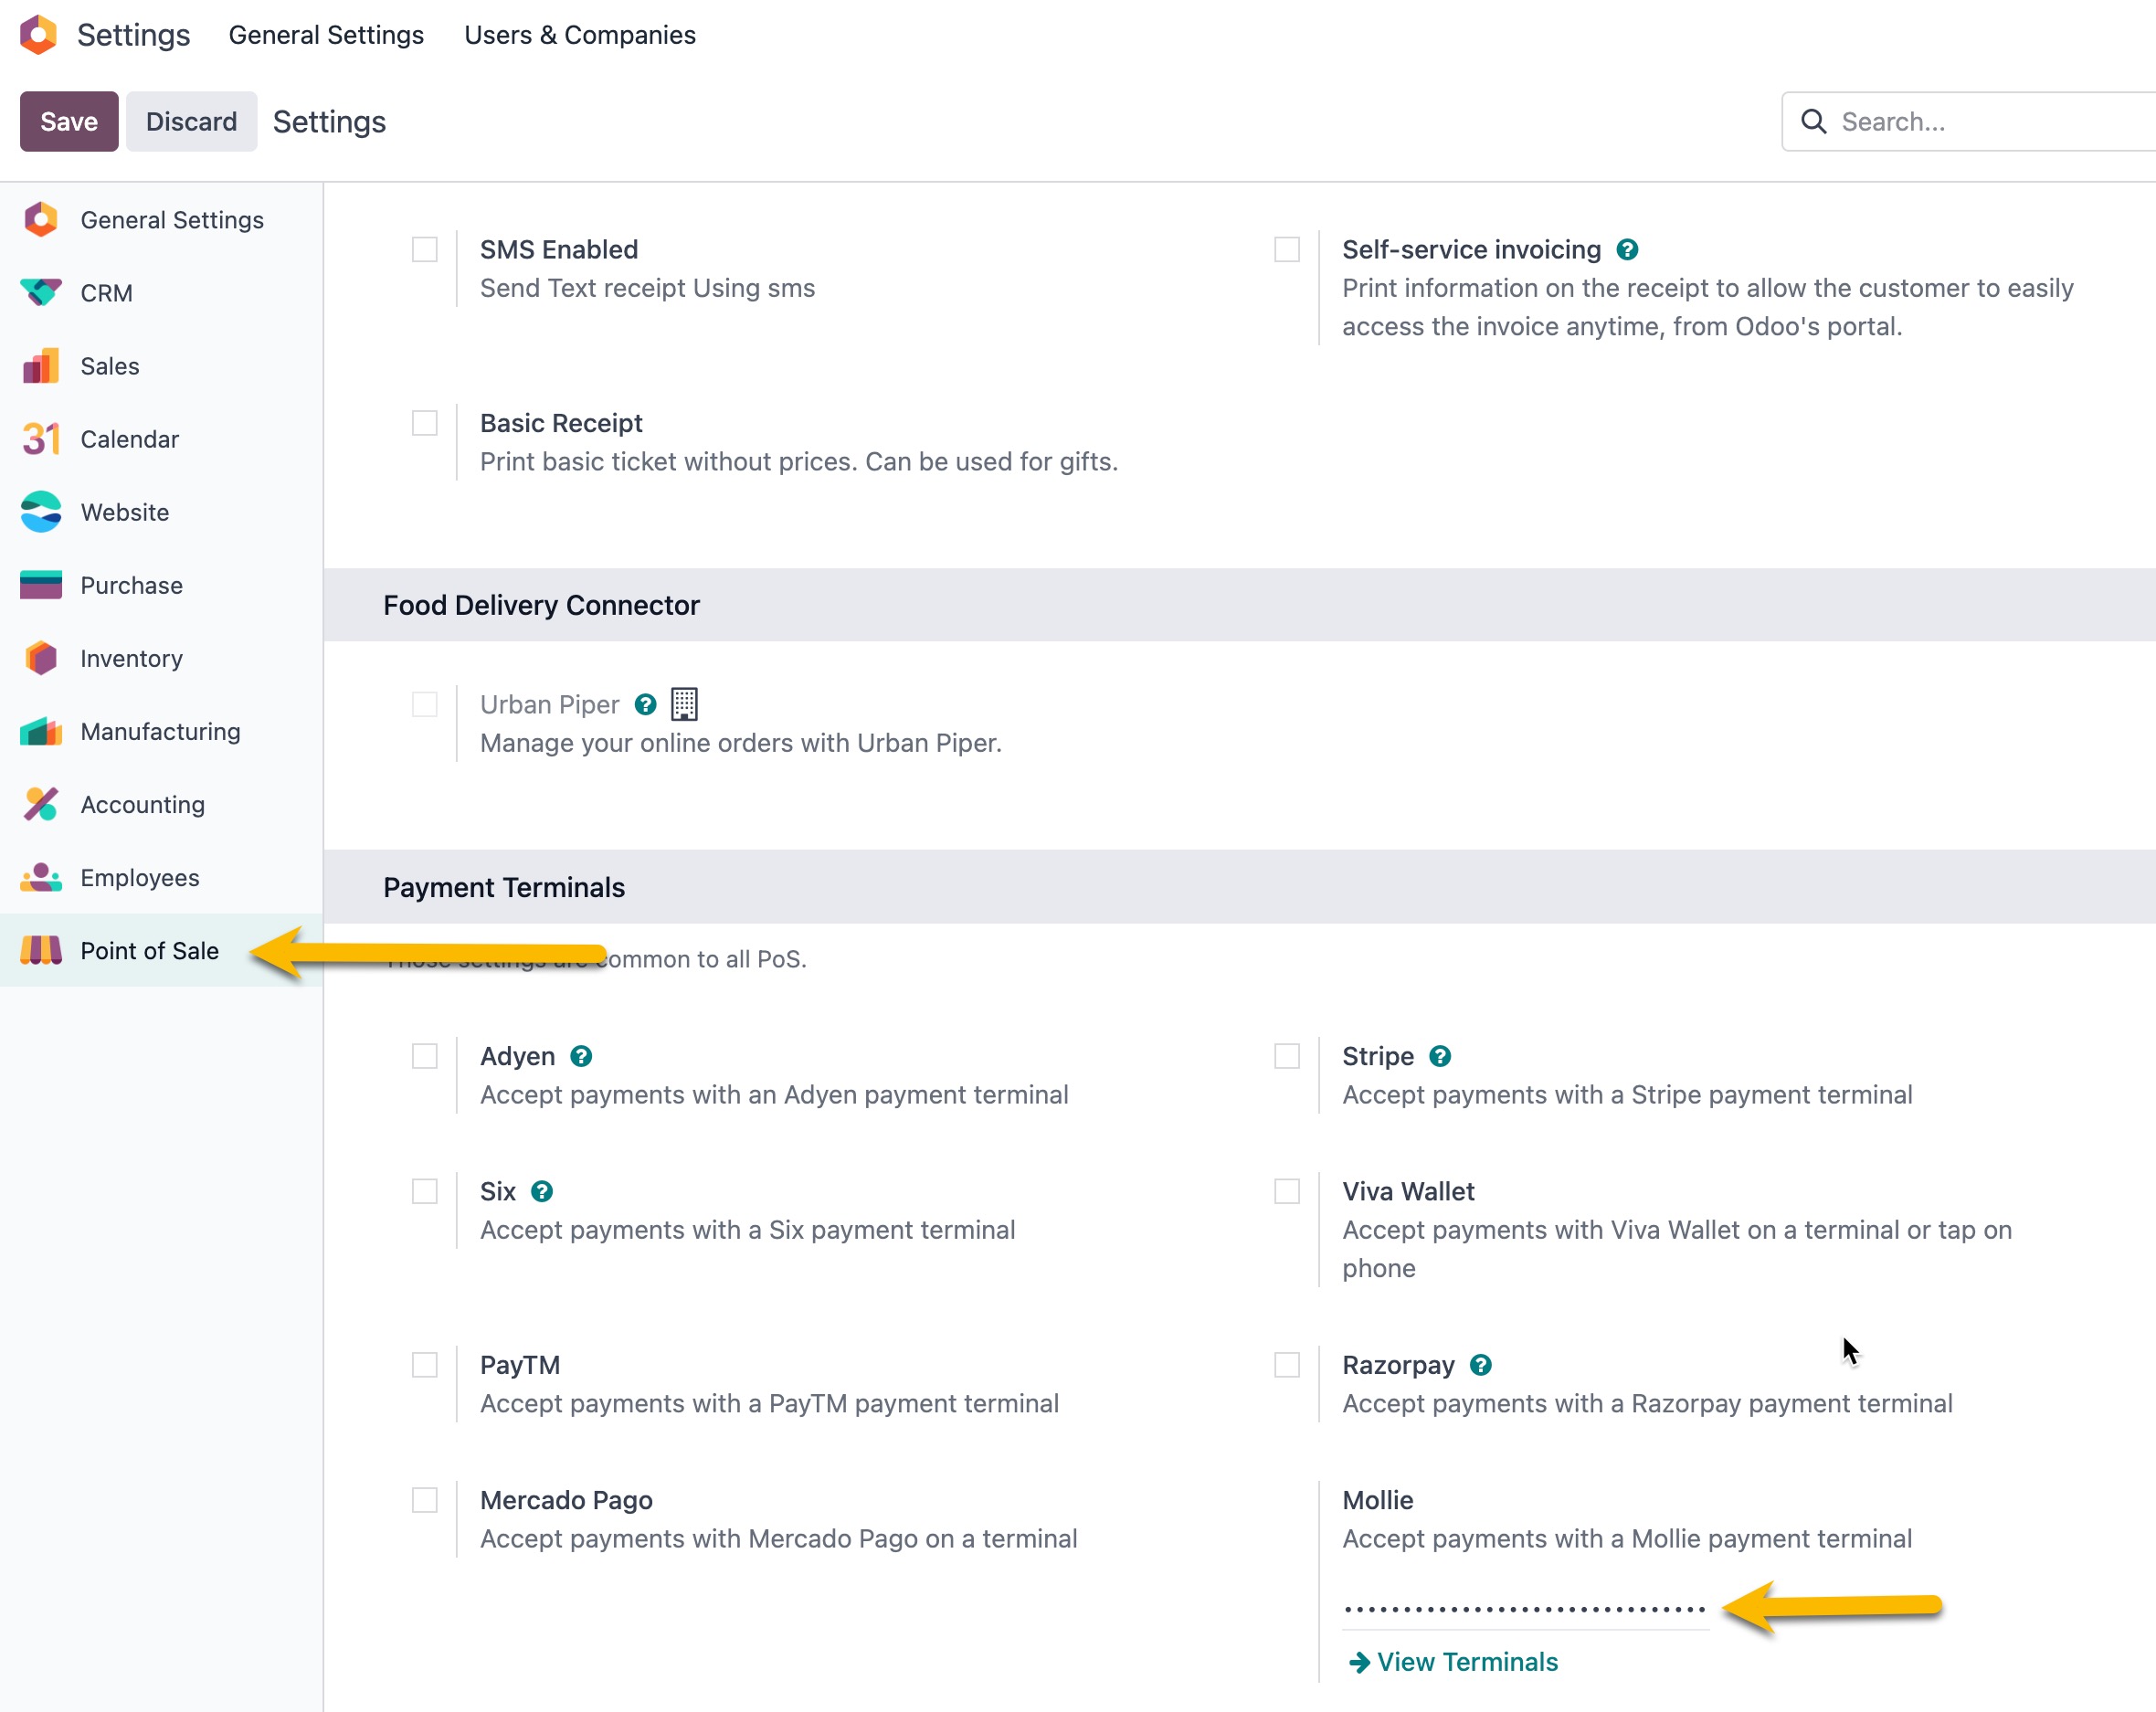
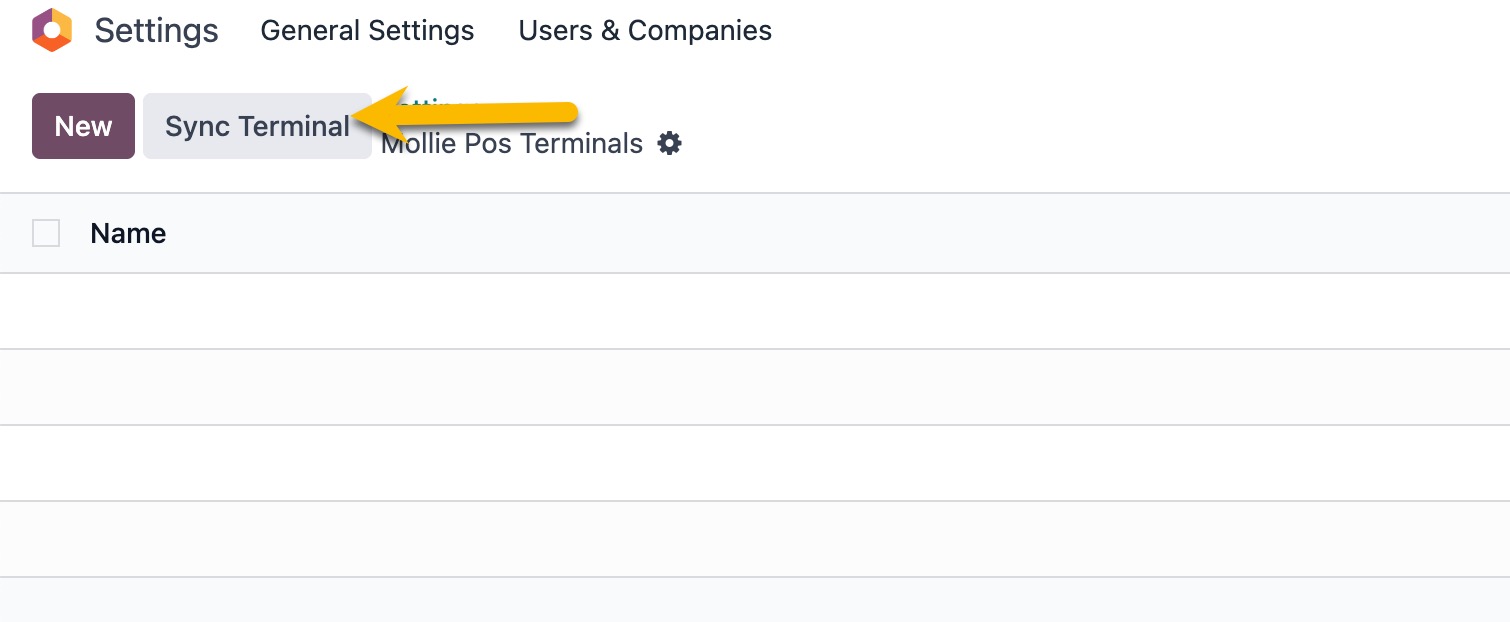
- Save the changes and click View Terminals.
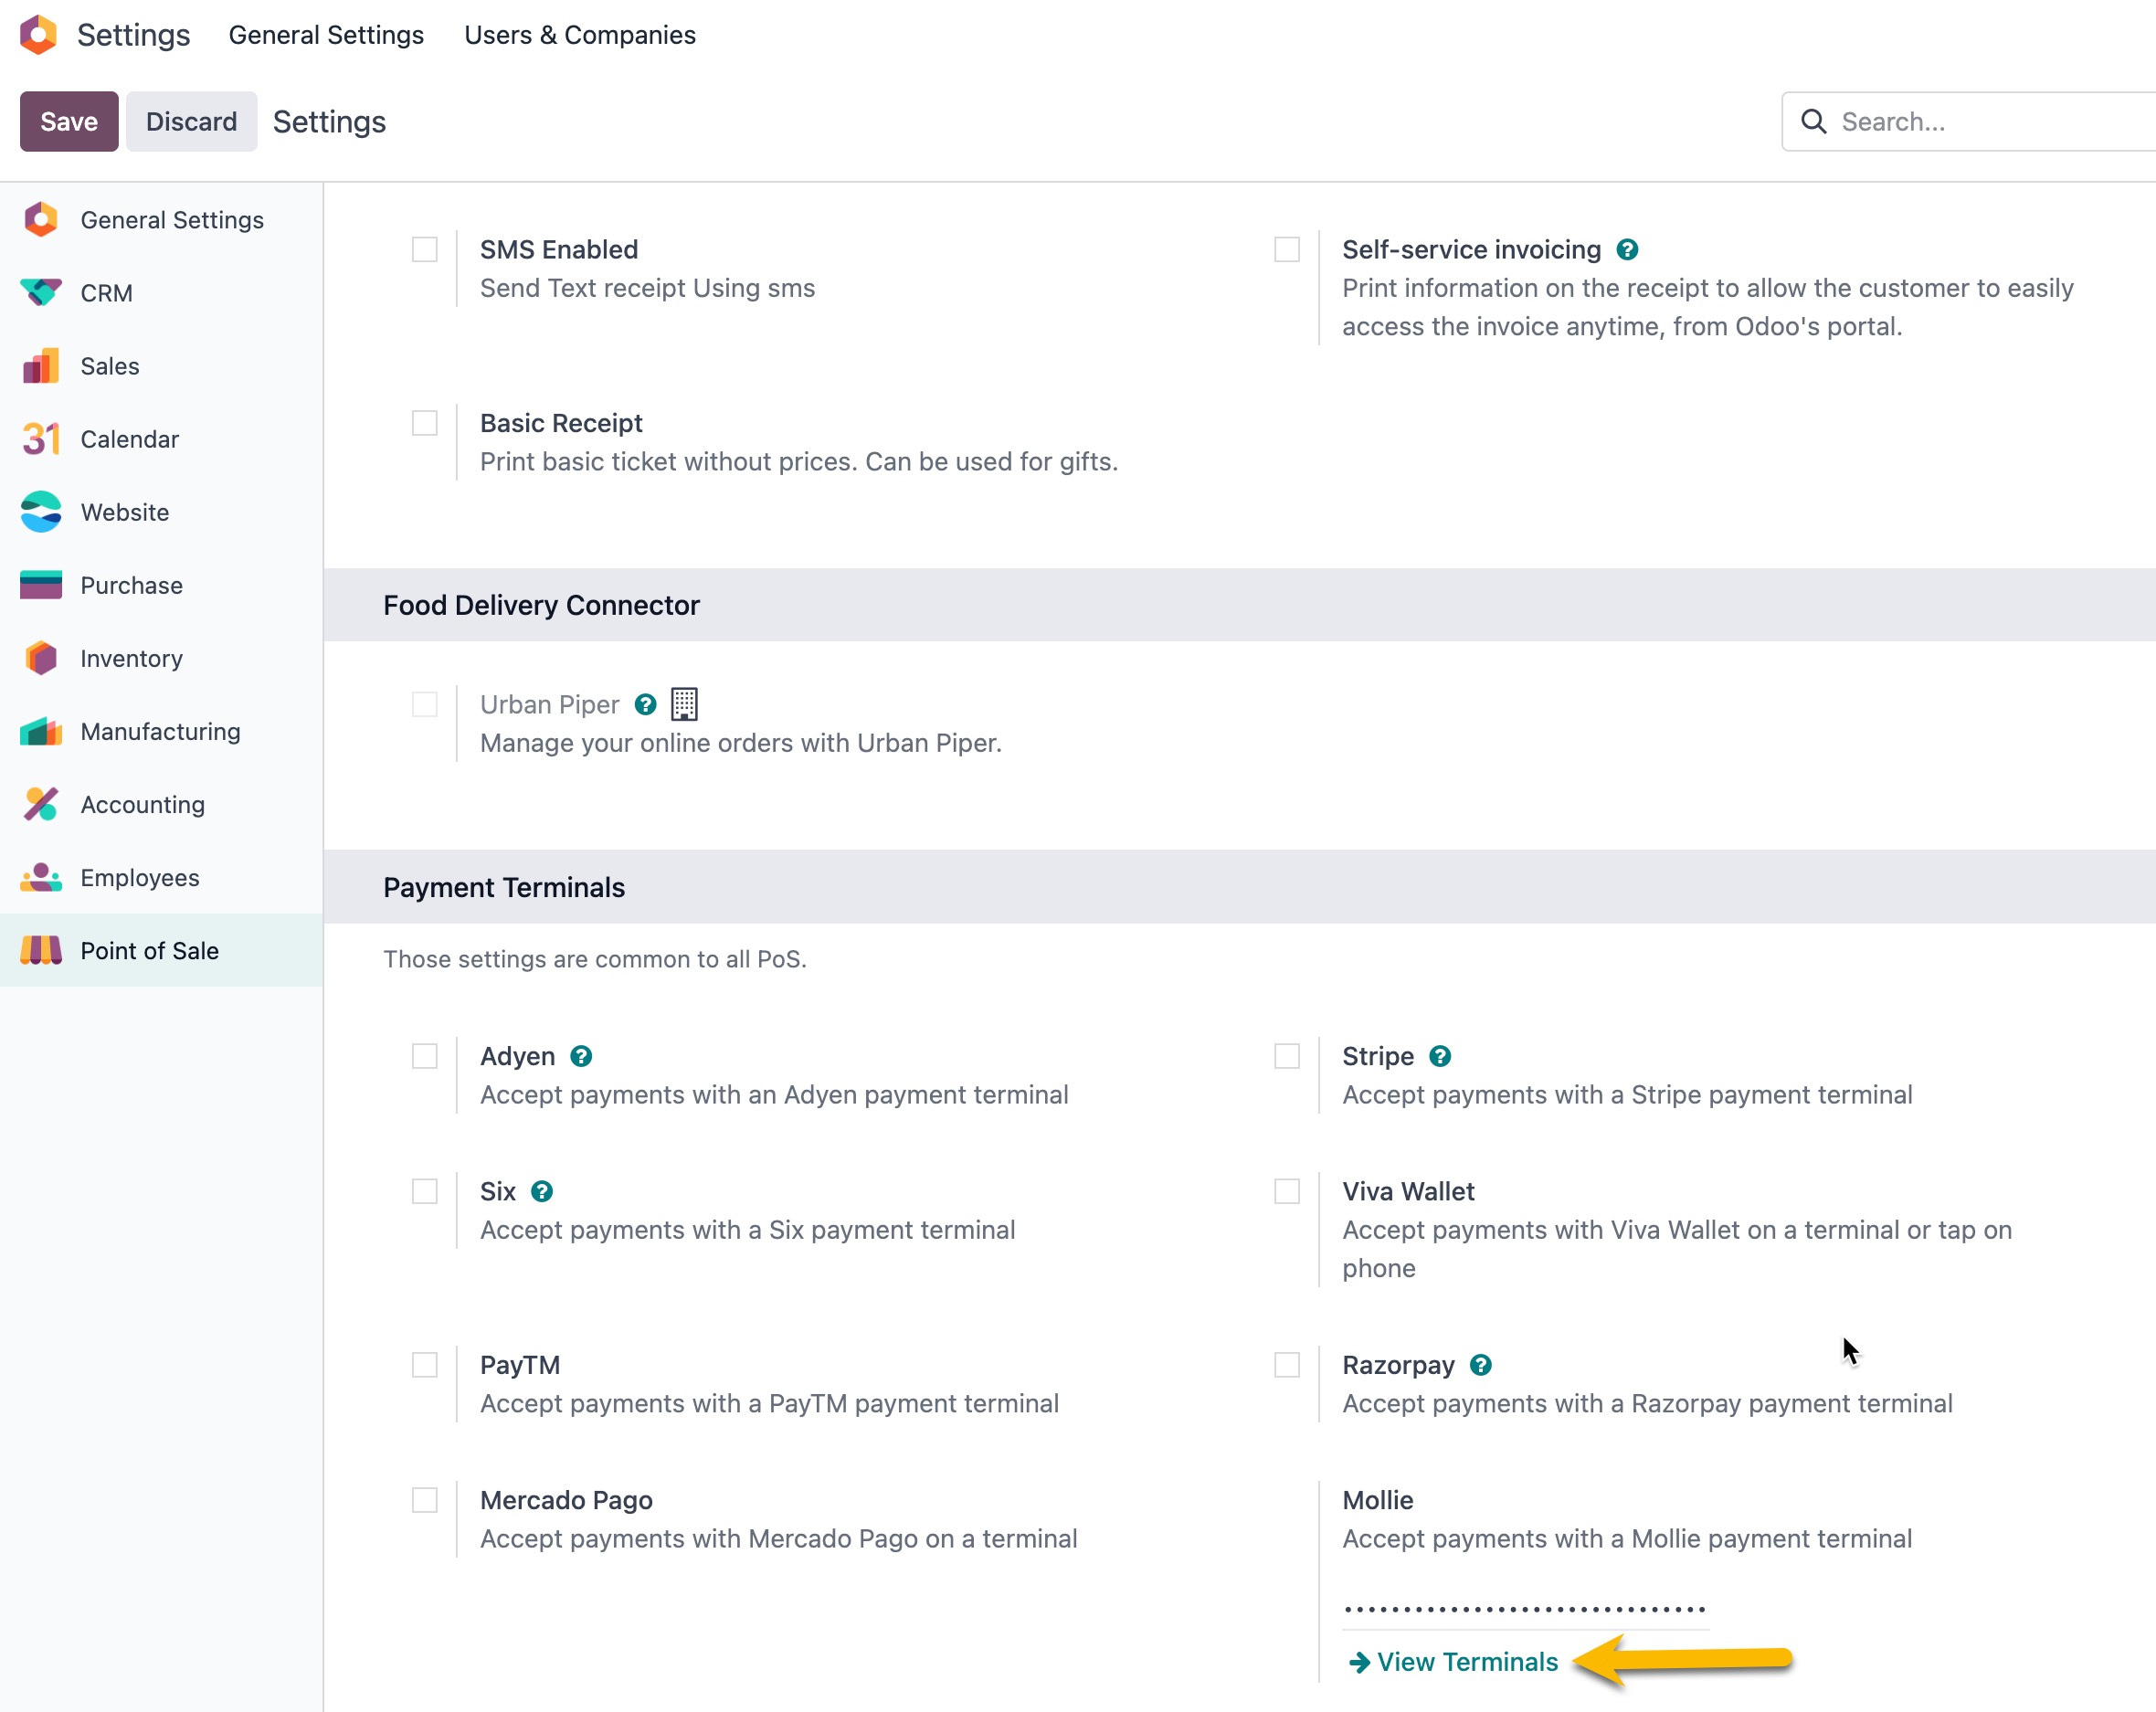
- Select Sync Terminals for your connected devices to show up:
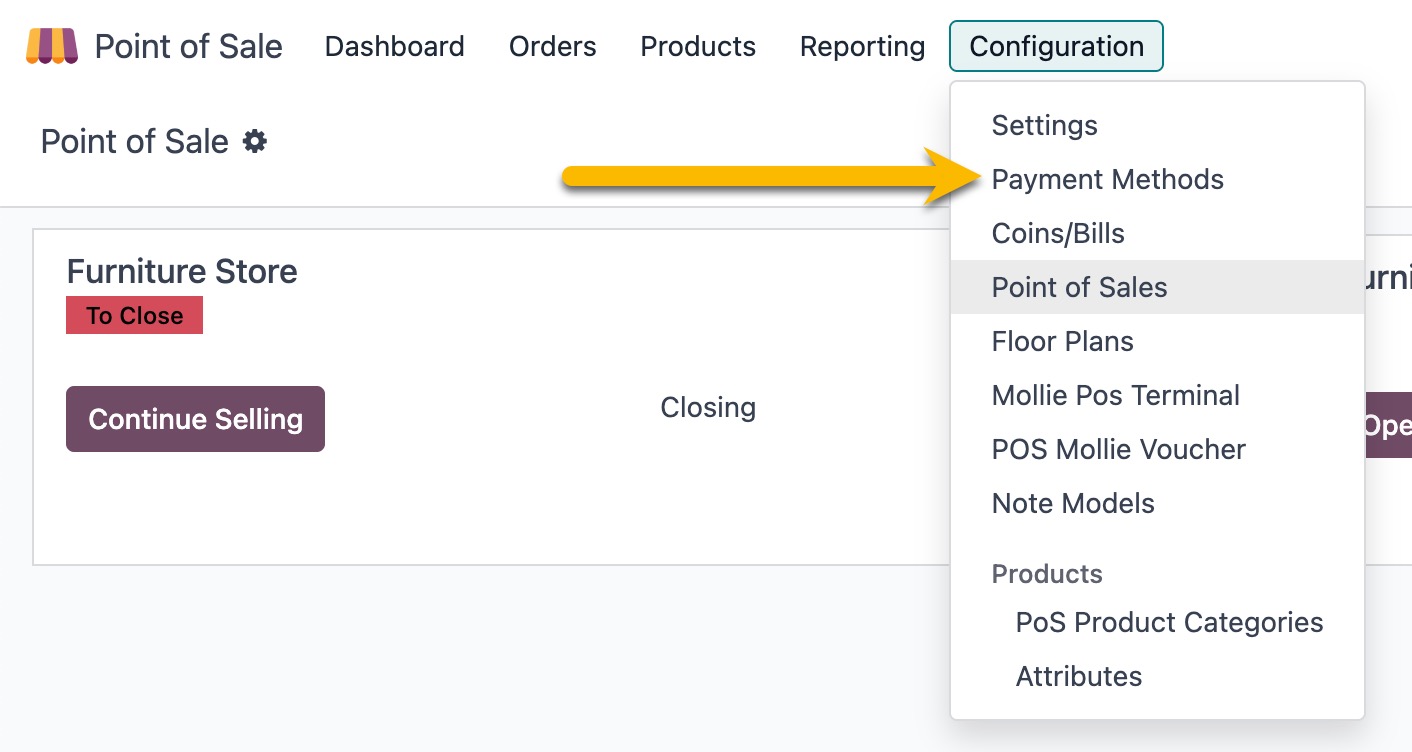
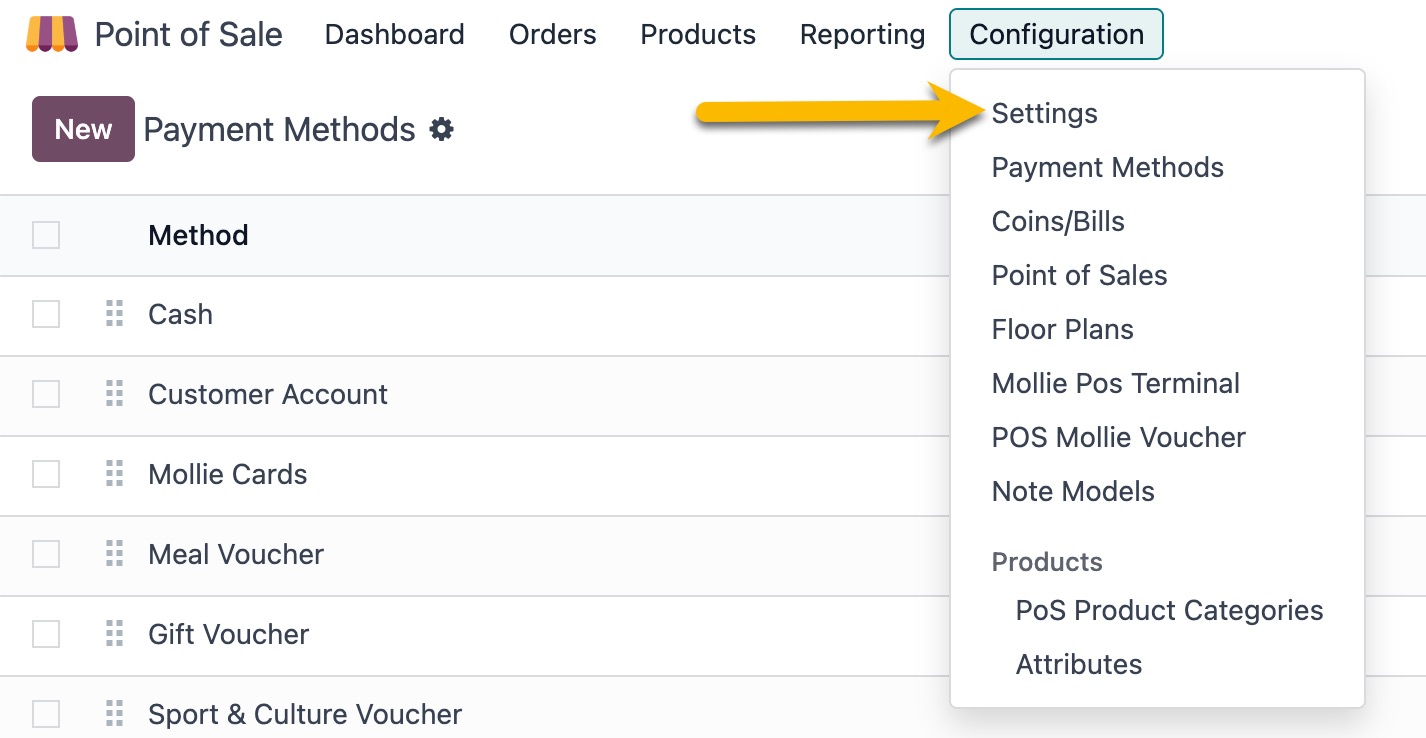
- To further set up your terminals, go to Point of Sale > Configuration > Payment Methods.
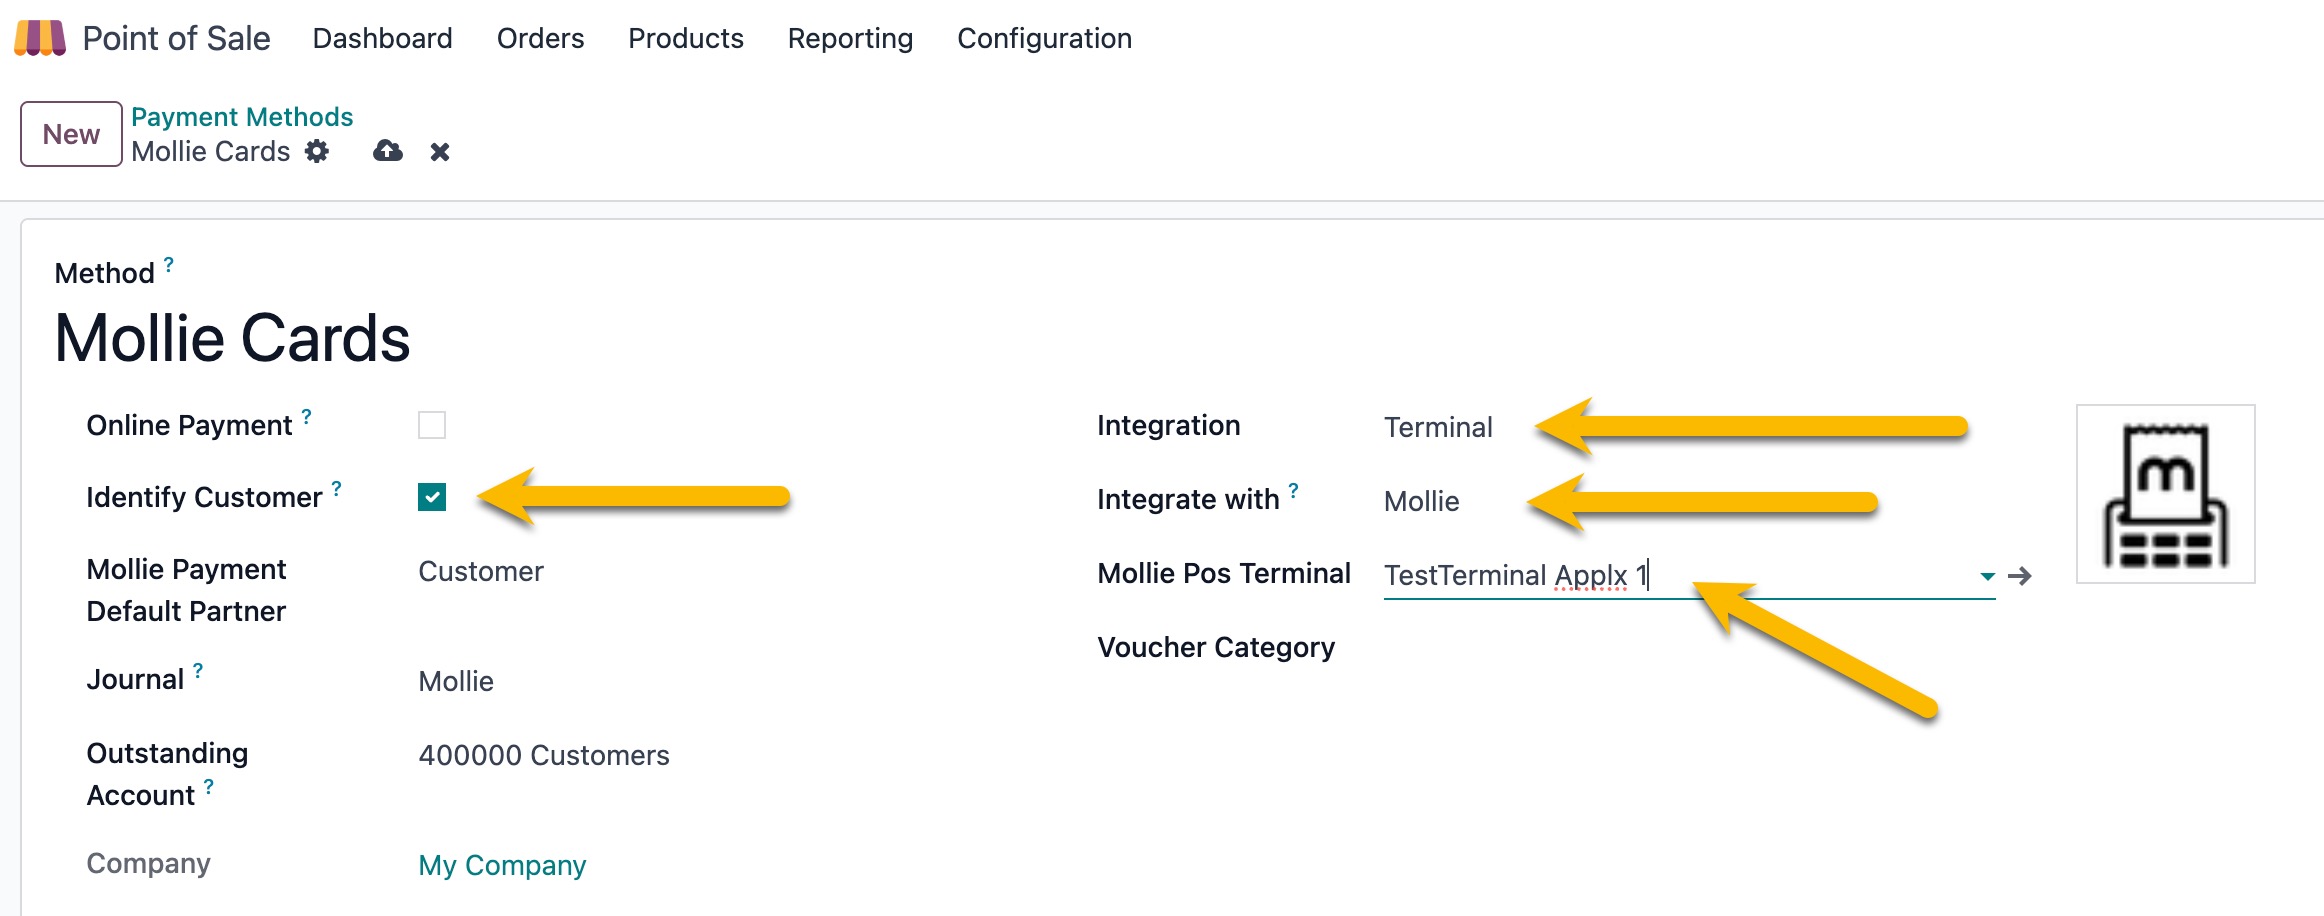
- Add a new payment method Mollie:
- Select a Journal you want these transactions to go to, pick a terminal in the Use a Payment terminal (Mollie) and Mollie Pos Terminal (your connected device).
- We recommend selecting Identify Customer to create a separate transaction every time a customer checks out using Point of Sales.
- Save the changes and go to Configuration > Settings to enable POS in your shop:
- Scroll down to the Payment section > add Mollie to Payment Methods and Save the changes:
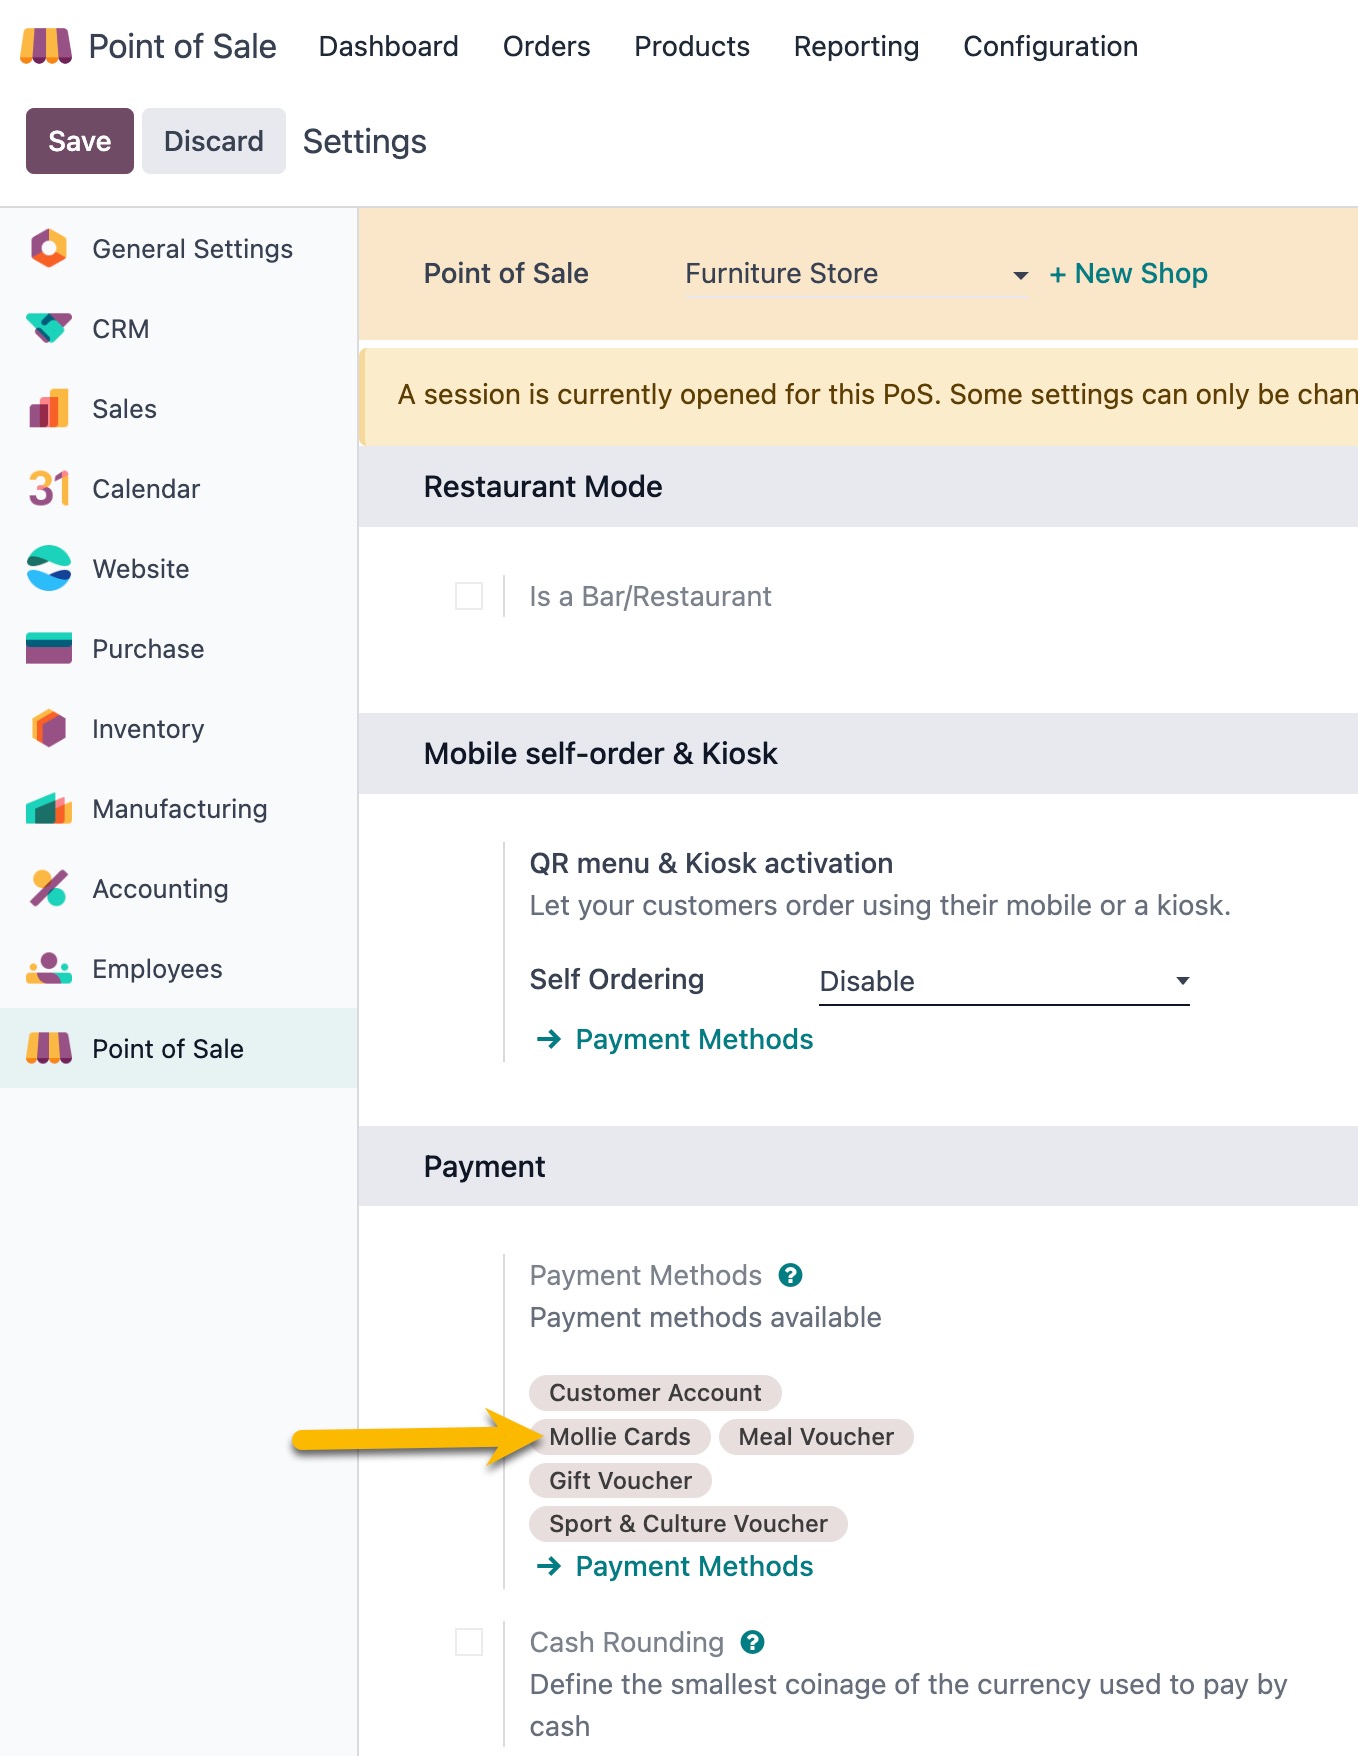
Now Point of Sale is added to the payment methods of your shop and you can view all the transactions it processed and their statuses in Point of Sale > Terminal > Transaction:
Refunds in POS are currently not available but will be added in the later version of the module.
For now, you can refund your customers in cash, or issue a refund manually in your Mollie Web app.
Refunds
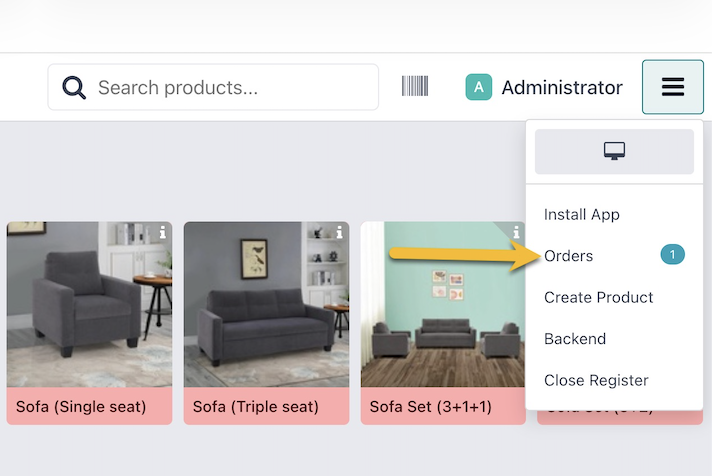
Starting with version 18.0, you can issue refunds directly from Odoo via the Orders tab:
- In Odoo, click Menu (in the right upper corner) > Orders:
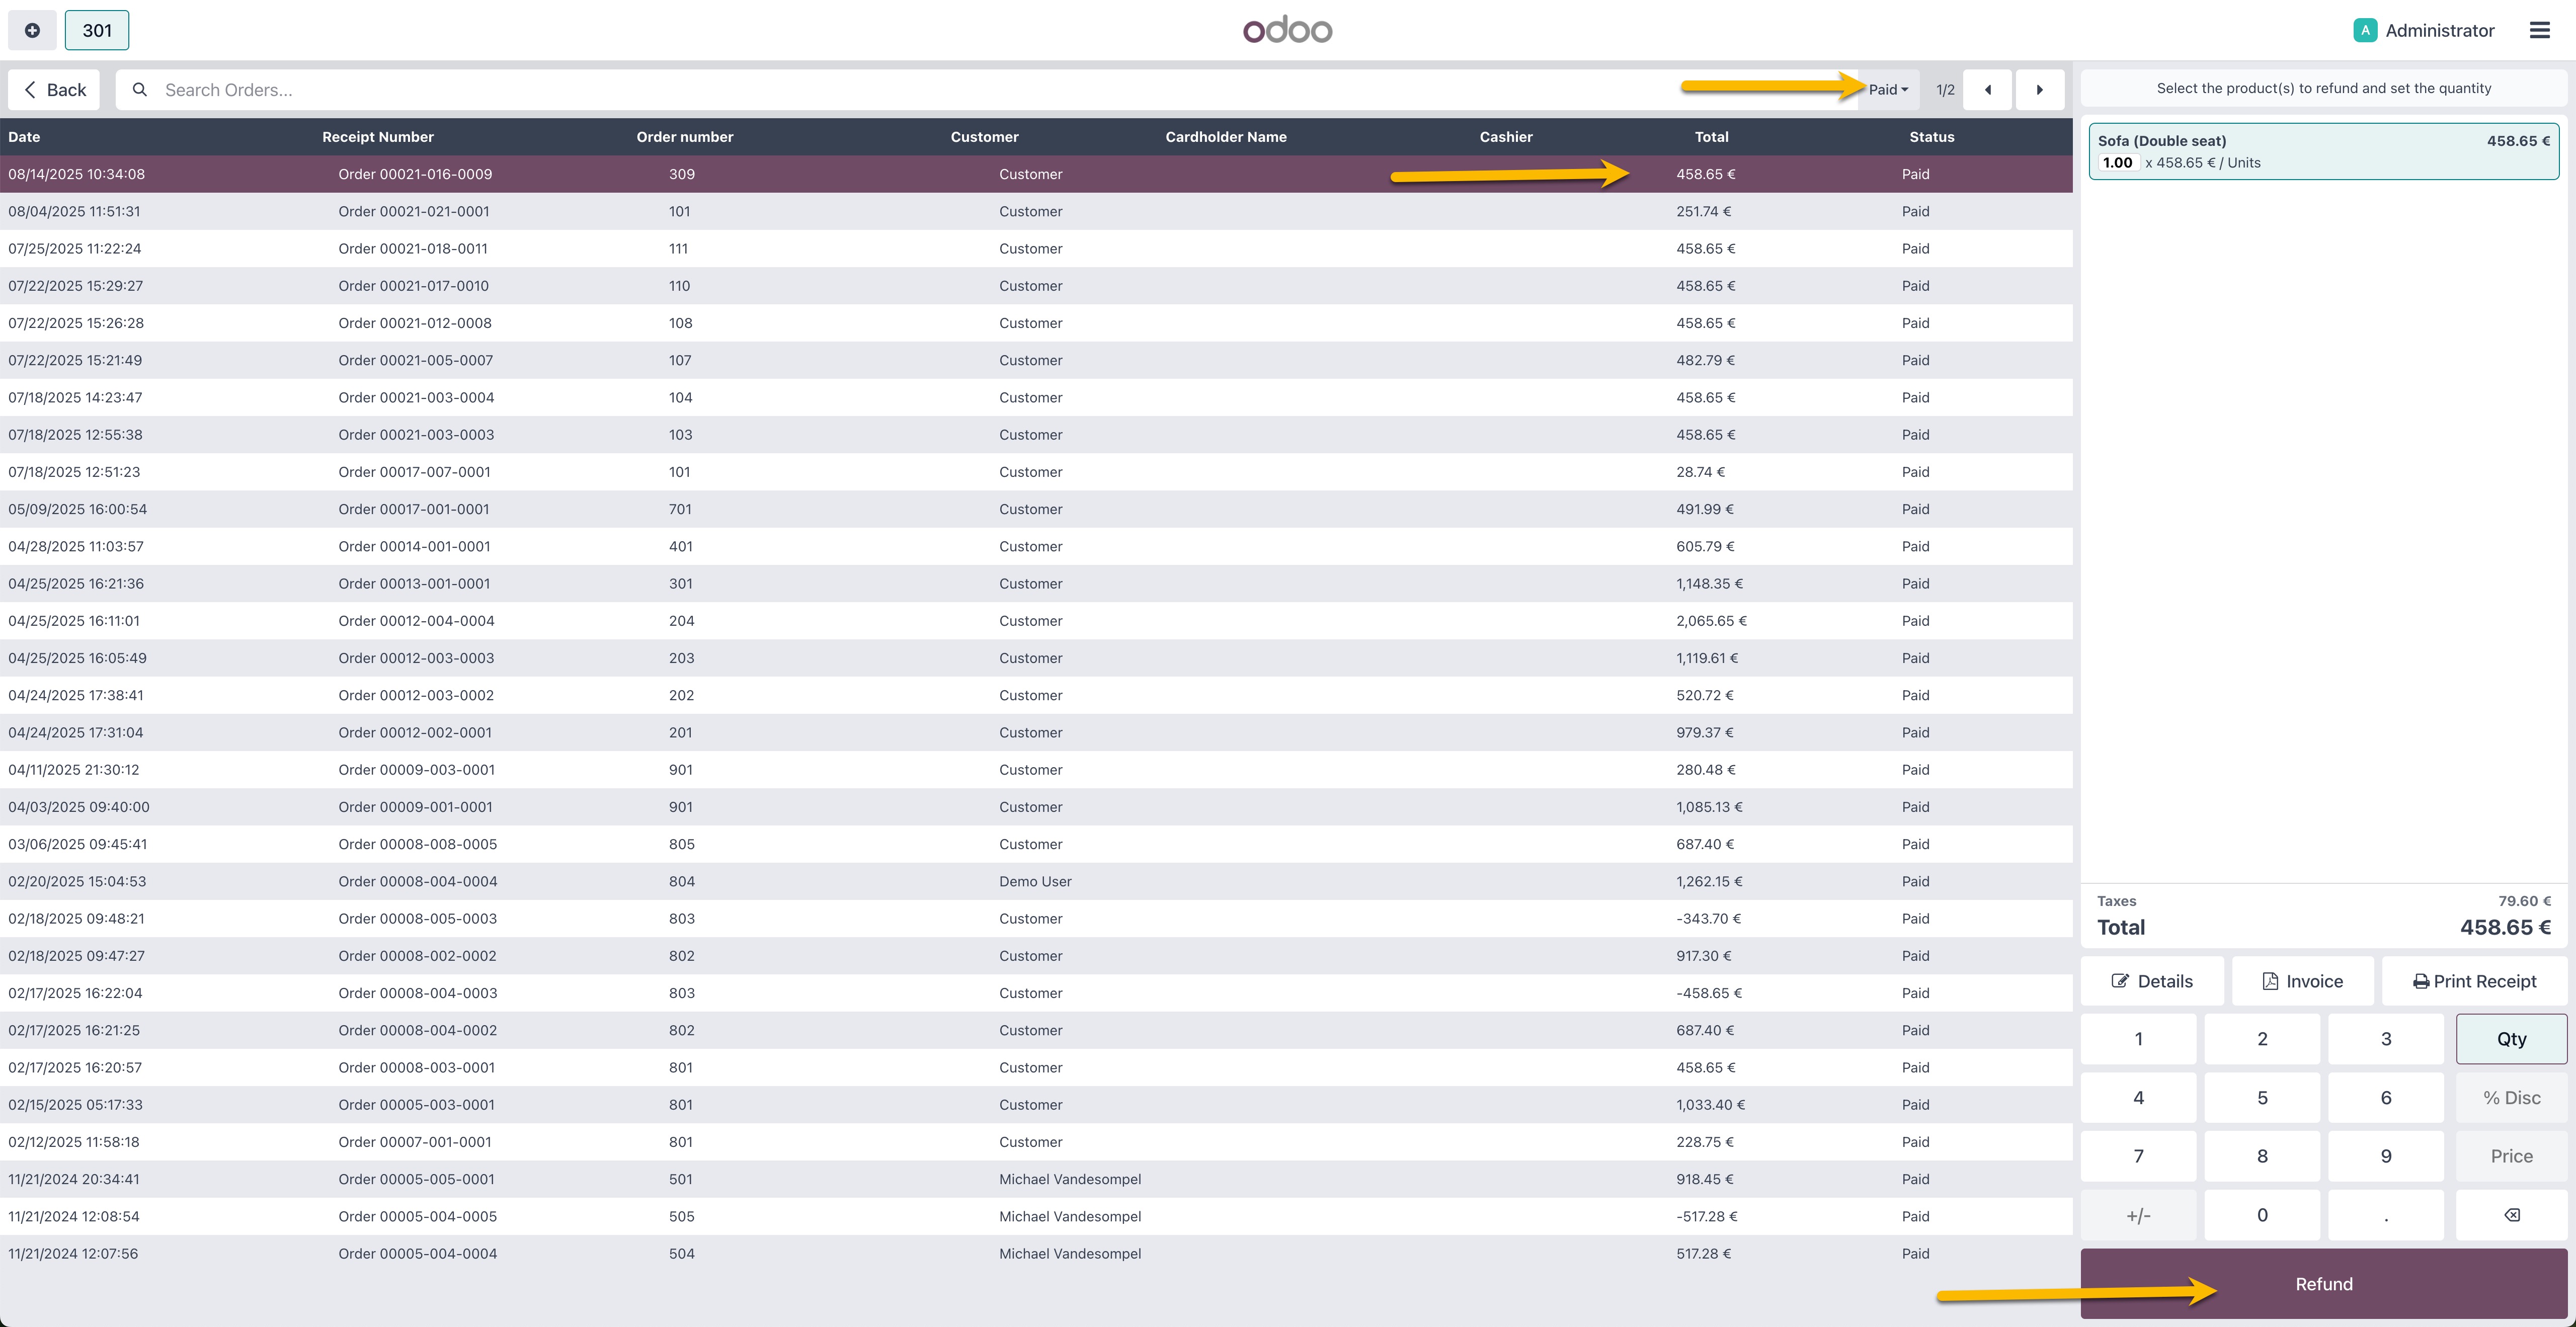
- Select Paid orders > click on a specific order and click Refund:
- In the left panel select Mollie > click Refund in the popup window:
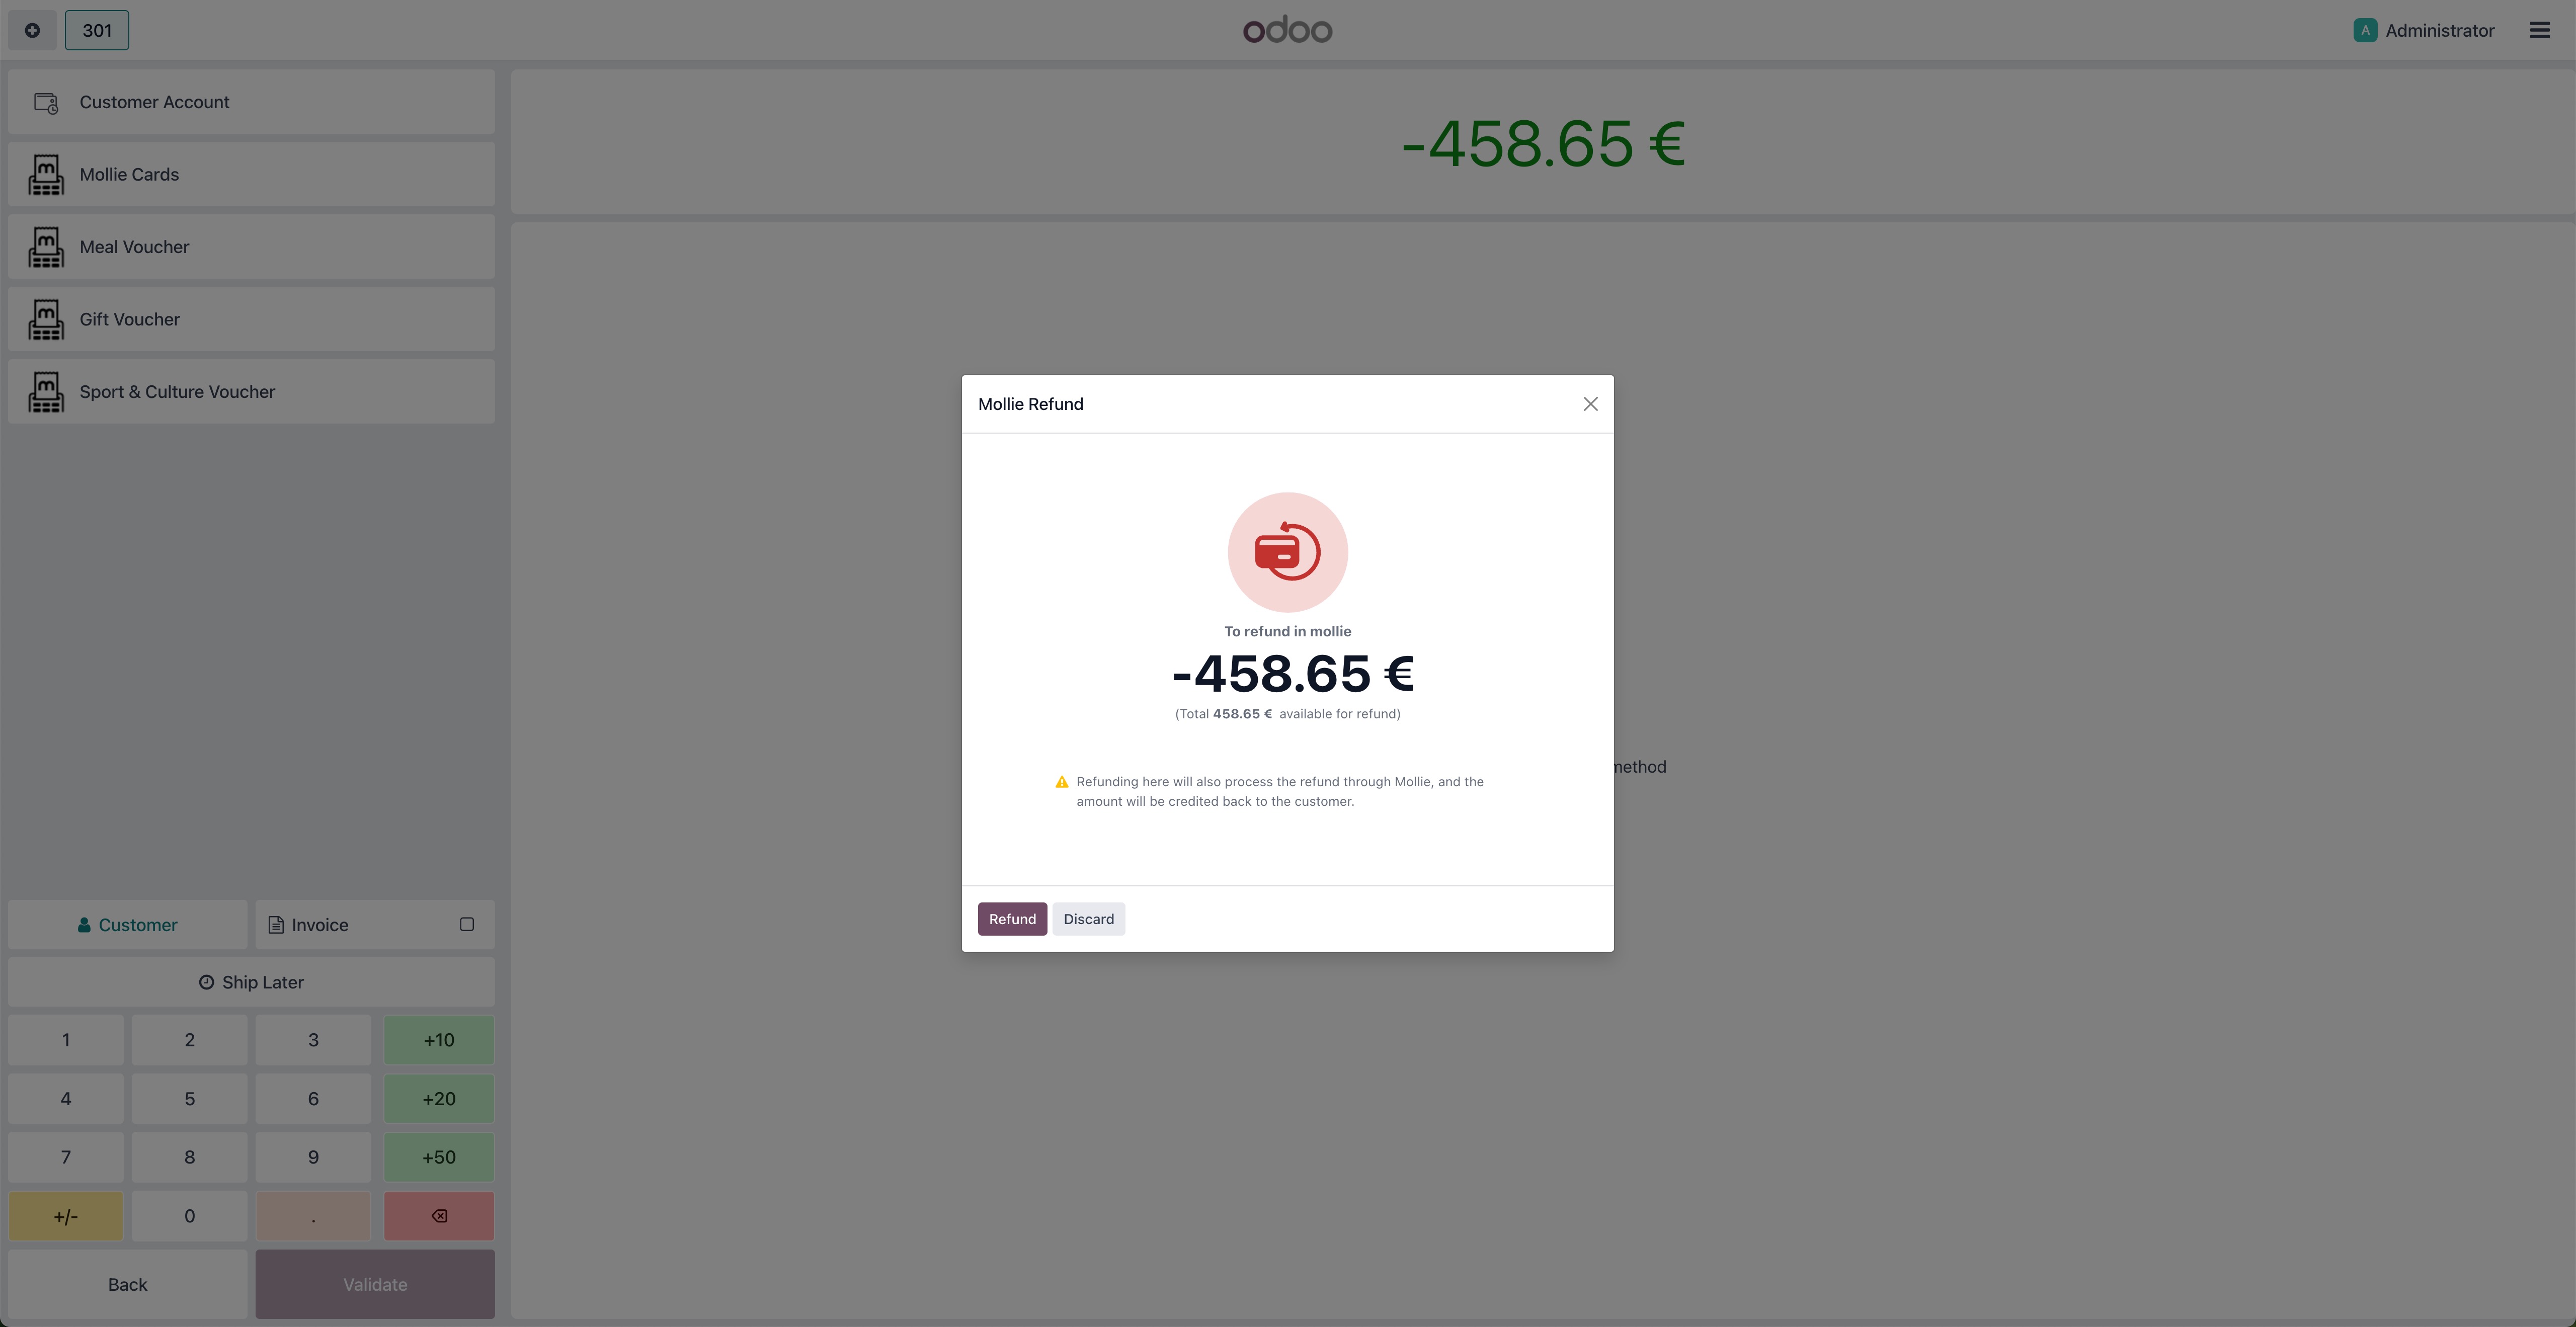
This will issue a full refund for the whole order and will take up to a few hours to process.
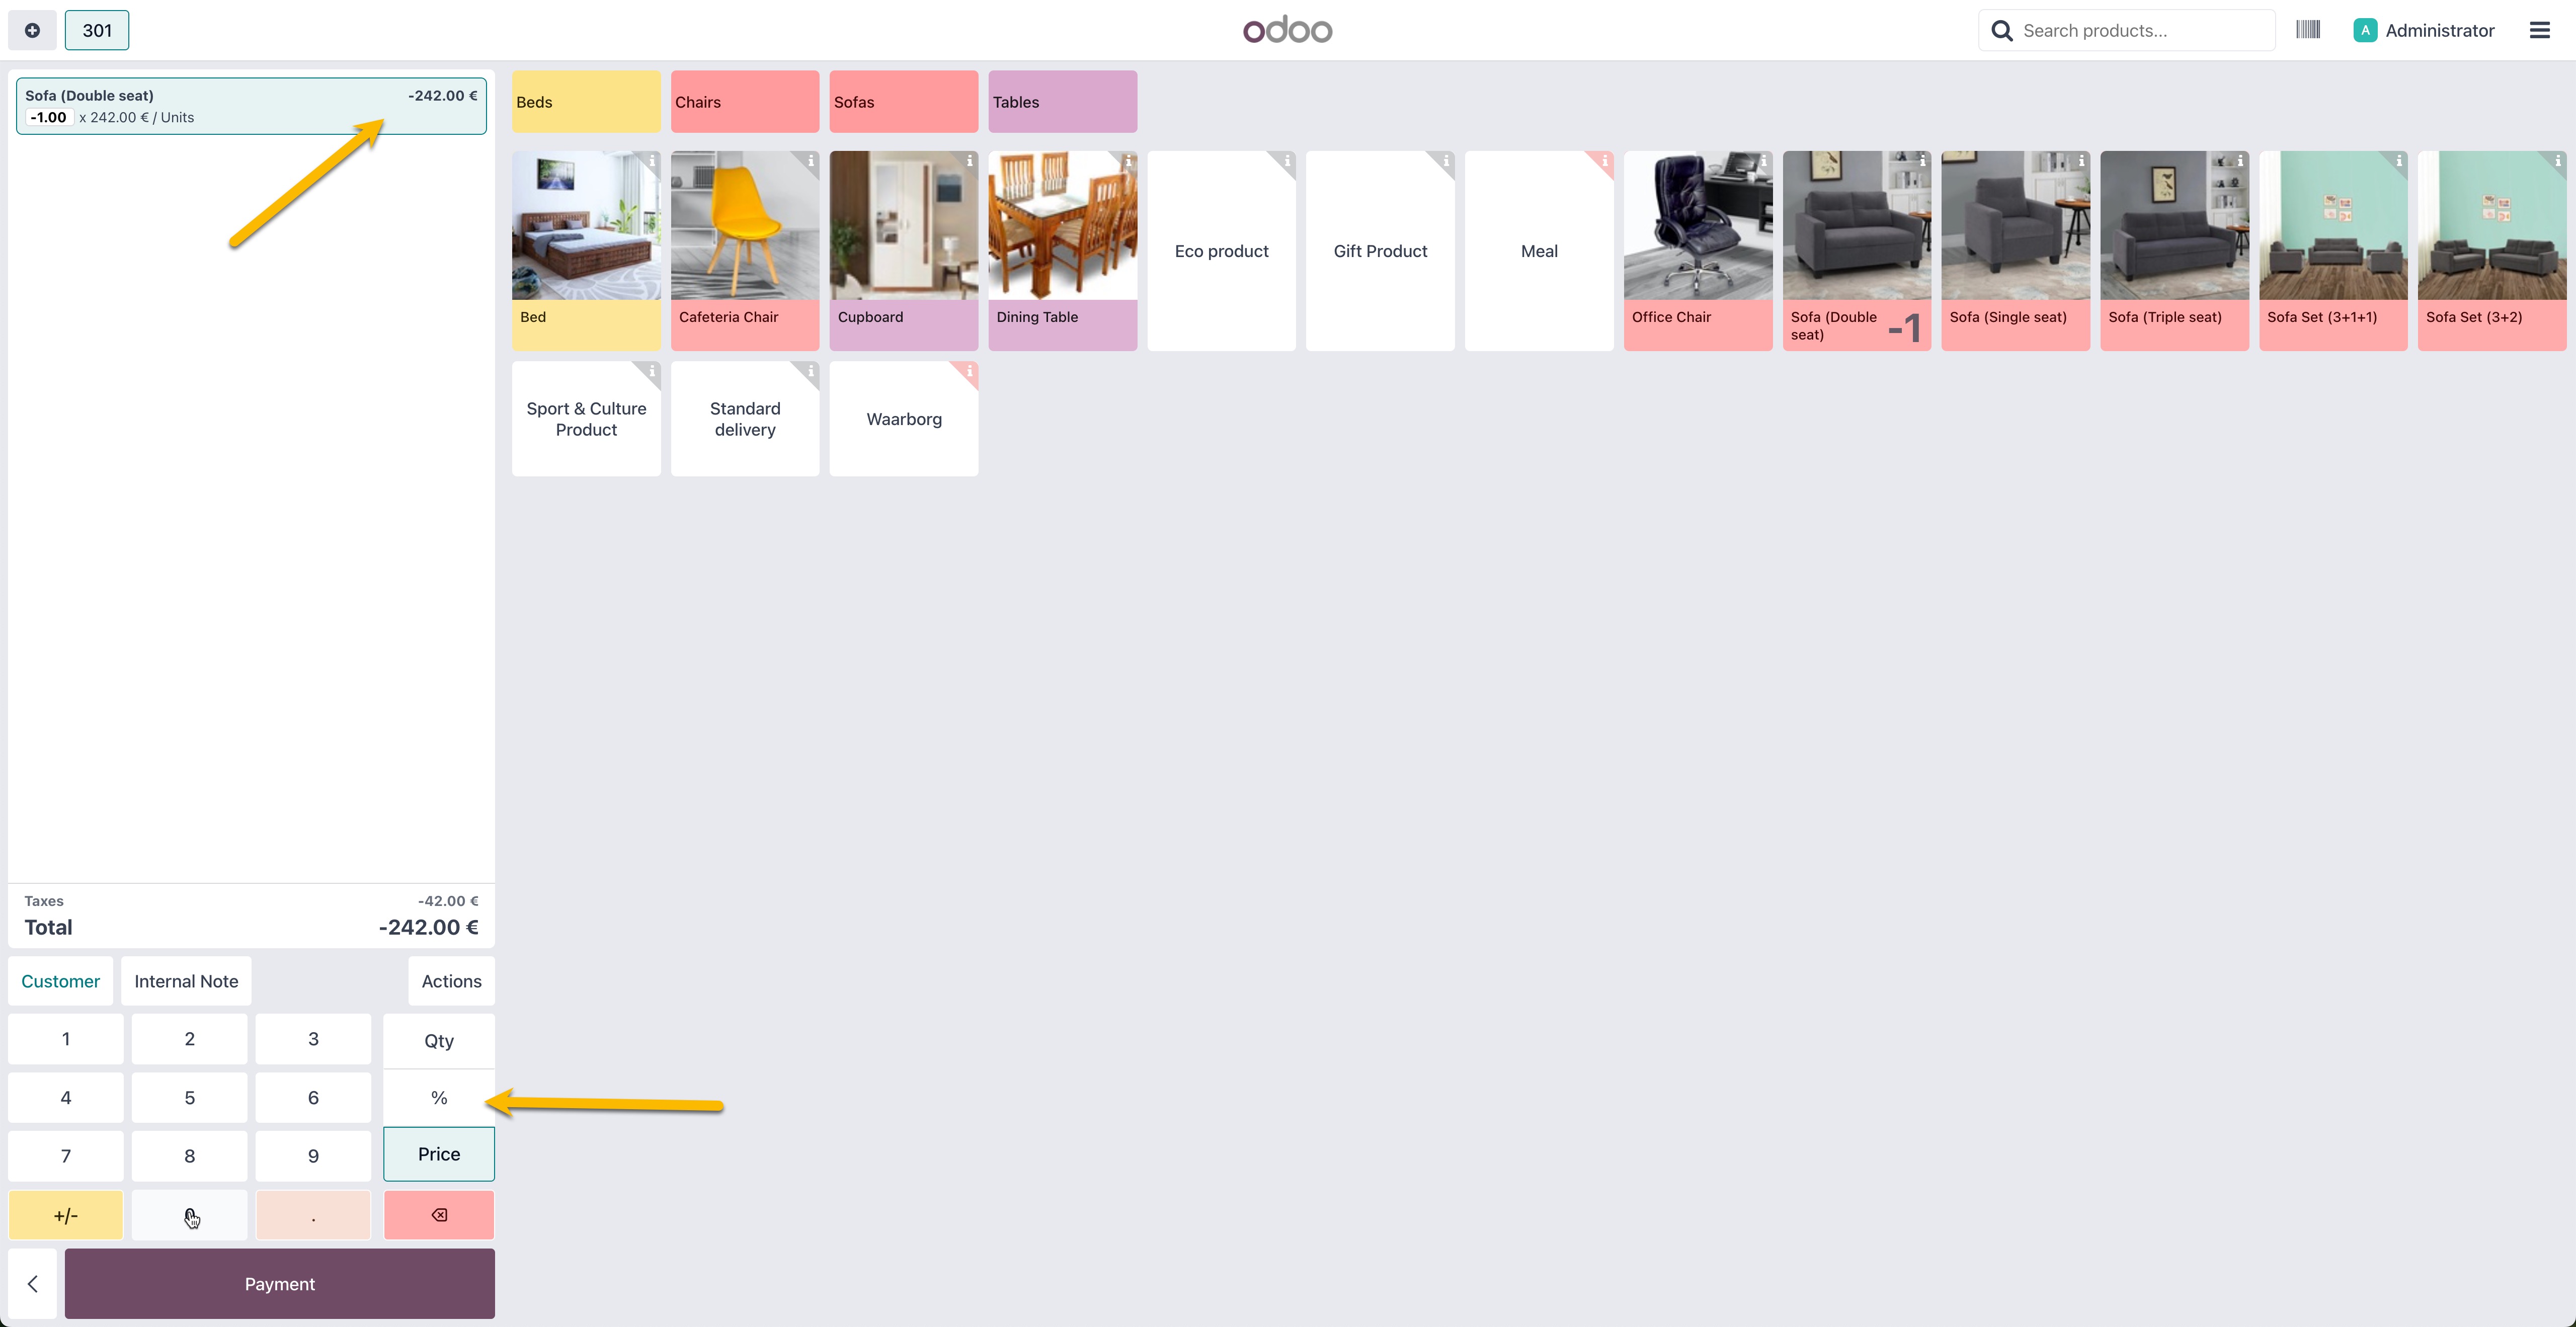
You can also adjust the refund amount using the keyboard to issue a partial refund:
Set up vouchers
Add vouchers
To use vouchers as a payment method in Odoo PoS you need to:
- Go to Sales > Products > Products and create a new product.
- Give your product an appropriate name, price and category.

Once the voucher (product) is created, you need to assign it to a specific product
category. This helps to keep your vouchers and other products organized:
- Select an existing category from the list or create a new category for your vouchers.
- Set parent category to All.
With your product and its category defined, the next step is to link this category to the Mollie voucher functionality.
Create Mollie voucher category
To standardize all your Mollie vouchers, we recommend creating a separate category:
- Go to Point of Sale > Configuration > POS Mollie Voucher.
- Create a new voucher and give it a fitting name.
- Add the above created product category and any other categories that you wish to
connect to this voucher.

Now the system needs a way to process these voucher payments. Let's set up the corresponding
payment method:
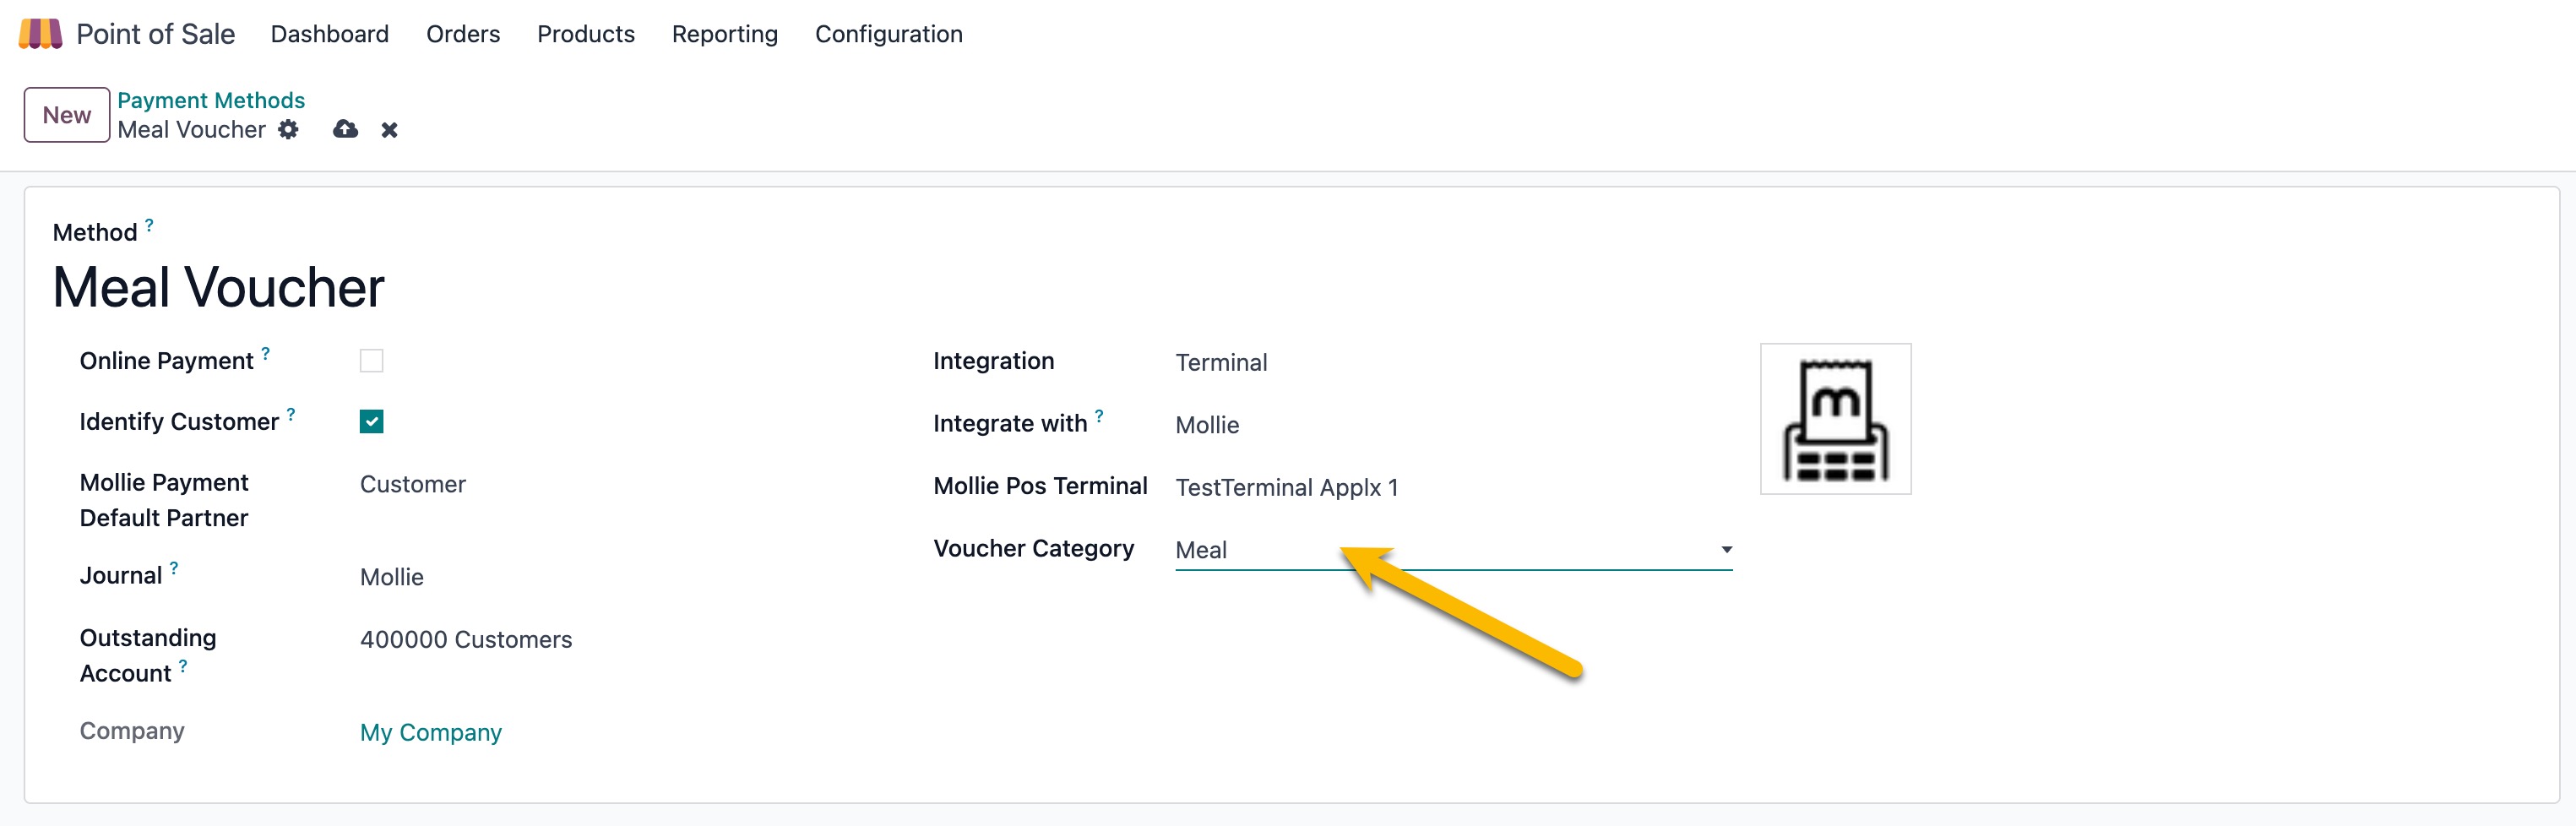
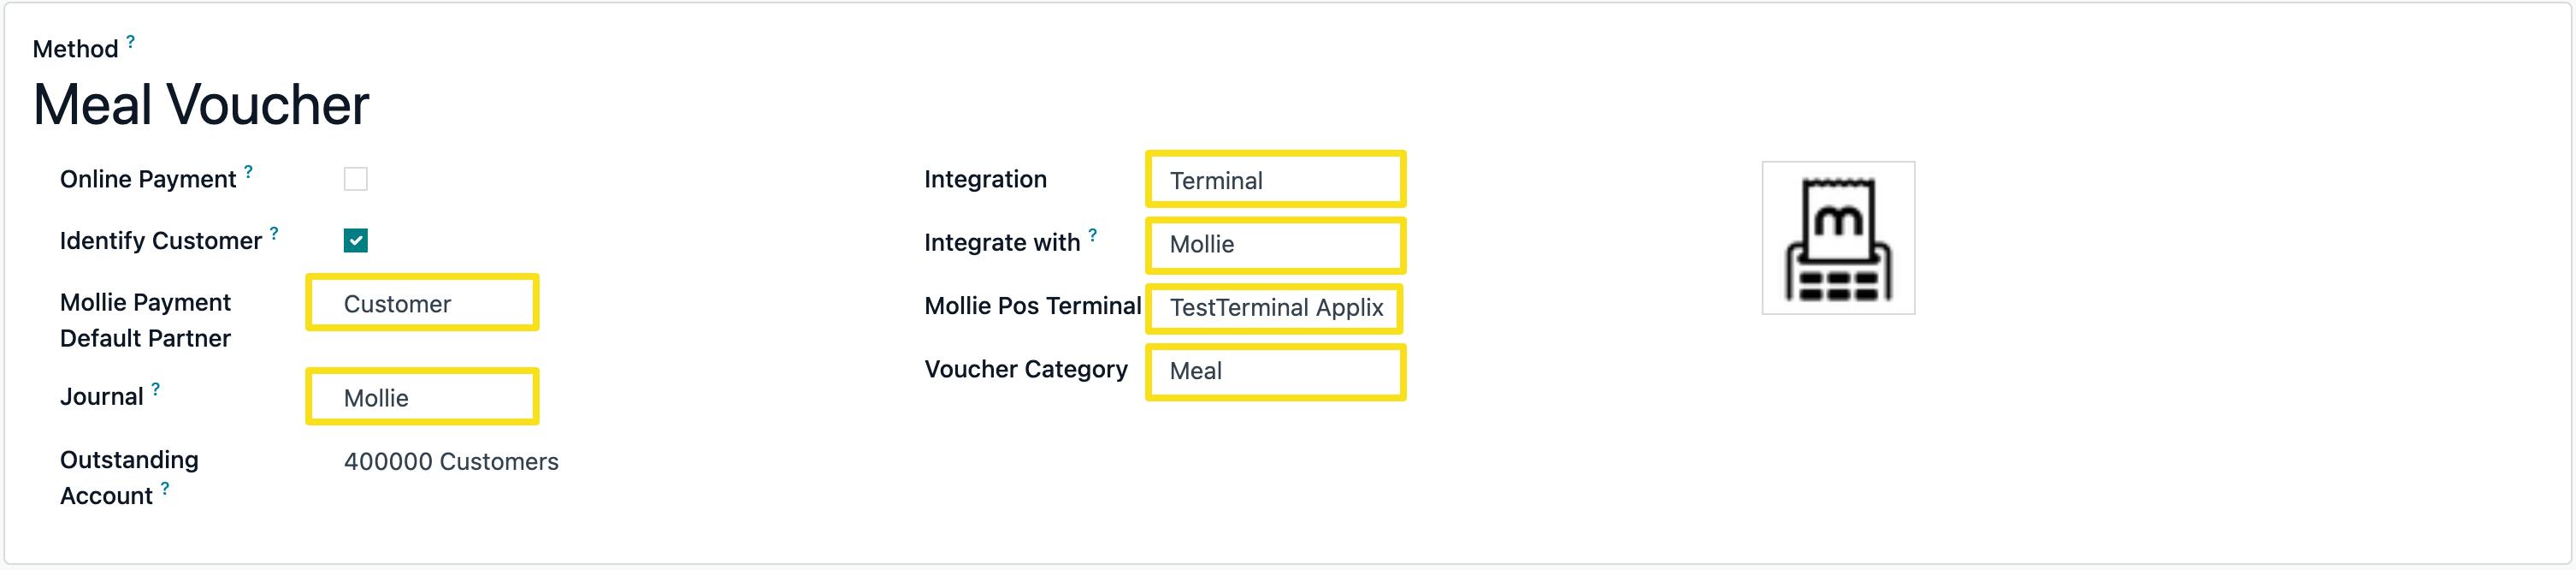
- Navigate to Configuration > Payment Methods and create a new method with the following details:
- Mollie payment default partner:
Customer; - Journal:
Mollie; - Integration:
Terminal; - Integrate with:
Mollie; - Mollie PoS Terminal:
your terminal name; - Voucher Category:
your category name;
- Mollie payment default partner:
After configuring the payment method details, make sure it's activated in your general POS
settings:
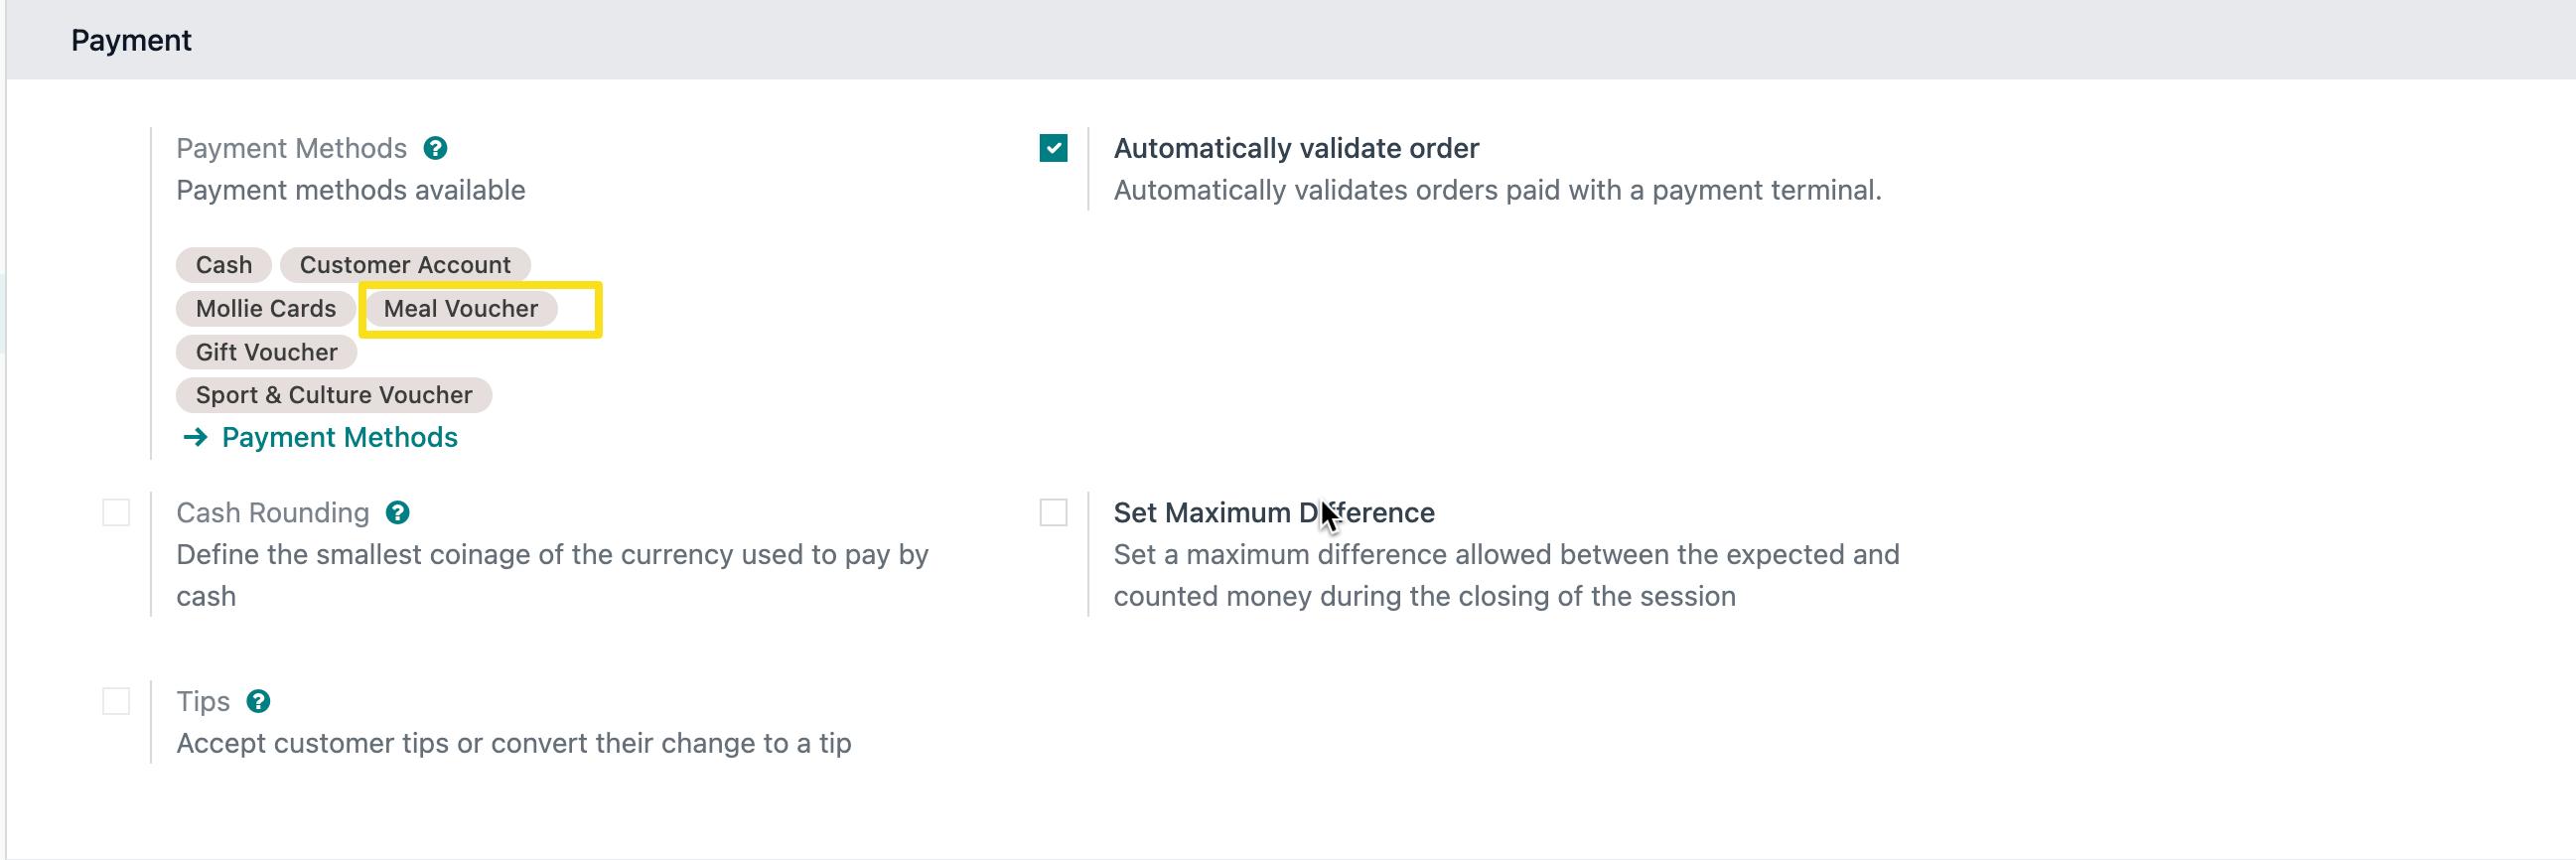
- Navigate to Configuration > Settings > Point of Sale > Payment.
- Under Payment methods available add your created voucher to the list of payment methods.
Double-check that all relevant products, including the new voucher product, are accessible
within the POS interface.
Publish your products
To ensure your products are live and available online, follow these steps:
- Navigate to Products > Products.
- Make sure all required items are selected as available (the box is checked) in POS.
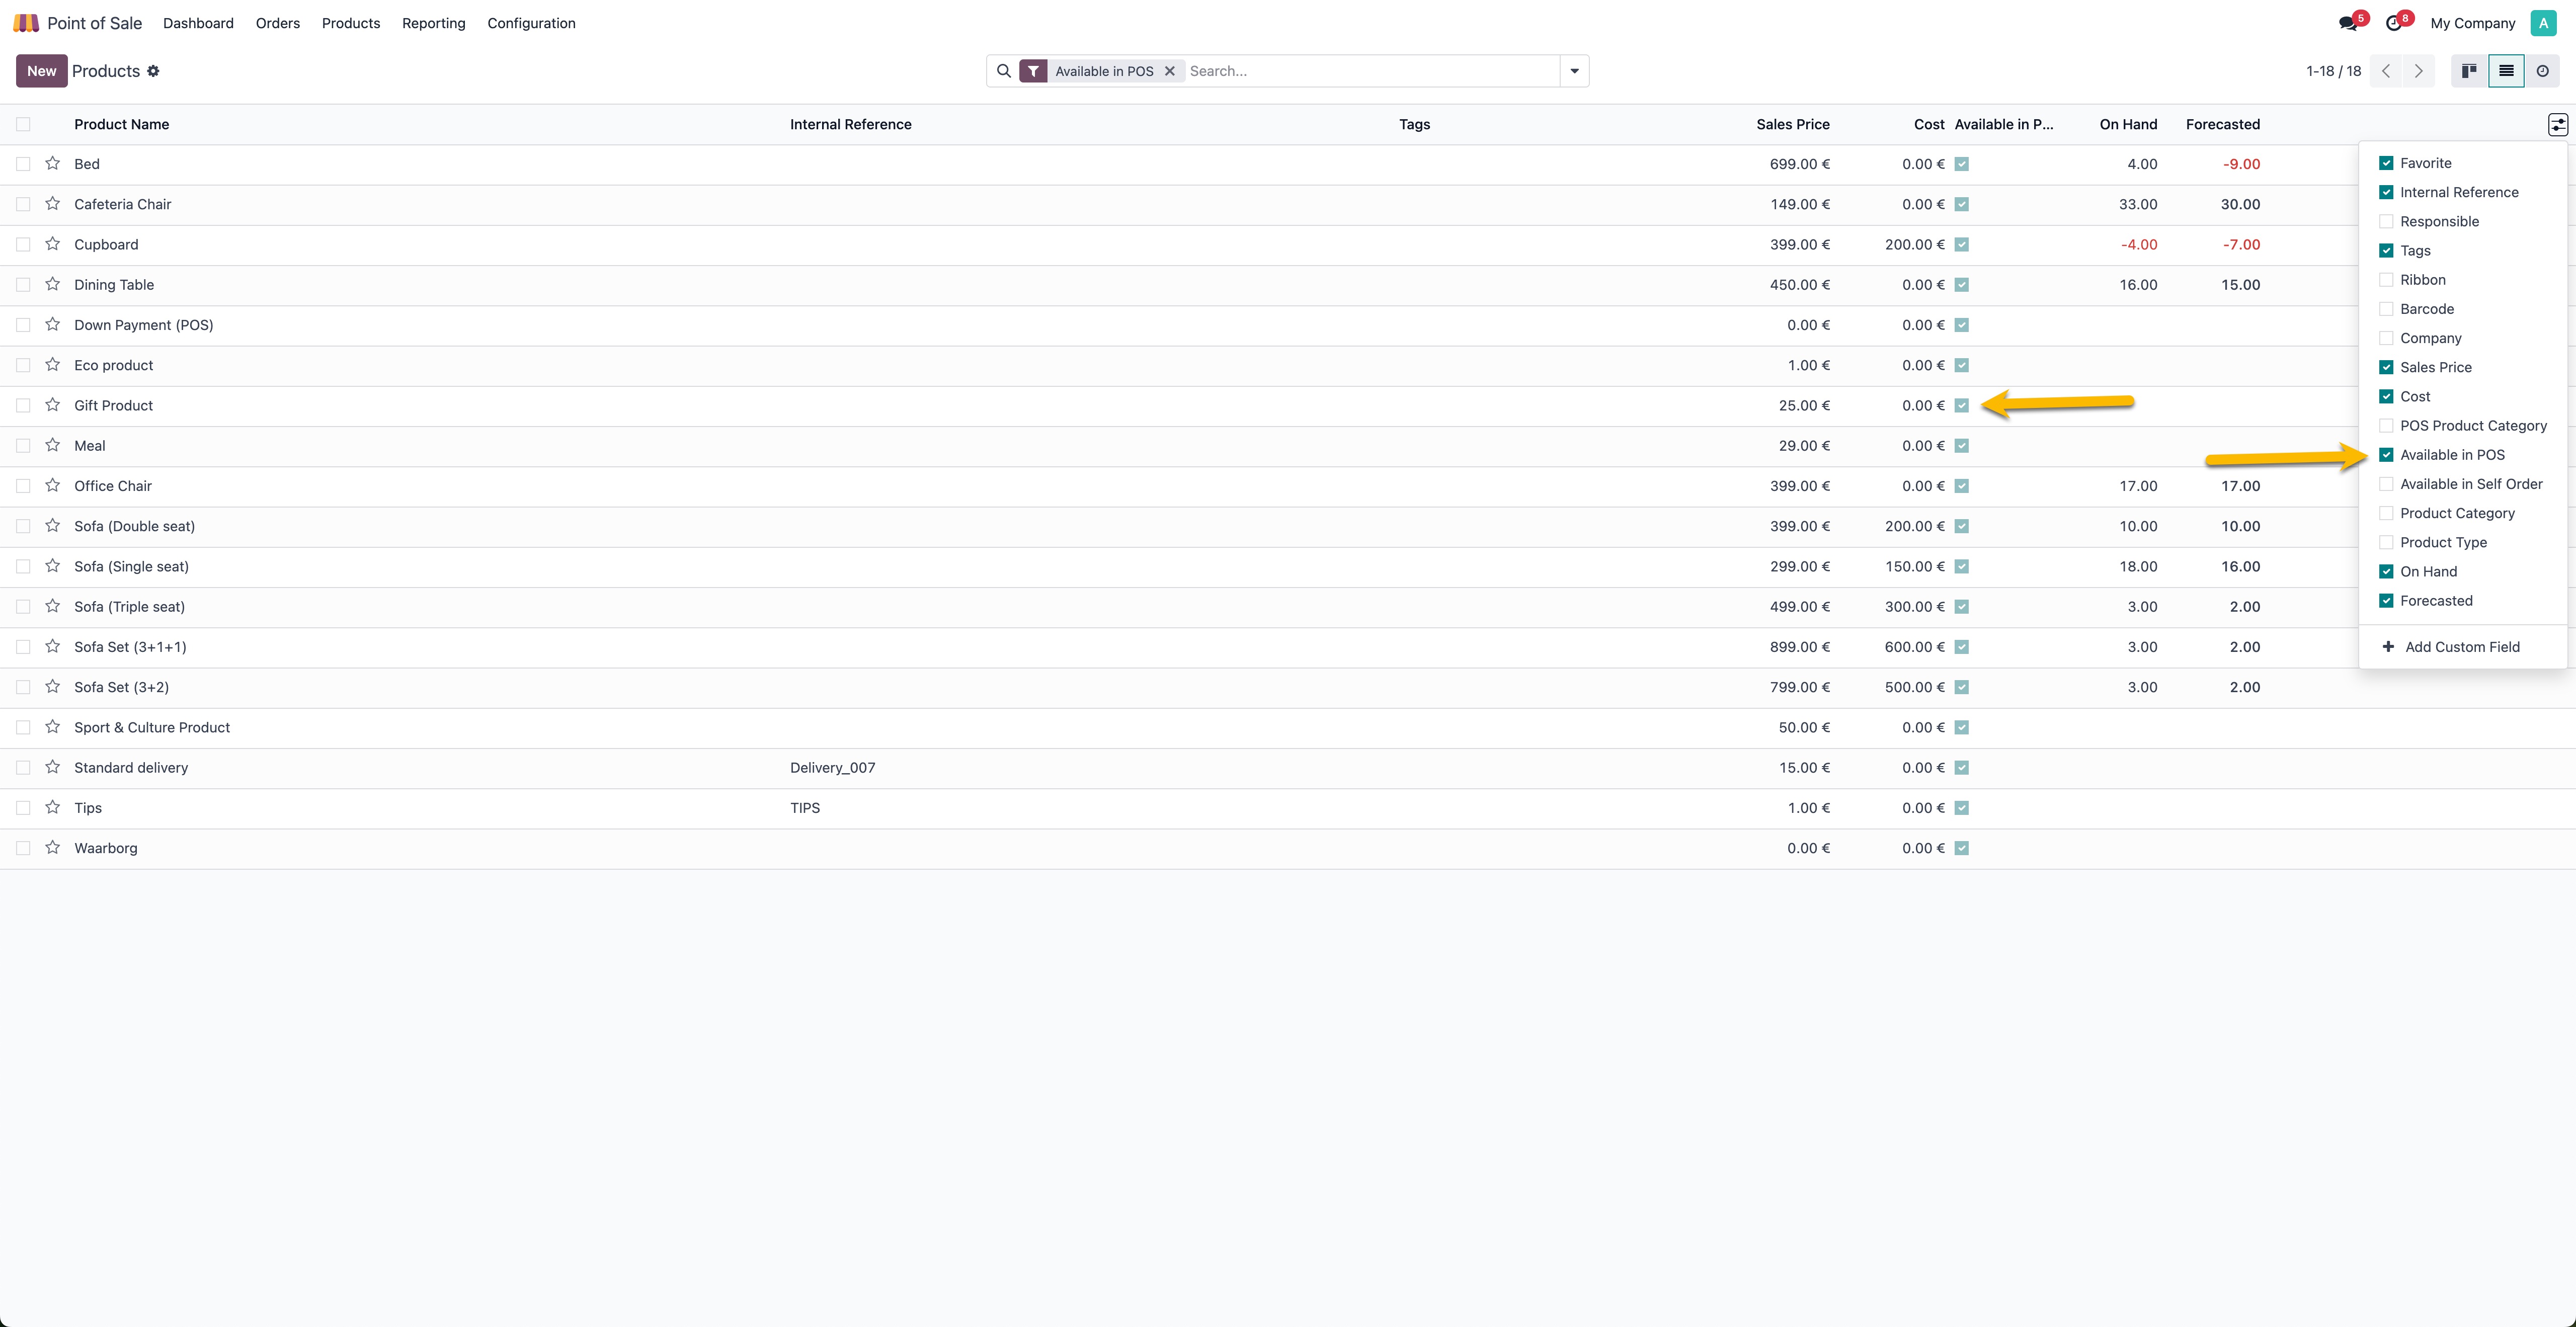
Now it's time to test your setup. and simulate a transaction using a voucher.
Test your setup
- Navigate to your Point of Sale and open the register.
- Find your newly added products and start the payment.
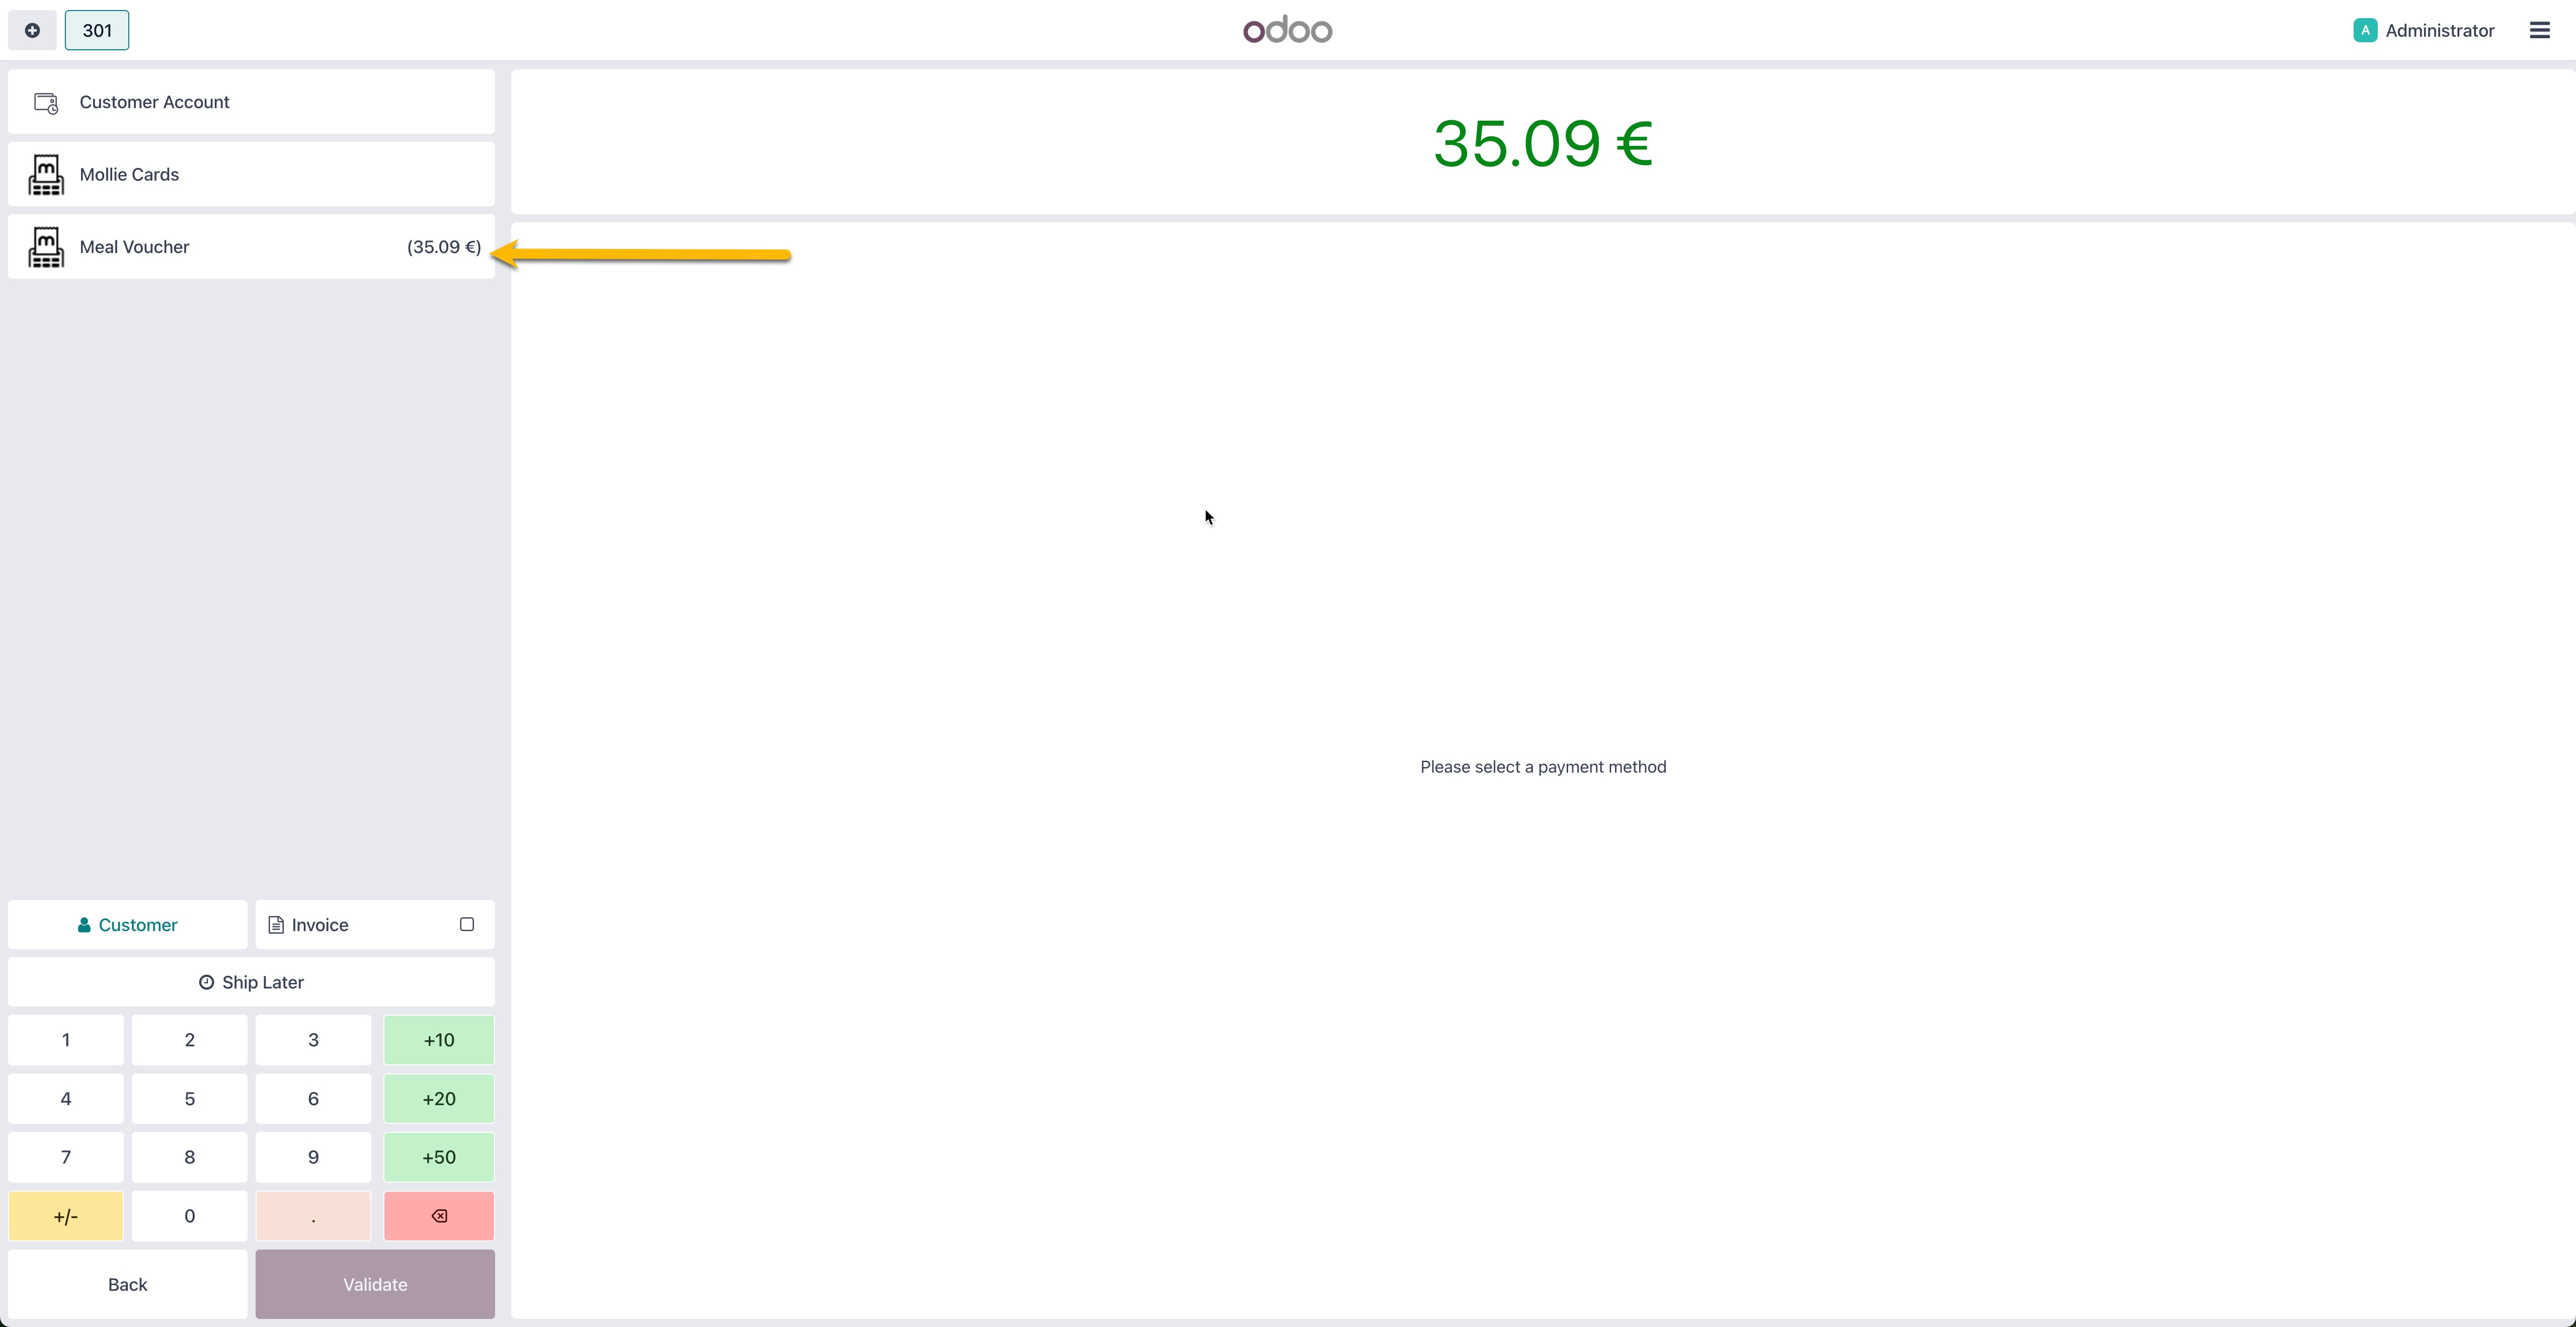
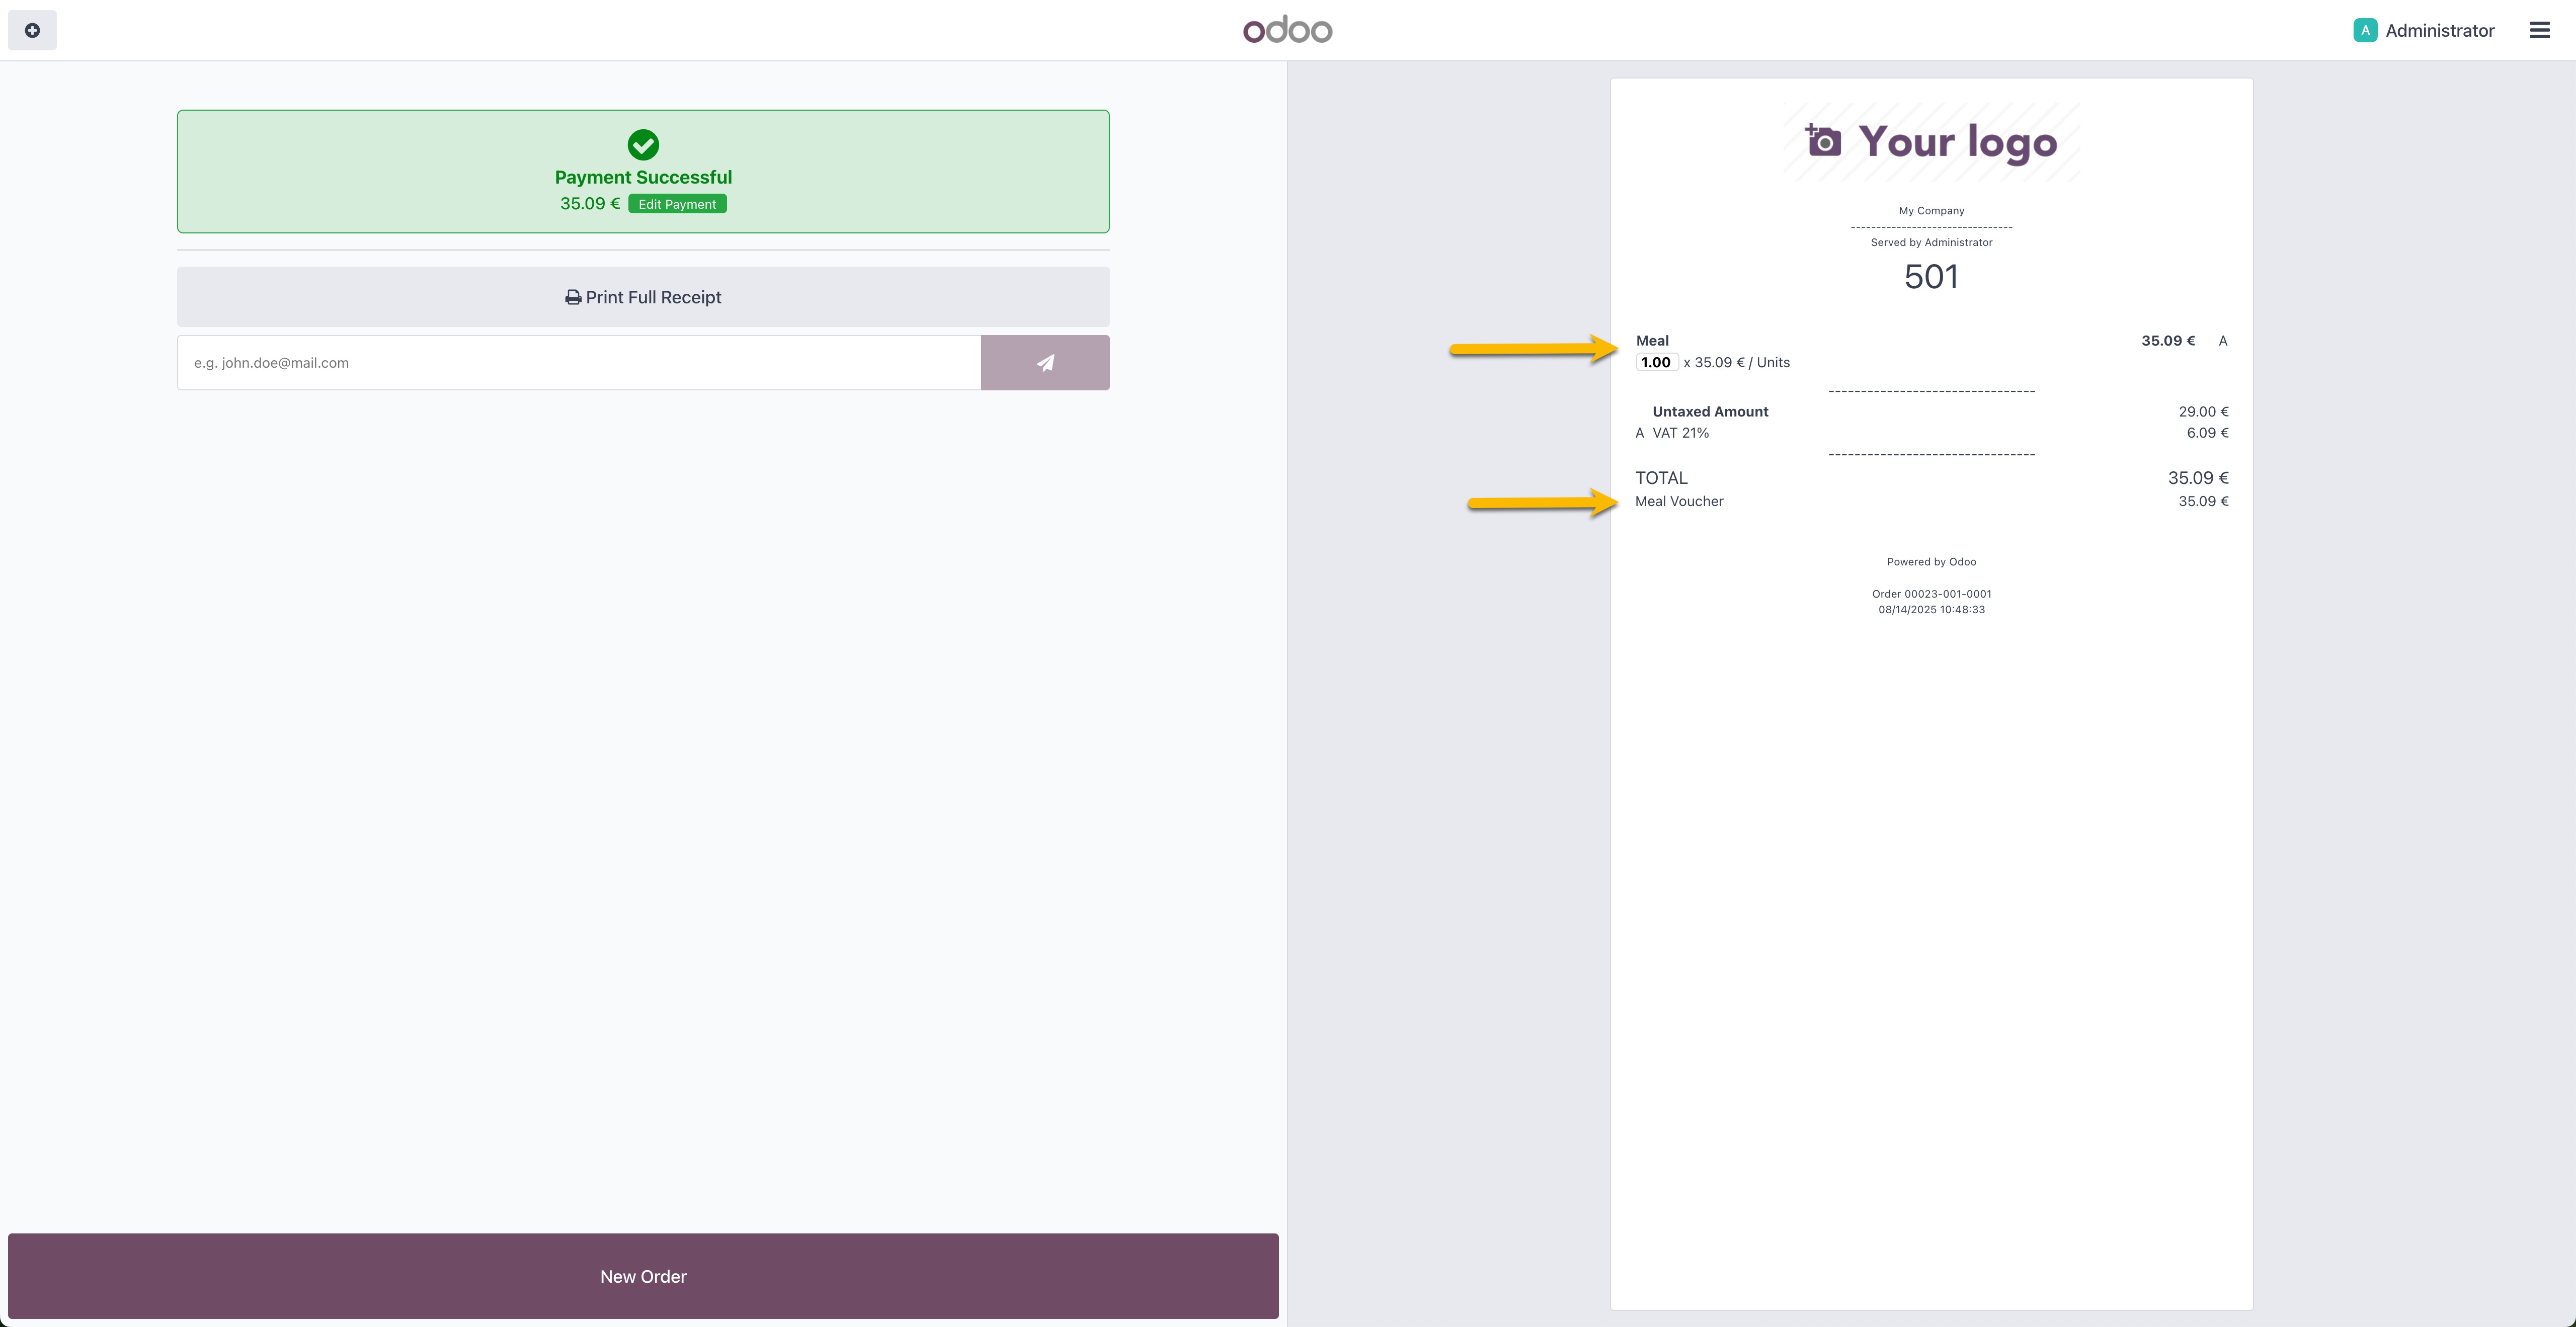
- The initiated payment goes into Pending > then Payment Successful.
If the payment was processed successfully and the receipt reflects the voucher payment, your setup is complete! You can now accept Mollie vouchers in your Odoo Point of Sale.
Updated 3 months ago