
Set up Next-gen Webhooks
Why use Webhooks
As an online business, you may want to track your payment statuses in real time to ensure orders are processed in a timely manner and the fulfillment process starts only after payments are successfully completed.
Instead of constantly checking for updates, Webhooks can automatically notify you of payment status changes, refunds, chargebacks and other financial and operational events. This makes order fulfillment faster, reduces manual effort, and helps keep you and your customers informed throughout the whole payment cycle.
Setup
Starting with Webhooks can be intimidating, so to simplify our setup we will be testing our flow using Webhook.site - a temporary webhook testing tool that gives you a public URL to instantly inspect incoming requests.
This way we can save time on building and deploying a complete backend infrastructure while still being able to receive and inspect webhook requests during testing.
You will also need a running Mollie account and we recommend going over our Next-gen webhooks article to ensure you are familiar with how Webhooks work.
Enabling Test mode
First, we will start by enabling the Test mode.
Since we are not going live yet, Test mode will allow us to separate real data from test inputs and hence will help us to not skew the actual statistics once we go live.
To enable the Test mode, go to your Mollie Organization > Developers > Webhooks > click the Org icon in the left upper corner > toggle Test mode.
Once you toggle it, the mode is switched to Test and you’ll also see a pop-up at the bottom of the screen saying Test mode in enabled:
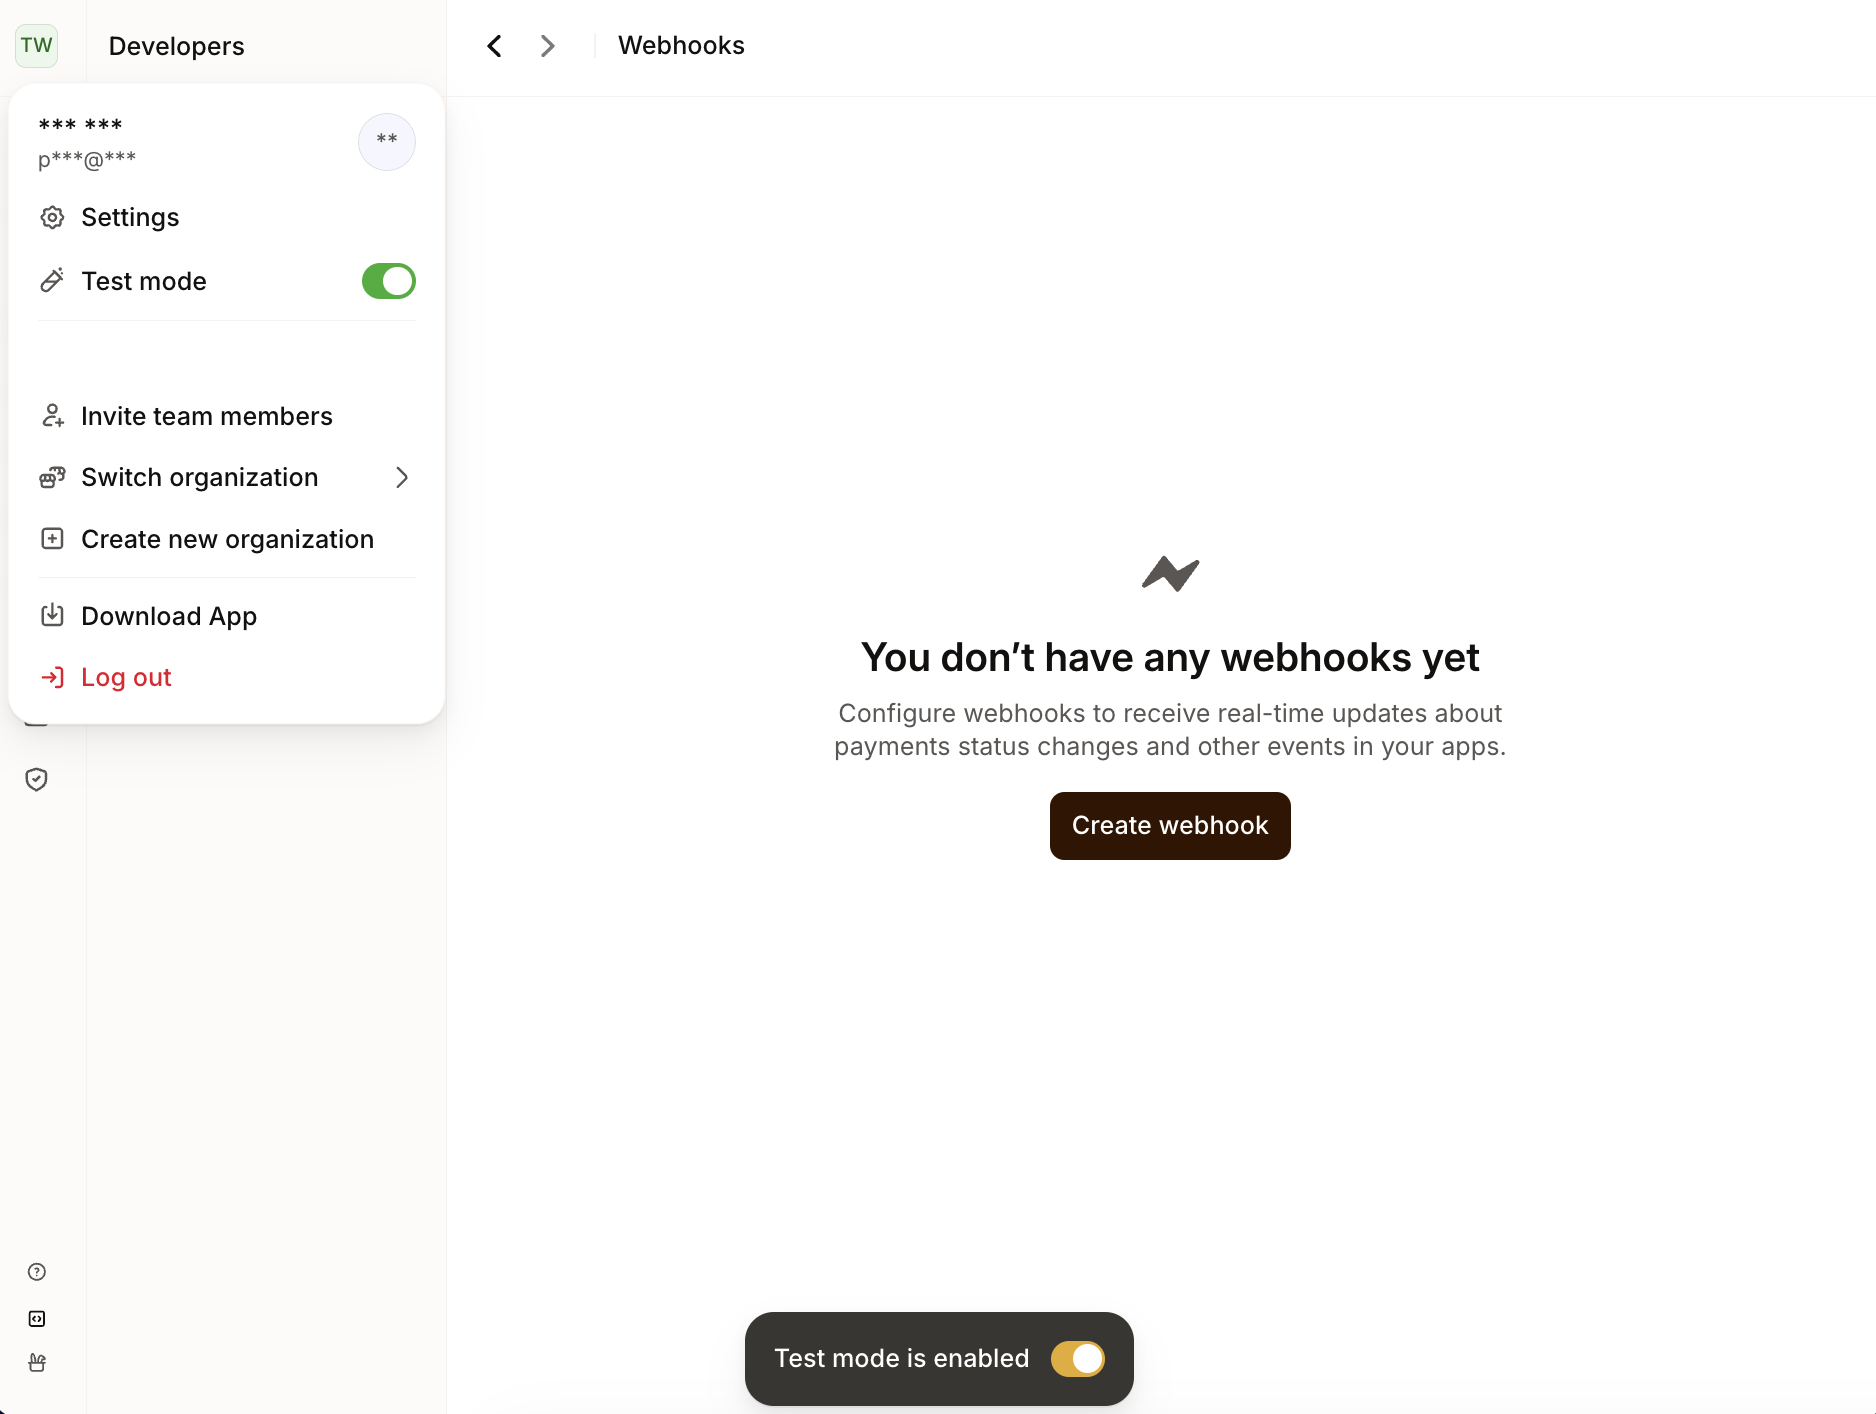
So now that we are working in a sandbox environment, we can move on to adding our first Webhook.
Creating Webhook
You can easily add Webhooks right in your Mollie Web App by going to Developers > Webhooks > Create Webhook:
-
Name your webhook: we recommend something descriptive to distinguish different events.
-
Choose a publicly accessible URL: we will be grabbing one generated by the Webhook.site.
-
Choose payload style (
snapshotorsimple): depending on the level of details you need, you can either go for detailed context or chose a more basic info. We will be going forsnapshot. -
Select event types you want to listen to: you don't have to select all if you are only interested in specific events types. Make sure you do not overload your system with unnecessary logging.
-
Click Create:
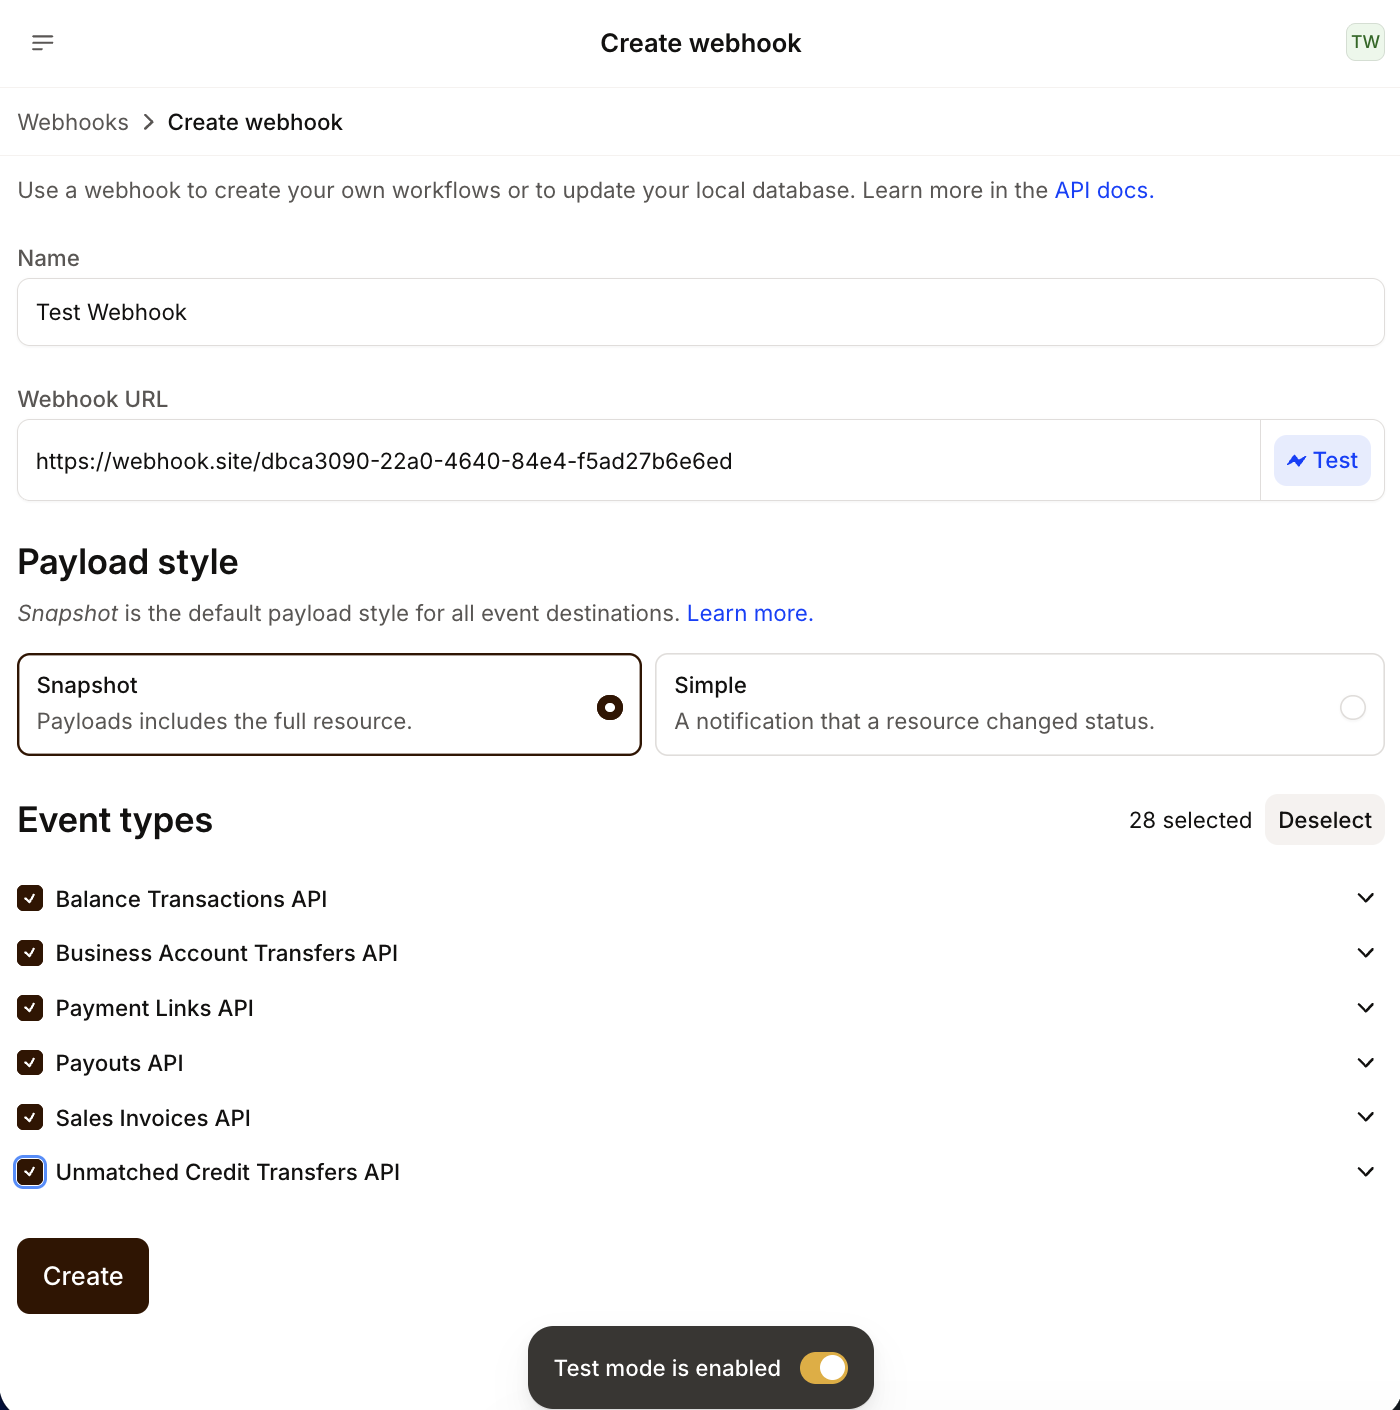
Now we have our first Webhook created and ready to receive updates about the selected changes within your Mollie account.
When you go back to Developers > Webhooks, you will see the following banner: The maximum number of subscriptions has been reached.
This is because Mollie enforces certain limitations when creating Webhooks:
| Subscriptions | Test mode | Live mode |
|---|---|---|
| Active subscriptions per organization | Up to 2 | Up to 3 |
| Same event type subscriptions | Up to 2 | Up to 3 |
We recommend utilizing a single webhook URL whenever possible to process multiple event types. More on it here.
Testing your Webhook
Now it's time to check if our Webhook is actually reacting to the changes and events we subscribed for. We will be testing this newly-created webhook with our Invoices.
For Invoices, we can listen to the following event types:
| Event type | Permissions Required | Description |
|---|---|---|
sales-invoice.created | invoices.read | Occurs when a sales invoice has been created. |
sales-invoice.issued | invoices.read | Occurs when a sales invoice has been issued. |
sales-invoice.canceled | invoices.read | Occurs when a sales invoice has been canceled. |
sales-invoice.paid | invoices.read | Occurs when a sales invoice has been paid. |
We will be listening to a Webhook that will update us on Invoice creation.
- In the Webhooks tab, click …(More) > Test Webhook next to your newly added Webhook.
- Go to Invoicing > Invoices and create a brand new invoice.
Since our Webhook is set up to listen to events coming from Sales Invoice API, the creation of a new invoice will trigger a new log entry in your Web App:
-
Go to Developers
-
Select the Webhook we just created
-
In the list of triggered events, click
sales-invoice.createdevent to view the full event data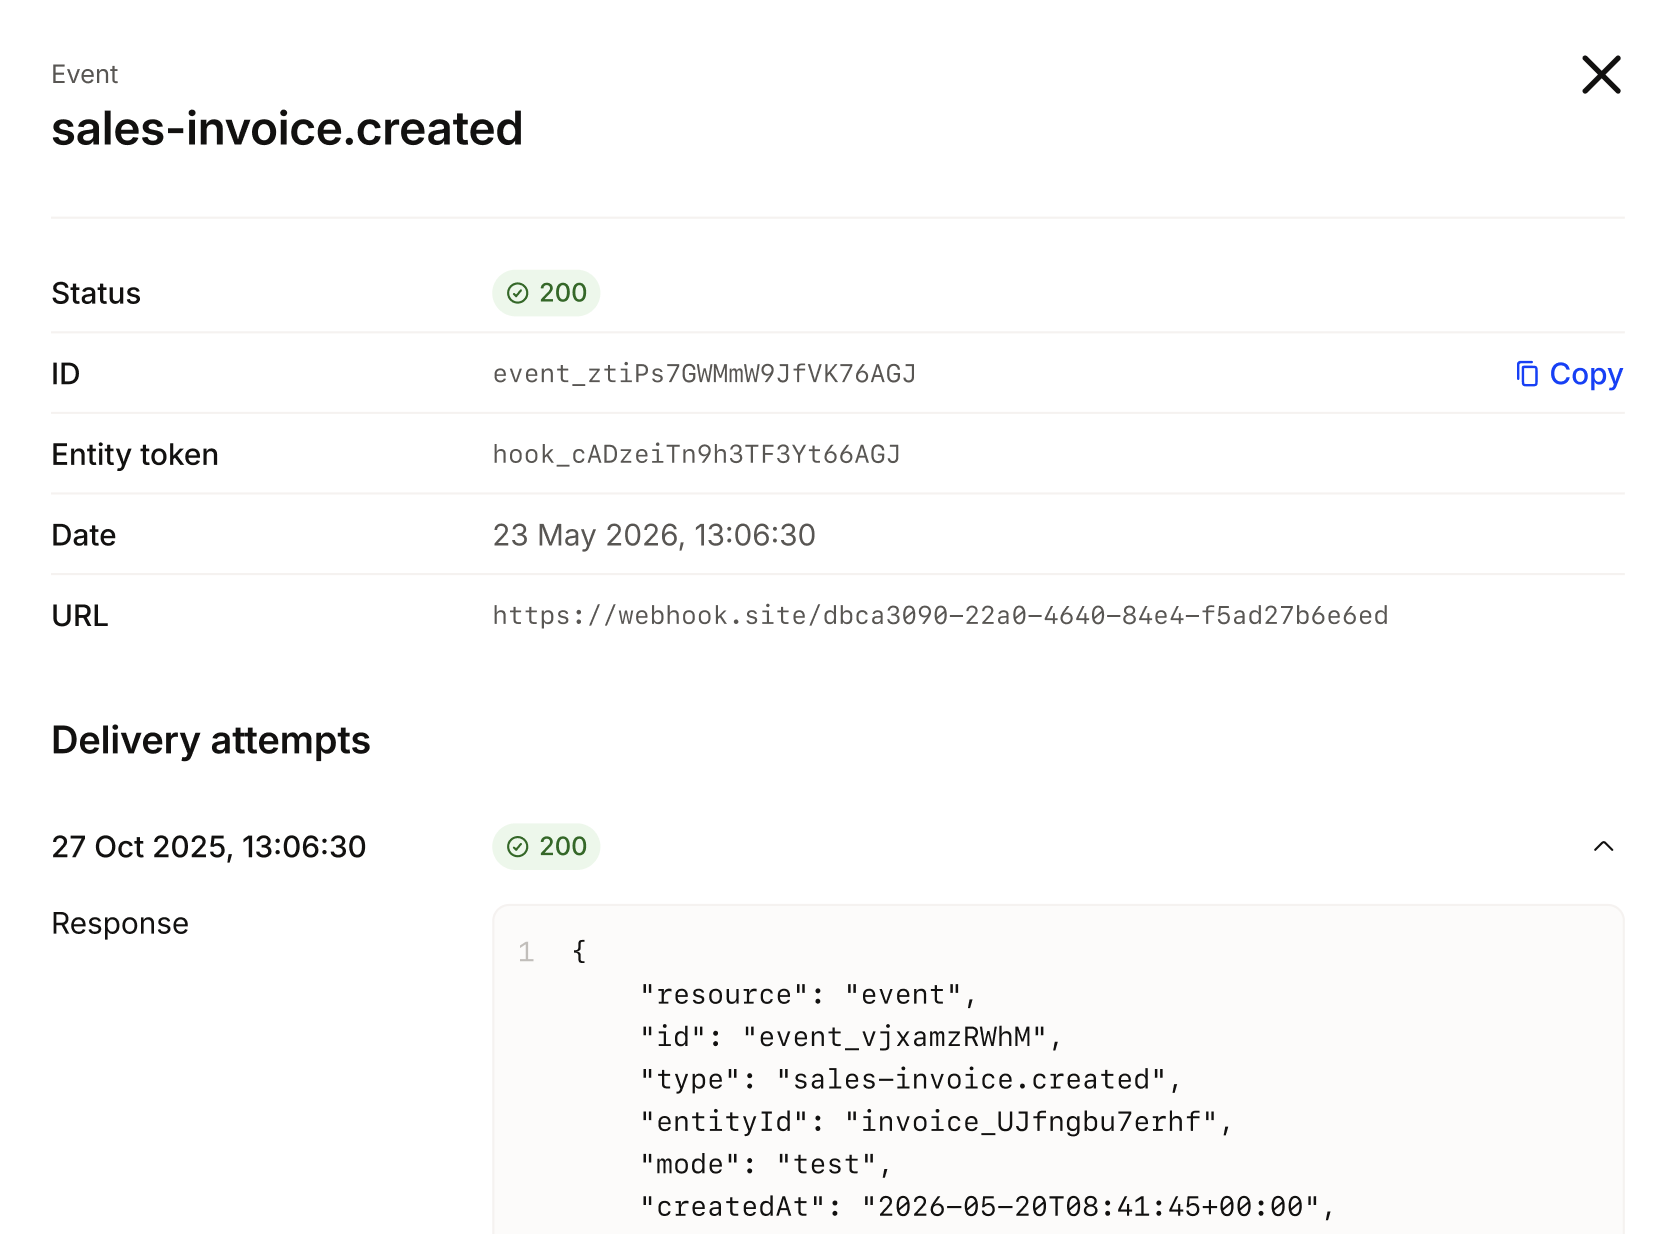
This completes the full Webhook lifecycle:
-
Webhook created
-
Event triggered
-
Event received by your Webhook
-
Response generated and delivered
Now you can use the delivered response and further extract the needed data to integrate into your workflow and set up the necessary actions.
This helps you with always staying up-to-date on the current state of the payment lifecycle rather than relying on periodic polling or requesting status updates manually.
Updated 3 months ago