
Shopify: App installation
Add payment methods, set up credit/debit cards and understand Klarna settlement.
Add payment methods
The Payment methods provided by Mollie always settle payments automatically, even if your Shopify store is set to manual capture.
What you need to do in advance
- Create a Mollie account.
- Ensure that you have the Shopify owner role↗.
- Ensure that you have the Mollie owner role.
- Ensure that the payment methods that you want to offer are activated in the Mollie Web app:
- Log in to your Mollie Web app.
- Select the organization in the top-left corner of the Web App's home page.
- Go to Organization settings > Profiles.
- Select the web store to view the payment methods and their status.
- Select the payment method.
- Select Activate.
Install payment methods from Shopify's App Store
When integrating payment methods, it is important for you to install each specific method that you want to offer at your checkout individually.
If your Mollie organization only has one website profile associated with it, Mollie assigns that one automatically. You won't see steps 7 -> 9 as Shopify opens directly so you can activate the desired payment method(s).
- Pick your payment methods:
Alma, BANCOMAT Pay, Bancontact, Belfius, Billie, Bizum, Blik, Credit cards, EPS, Gift cards, iDeal, in3, KBC/CBC Payment button, Klarna, MB Way, MobilePay, Multibanco, Onsite Cards, Pay by Bank, Payments (all payment methods in a single app), Podium Cadeaukaart, Przelewy24, Riverty, Satispay, SEPA Bank Transfer* (not SEPA Direct Debit, for that see Shopify: Set up subscriptions), Swish, TWINT, Vipps, VVV Giftcard, Webshop Giftcard, Wero
We recommend installing each payment method individually to ensure the best checkout experience. This ensures that all selected payment methods are listed separately, instead of being grouped under a single Mollie logo.
Simply follow the instructions below for each payment method and make sure to install separate apps for every payment option you want to offer at your checkout.
- Select Add app.
- If necessary, log in to your Shopify store.
- On your admin home page, select Install app.
- Select Connect via Mollie (you may need to log in to your Mollie account).
- This opens the Shopify integration page in your Mollie Web App (Settings > Integrations > Shopify). Find the method you just installed (it shows as Action required until you assign it a specific profile).
- Scroll through Assigned profile dropdown and select the website profile you want this payment method to use. After, a confirmation window appears and the status updates to Connected.
- Finish setting up [payment method] pop up opens. Assigning a profile doesn't activate the app in Shopify automatically, so select Open Shopify settings to continue your setup.
- In Shopify, select Activate to turn the payment method on and offer it at checkout.
Manage payment methods from your Mollie dashboard
Once you've installed a payment method app, you can manage its website profile assignment in Settings > Integrations > Shopify in your Mollie Web App.
This page shows every payment method, whether its Shopify app is installed and its status:
| Status | Description |
|---|---|
| Connected | The payment method app is installed and assigned to a website profile (you must still activate it in Shopify to offer this payment method at checkout) |
| Not installed | Install the Shopify app for this payment method before assigning a website profile. |
| Action required | The payment method needs your input (such as assigning a website profile, before it can go live). |
| Pending | Mollie is reviewing this payment method for the assigned website profile. You receive an email once it's approved. |
Assign or change a website profile
- Go to Settings > Integrations > Shopify in your Mollie Web App.
- Select the dropdown next to the payment method and choose a website profile.
- If you're setting up the payment method for the first time a dialog explains that assigning a profile doesn't activate the app in Shopify automatically. Select Open Shopify settings.
- In Shopify, select Activate to turn on the payment method at checkout.
You can also open the Shopify settings page at any time using the link-out icon next to the payment method.
If you're changing the Mollie profile for a payment method you've already connected, no further action is required in Shopify settings.
Optional: Switch to a different Mollie organization
To connect your Shopify store to a different Mollie organization:
-
In your current Mollie organization, go to Settings > Integrations > Shopify.
-
Select the delete icon next to the payment method you want to move.
-
Select Disconnect in the dialog.
Disconnecting stops the payment method from creating new payments. Existing refunds and captures continue to work. It does not disable the app in Shopify. -
Log in to the Mollie organization you want to use instead.
-
Reconnect the payment method using either option:
- Install the Shopify app again from scratch.
- Open the app's settings page in Shopify and select Manage to re-authenticate the app with your new Mollie organization.
-
Select a website profile for the payment method in the new Mollie organization.
Set up credit/debit cards
What you need to do in advance
Display selected credit/debit card issuers
Hide selected credit/debit cards to avoid higher transaction fees or regional restrictions.
- Log in to Shopify.
- Select Settings.
- Select Payments.
- Scroll down to the payment method and select Manage.
- Select the checkboxes of the credit/debit cards whose logos you want to display.
You must select at least one logo.
Split payment authorization and capture
Authorize customer payments and capture funds separately to have more control over your store's cash flow management.
Mollie seamlessly supports Shopify functionality for separating payment authorization and capture. For instructions on how to configure the relevant Shopify settings, refer to these Shopify guides:
Understand Klarna and Mollie
Shopify's restrictions on third-party payment providers, like Mollie, impact Klarna order settlement and information in the Mollie Web app. Understanding these restrictions is important for Shopify store owners using Klarna, as it affects the order status, shipment, settlement, and order totals displayed in the Mollie Web app.
In Scandinavia and UK, Mollie for Shopify accepts Klarna payments only in the currency of the Scandinavian or UK country set as your store's address. To accept payments in multiple currencies, you need to create separate sub-stores with different store-address countries.
Understand Klarna order totals in your Mollie Web app
Shopify does not share complete order details with payment service providers such as Mollie. Consequently, Mollie may apply a fee or subtract a discount from the Klarna order overview in your Mollie Web app to ensure accuracy of the total order amount. No further action is required on your part.
Klarna BNPL settlement and Shopify payment capture
The Mollie Shopify app uses Shopify's native payment capture settings to determine when to settle Klarna/BNPL payments. This means your order fulfillment status in Shopify directly controls when funds are captured, creating a seamless workflow.
You can manage your store's payment methods in your Shopify settings. To learn more about this configuration, please refer to Shopify's official documentation on payment authorization.
Mollie Onsite Cards
Optimise your checkout with Mollie’s Onsite Cards app for Shopify to deliver seamless customer experiences and boost conversion. You can collect your customers' card details directly by integrating into Shopify checkout. That means there’s no need to redirect buyers to an external payment page.
By installing onsite cards, this will override the default payment methods in your store. Please refer to the Shopify documentation for more details.
Existing merchants
Existing merchants will need to deactivate the existing Cards app and install the new Onsite Cards app.
- Go to your Cards app > Payments.
- Select a specific payment method by clicking on it.
- Deactivate your payment methods by clicking Deactivate.
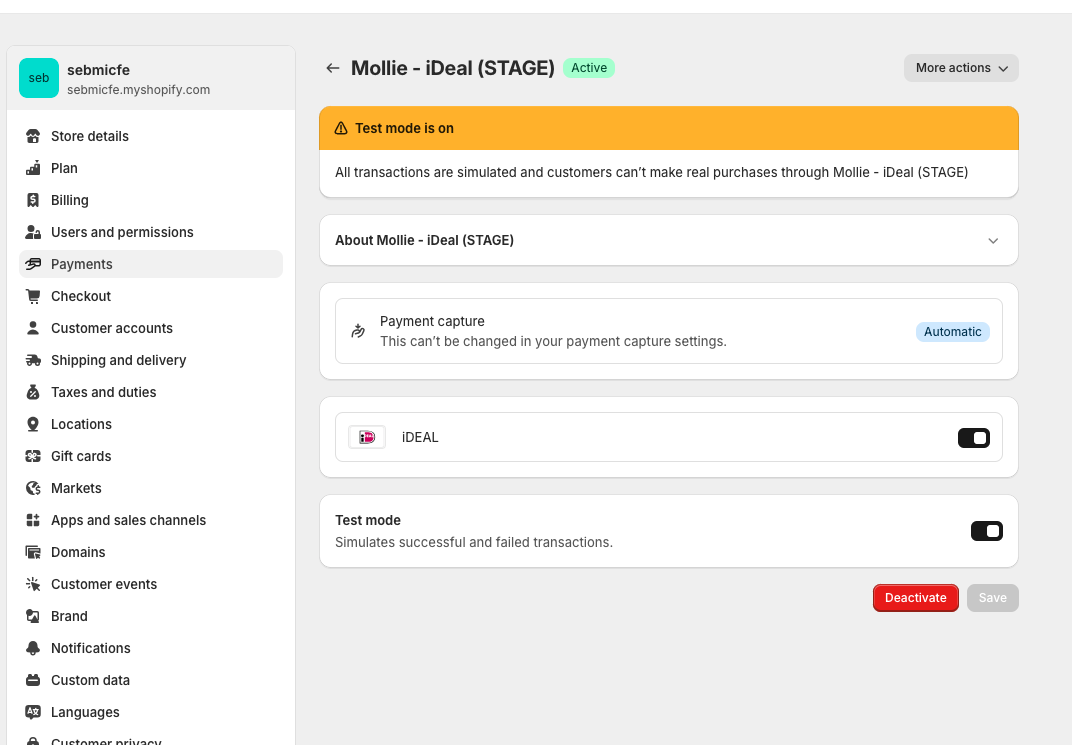
- Deactivate the existing Cards app:
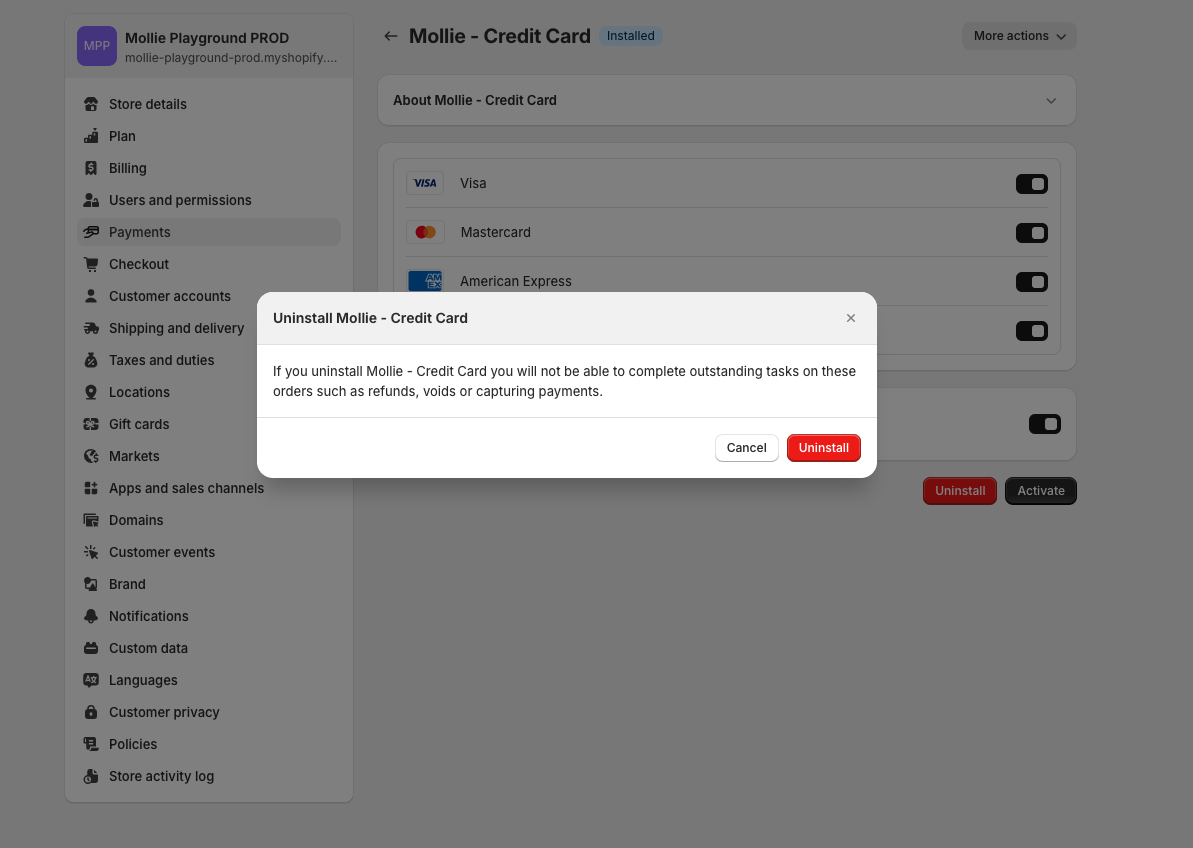
Make sure to just deactivate the old app, do not delete it. Deleting it will prevent you from being able to process refunds and manage older payments.
- Install the new Onsite Cards app.
- Activate the payment methods that you want to offer in your shop.
New merchants
New merchants have to install the new Onsite Cards app to ensure that the embedded payments option is offered during checkout.
To test onsite cards, please refer to this article.
Updated 8 days ago