Connect for Marketplaces: Setting up OAuth
Most of the functionality of Mollie Connect leverages open standard OAuth, which allows you to make API requests on behalf of your customers without requiring them to share credentials with you.
What is OAuth
OAuth is an industry-standard protocol for authorization, enabling third-party applications to obtain limited access to an HTTP service, either on behalf of a resource owner or by allowing the third-party application to obtain access on its own behalf.
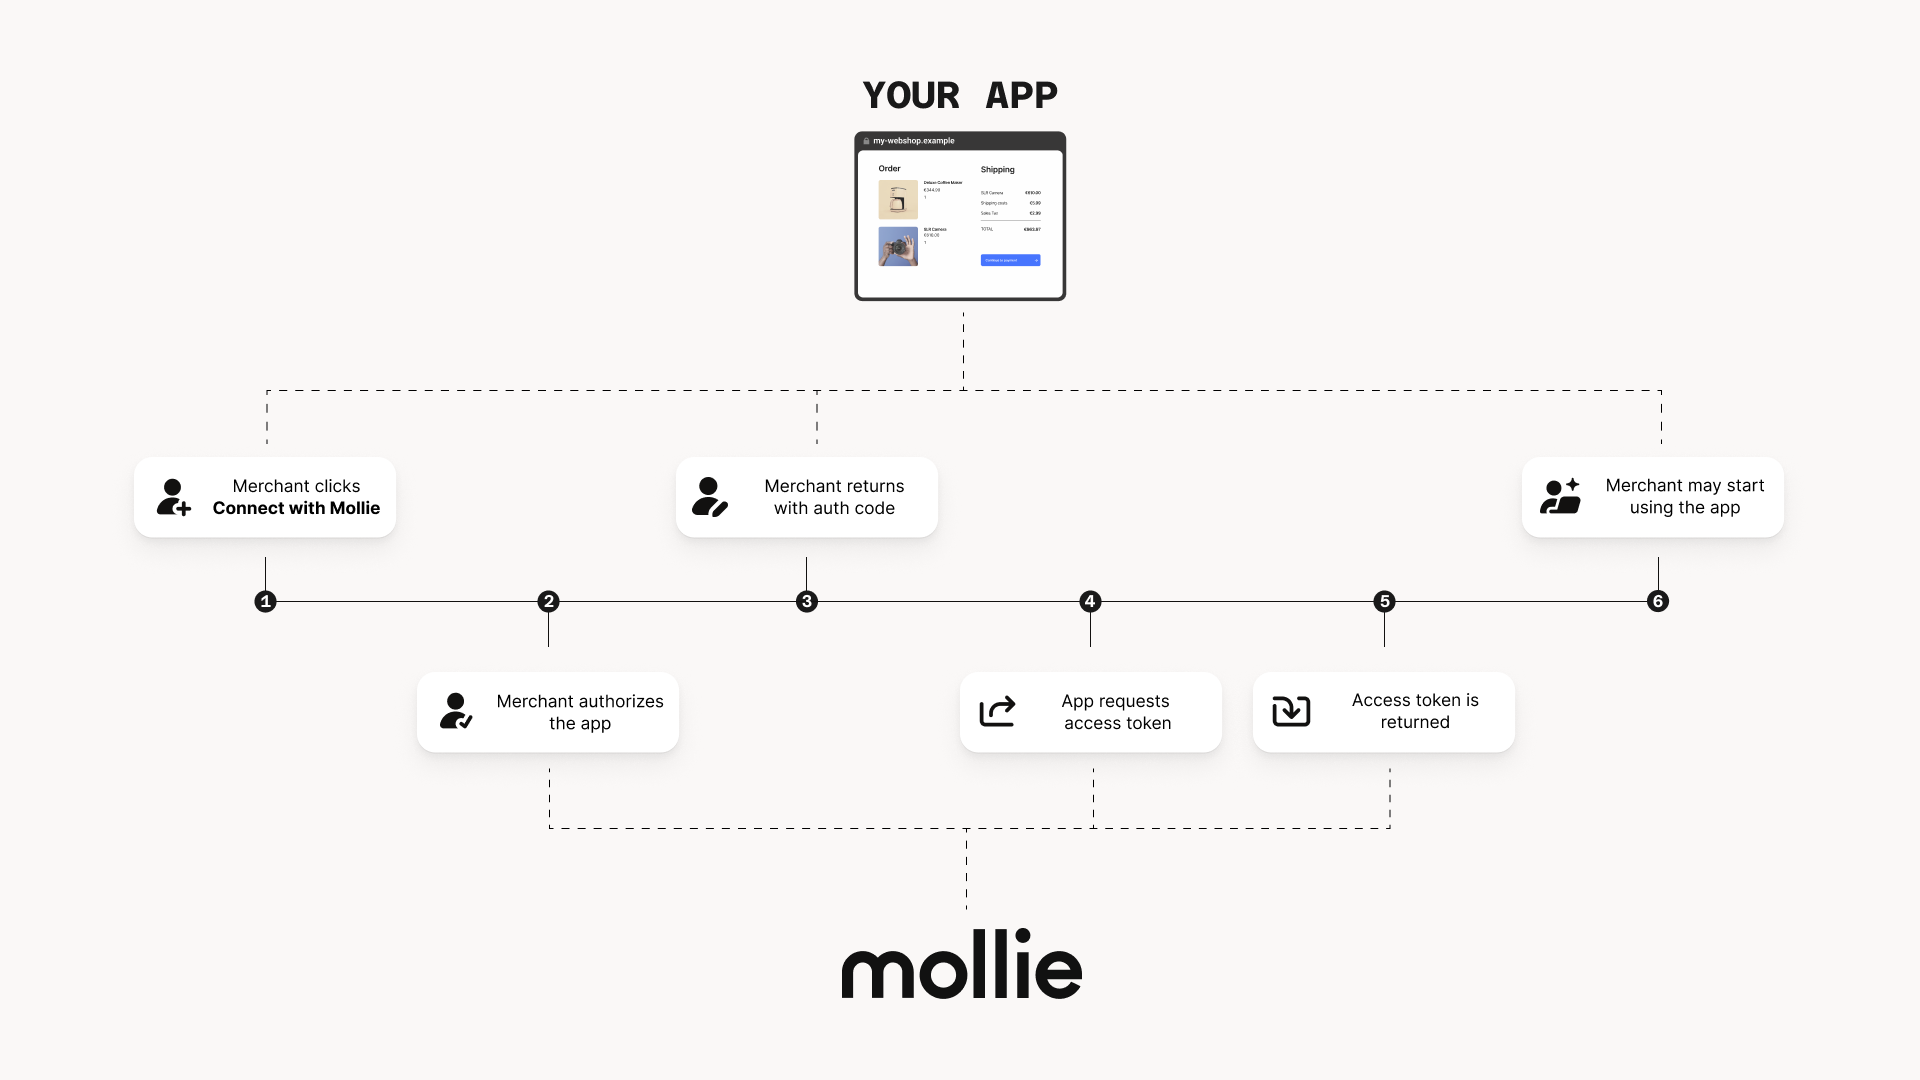
OAuth is the foundation of Mollie Connect, allowing you to connect multiple Mollie accounts to your application and giving you access to perform actions on their behalf. The steps in the authorization flow are shown below:
Benefits of using OAuth
Using OAuth, your app will be able to communicate with the Mollie API on behalf of the user (with their consent): you may access the merchant’s account data, retrieve information and do things on behalf of your customers and hence allowing the merchants to start using your app:
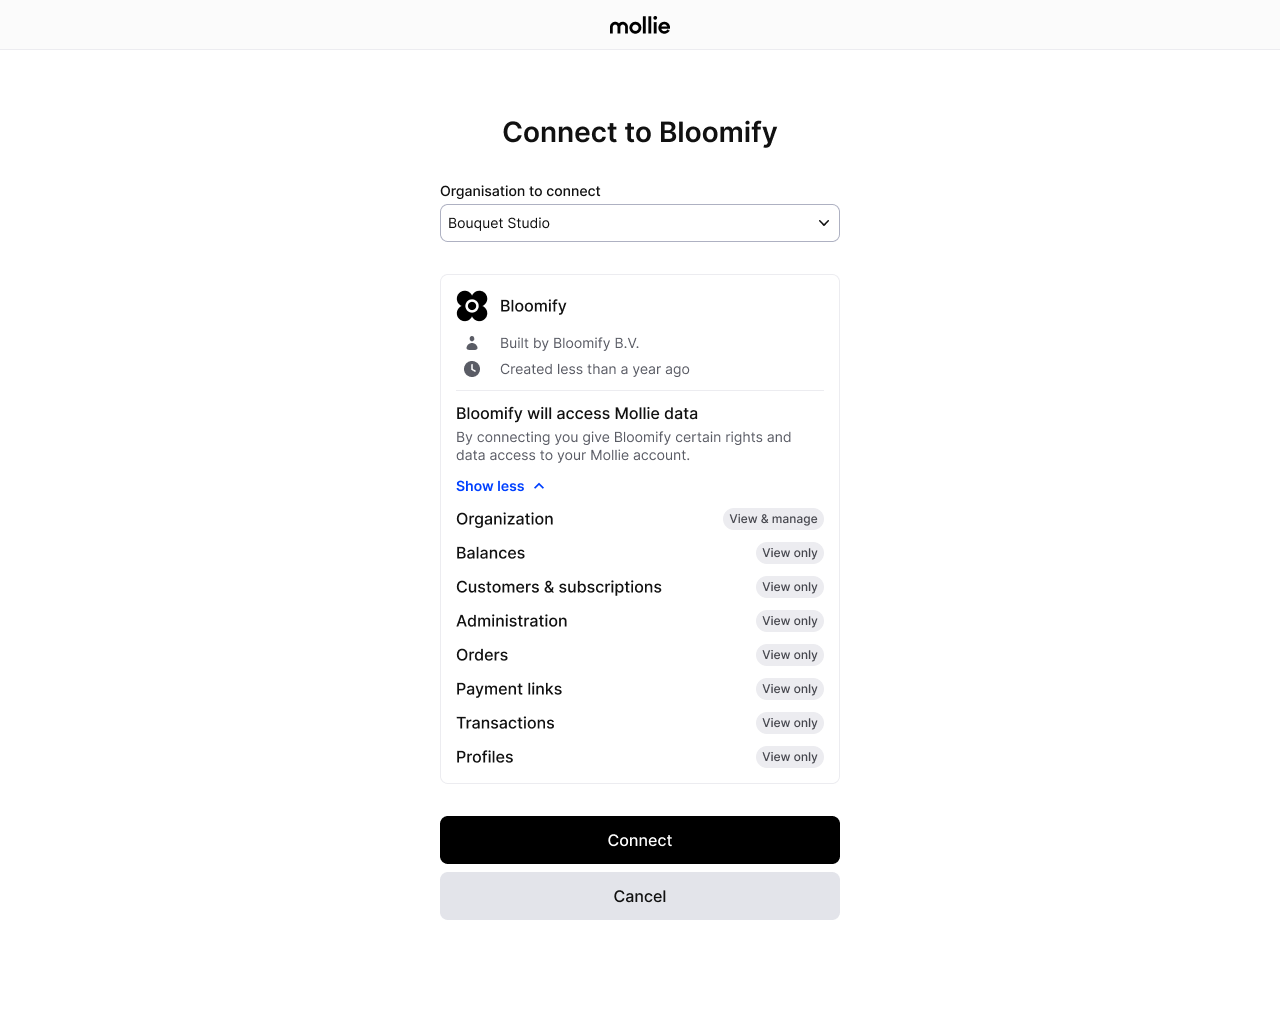
This guide will explain how you can register your OAuth app to later link your customers to it using Mollie Connect. To see how you can onboard customers once you have created an OAuth app within Mollie, please refer to the Connect Onboarding Customers article.
Client libraries/packages for OAuth
For many programming languages there are open source packages available with detailed instructions to help you implement the OAuth flow.
Here are some examples:
- Simple OAuth2 for Node.js
- The PHP League’s OAuth 2.0 Client for PHP
- Authlib for Python, with support for common web frameworks like Flask and Django
If your application is built with PHP, you can integrate it using the official mollie/oauth2-mollie-php package.
The official Python client supports OAuth out of the box.
Create OAuth application
Mollie offers a Postman collection covering the latest version of the Mollie API. You can import this collection into your own Postman application to simplify your explorations of the Mollie API:
To create and register your OAuth application, follow the steps below:
- Click More -> Developers.
- Select Your apps tab and click Create Application.
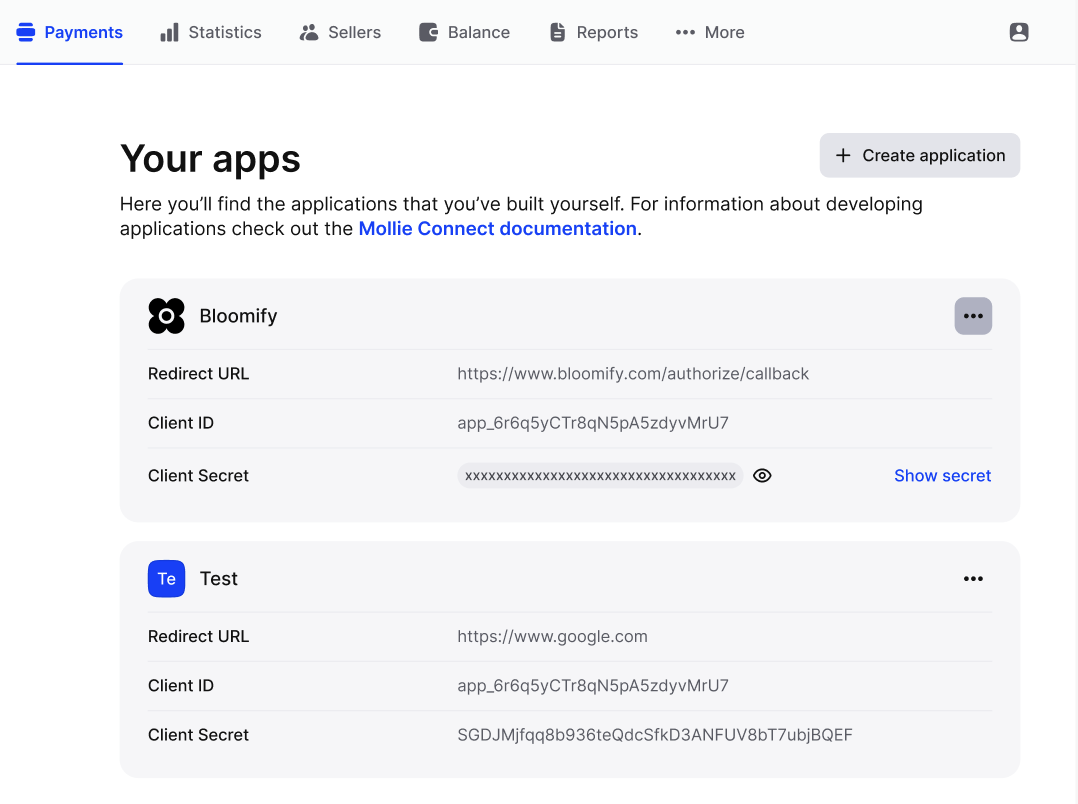
- Fill in your app details and click Save.
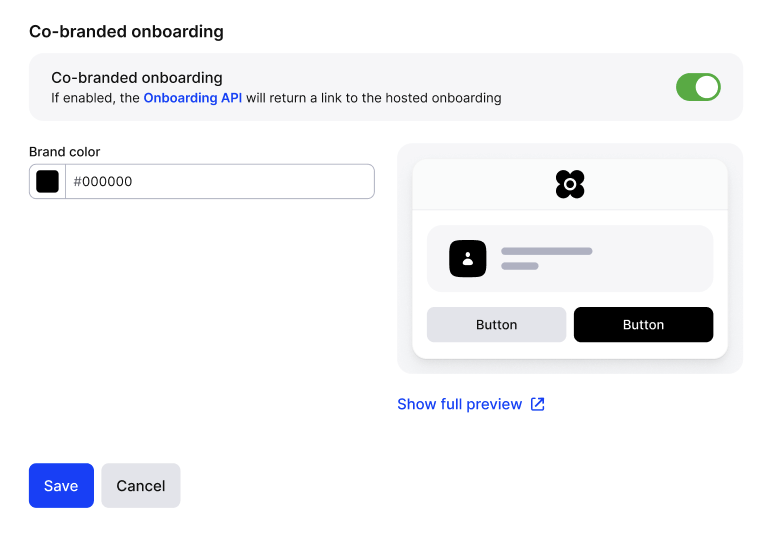
Optional: enableCo-Branded Onboarding.
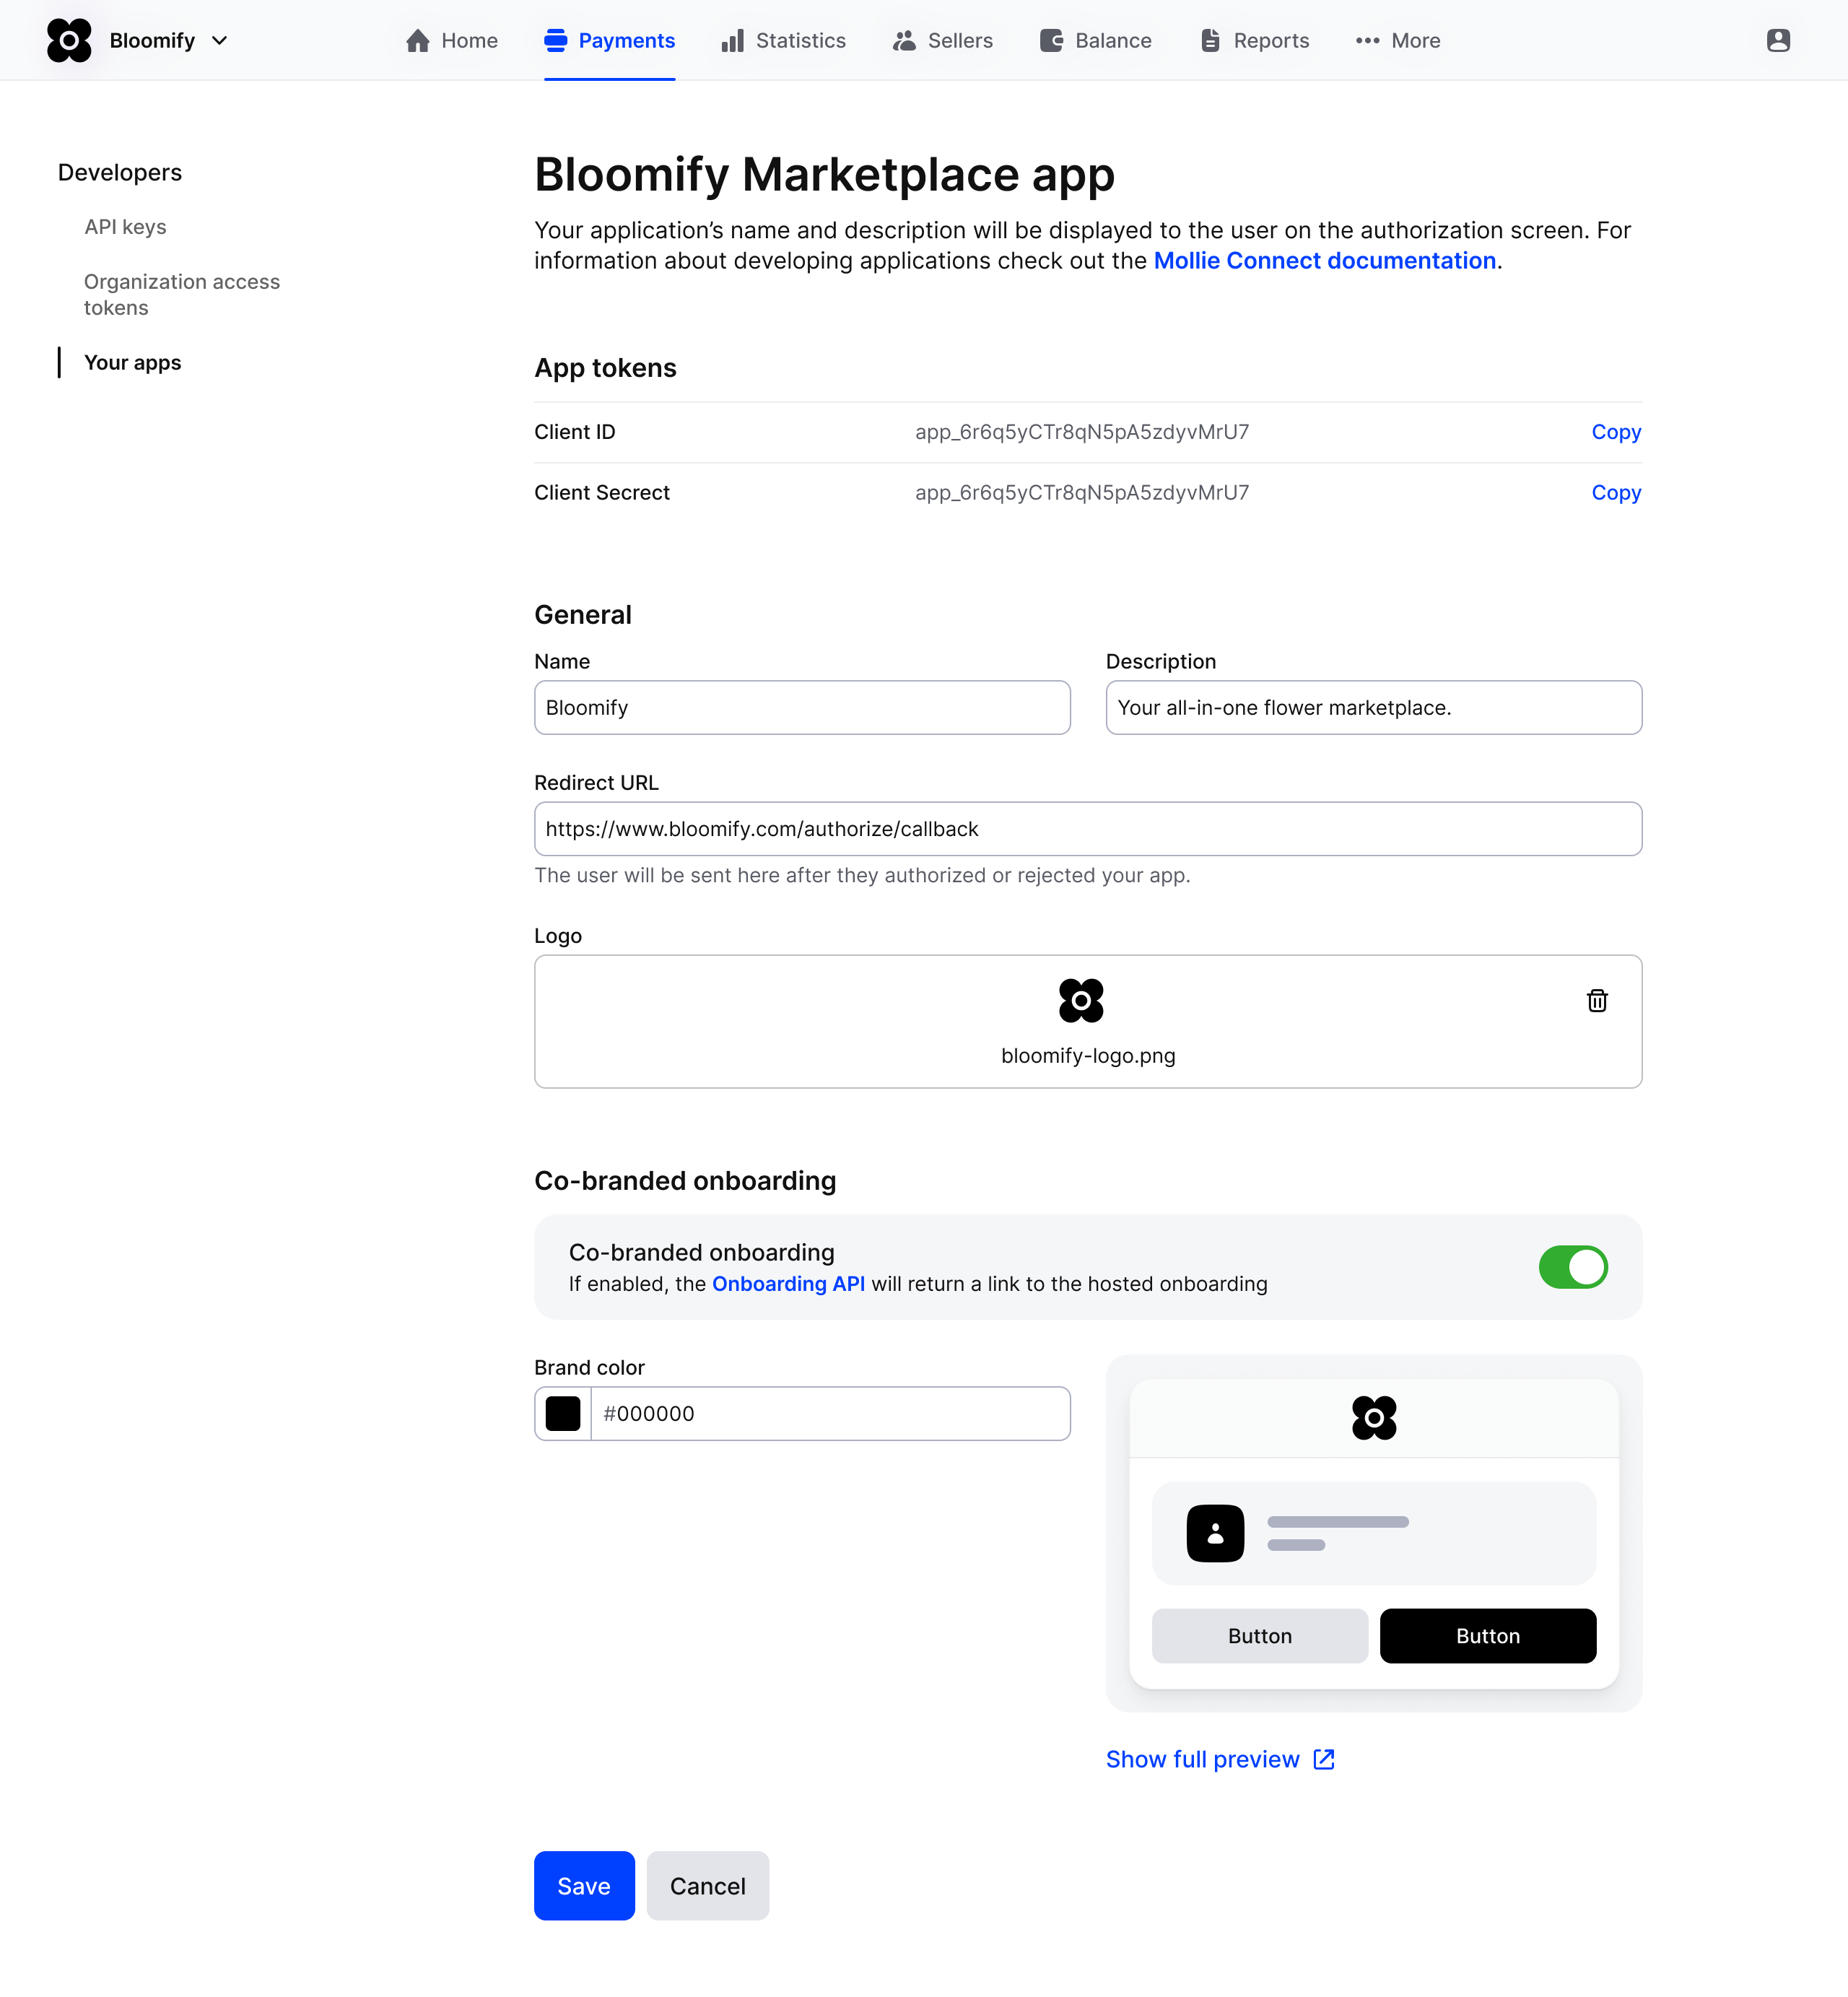
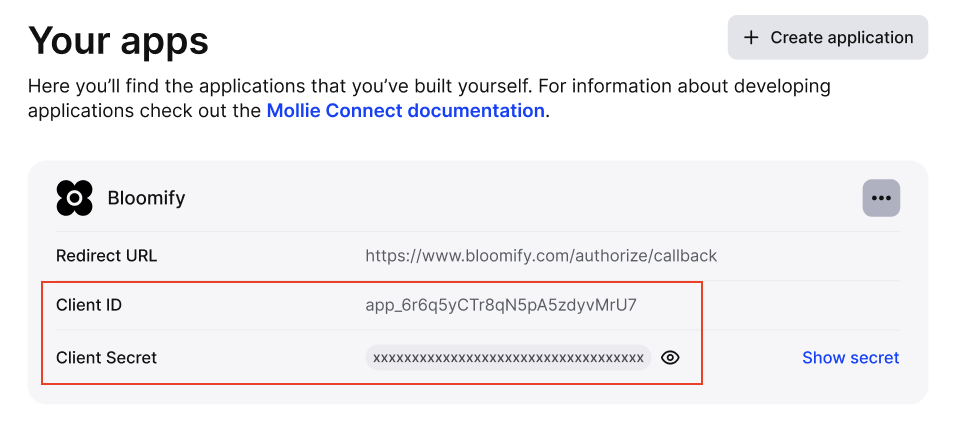
- Now your application will show up under Your apps tab, where you can grab
Client IDandClient Secret.
Co-branded Onboarding
Through Co-branded Onboarding, you fully control and own the experience of your customers during the creation of their payments account. Co-branding the onboarding increases trust and improves conversion rates.
You can configure co-branding by customizing the following:
- Brand Color, to ensure a consistent style across Mollie’s onboarding steps.
- Back URL, to seamlessly redirect users back to your platform upon completing the onboarding process.
Permissions
To ensure seamless interaction between onboarded customers and Mollie, carefully select the appropriate subset of OAuth permissions (referred to as scopes in OAuth terminology). Refer to the complete Permissions list [here].
Adding permissions at a later stage will require the merchant to re-connect the app.
Below you can find example scopes for various business models:
‘Recommended permissions’ column is a rough recommendation regarding the types of permissions certain types of apps should request. For personalized advice, contact [email protected].
| Business model | Recommended permissions |
|---|---|
| Payment-generating integrations | payments.read payments.write refunds.read refunds.write |
| Bookkeeping integrations | payments.read invoices.read settlements.read balances.read |
| ERP / OMS integrations | orders.read orders.write shipments.read shipments.write balances.read |
| Invoicing integrations | payment-links.read payment-links.write |
| Integrations offering Mollie POS (In-person payments) | terminals.read terminals.write |
| Processing payments with Klarna | orders.read orders.write shipments.read shipments.write |
| Customer onboarding and monitoring | organizations.read organizations.write profiles.read profiles.write |
| Subscription-based integrations | customers.read customers.write mandates.read mandates.write subscriptions.read subscriptions.write |
Updated 2 months ago