Connect for Platforms: Example integration
This guide walks you through the basics of implementing Mollie Connect by registering an OAuth-compatible app, connecting your existing customers with a Mollie account and facilitating payments on their behalf.
For this demonstration, we’ll first build an OAuth-compatible application called Circle that links gyms offering various fitness classes and want to facilitate their payments via Circle.
We'll then walk you through linking an existing customer: in this case, FitnessFlow, an imaginary gym that offers online fitness classes.
Lastly, we will learn how to test and then start processing payments on your customer's behalf and facilitate payouts using Mollie Connect functionality.
What to do in advance
- Create a Mollie account.
(We recommend creating apartner account as it enables you to access all partner-related features of the Connect suite.) - Check that you’ve submitted all the necessary information about your business and wait for Mollie to verify your account.
Step 1: Set up OAuth app
In order to use Mollie Connect to onboard your customers, you will have to first implement the OAuth authorization flow.
The flow starts with creating an OAuth-compatible application in your Mollie Web app: in this case, it is an app we are creating for Circle:
- In your Web app click More -> Developers.
- Select Your apps tab and click Create Application:
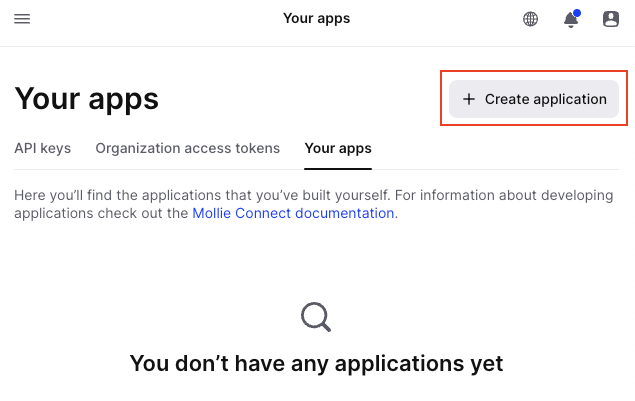
- Fill in your app details and click Save:
Here we also opt in for theCo-Branded Onboarding: this means that you are in control of your customers' experience during their account creation by incorporating your logo and brand colors into the onboarding process. This makes the onboarding experience more seamless and provides a trusted look and feel.

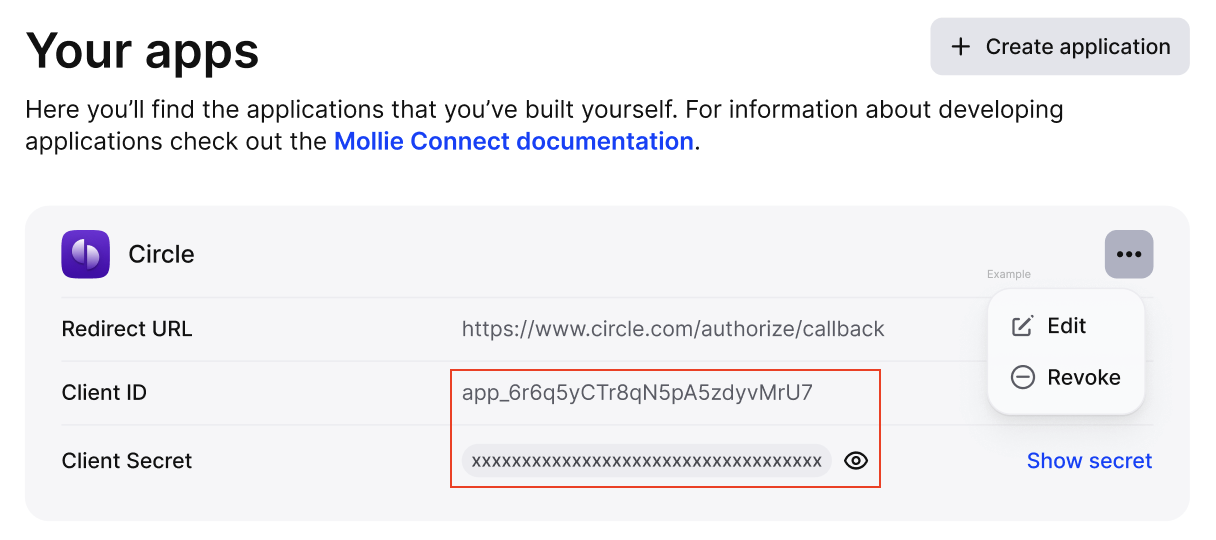
- Now that our app is created, we can view our
Client IDandClient Secret, which we will later use in the OAuth API requests:
Step 2: Connect customers
The next step in the onboarding is to have your customers connect their Mollie account/Organization to the app we just created to then accept payments on their behalf and facilitate payouts.
In this case, our existing customer is an imaginary gym FitnessFlow that offers online fitness classes and wants to facilitate their payments via Mollie.
You can also create new organizations for your customers using Client Links API that are then automatically connected to your partner account.
- To connect FitnessFlow to Circle, we will need to construct anAuthorization URL with the parameters such as
clientId,scope,stateetc. which you then share with FitnessFlow to connect their account to our app.
More on constructing the Authorization URL in our Authorize API reference.
Mollie offers a Postman collection covering the latest version of the Mollie API. You can import this collection into your own Postman application to simplify your explorations of the Mollie API:
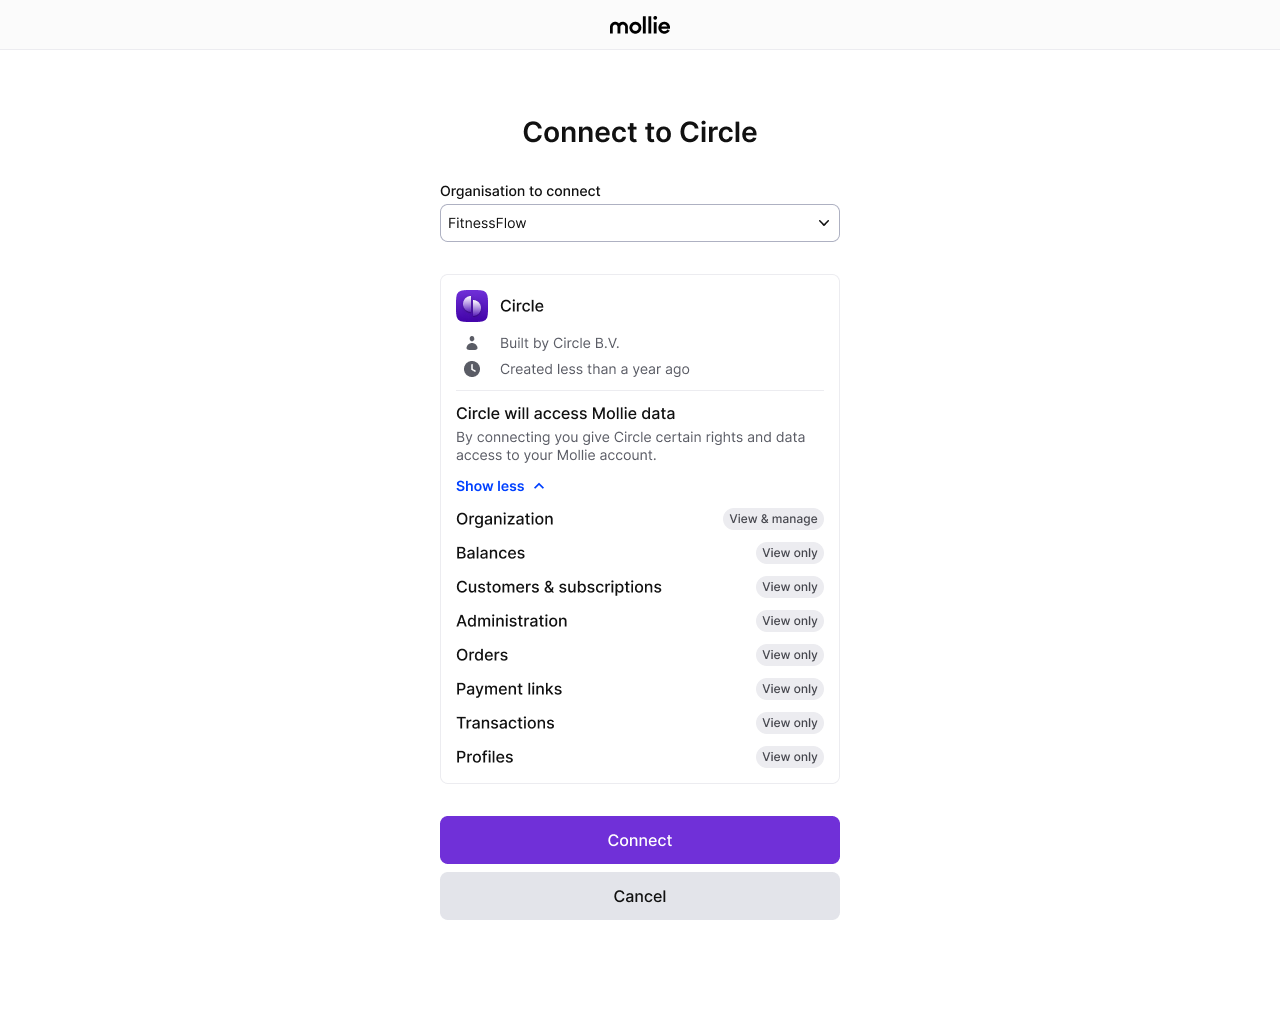
- Copy the final URL and redirect your customer to that authorization URL.
Once redirected, they will proceed through the authorization steps on Mollie's side (logging in and granting your app the requested permission to access their Mollie account):
- At the end of the flow, Mollie will redirect the customer back to the
redirect URLyou specified, with a payload described in our Authorize API reference. - Use the
auth_codefrom the redirect URI and exchange it for arefreshandaccess token. More on it here.
Securely store therefresh tokenin your database.
In order to operate your customer's Mollie organization on their behalf, we use these OAuth App credentials and specifically the
refresh tokento obtain a new access token to authorize the API calls.
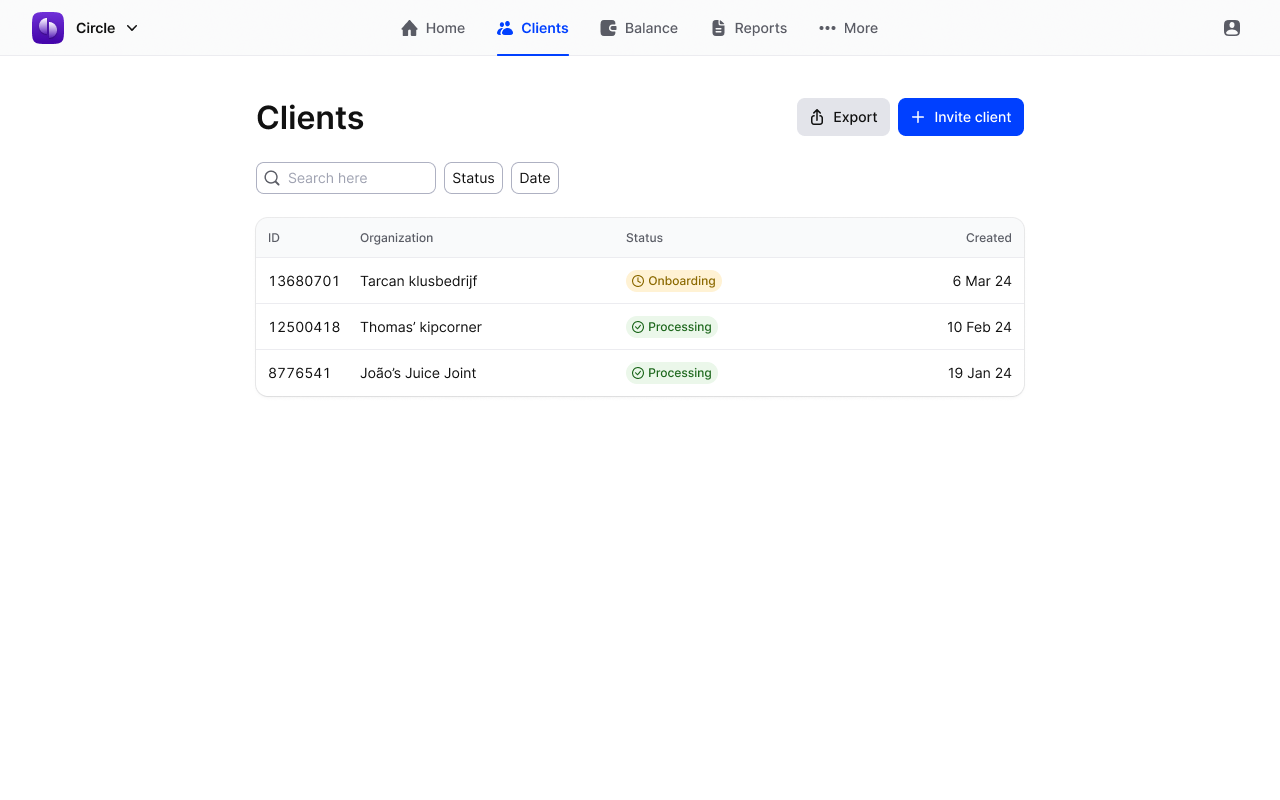
- (Optional) We recommend to immediately perform a Get Onboarding API call and displaying the name of the connected Mollie organization to indicate that the connection was successful.
Once your customer connects to your app, you can find their details and account status in your Web app under Clients:
Step 3: Complete the onboarding
Now the customer must complete the verification process to start accepting payments:
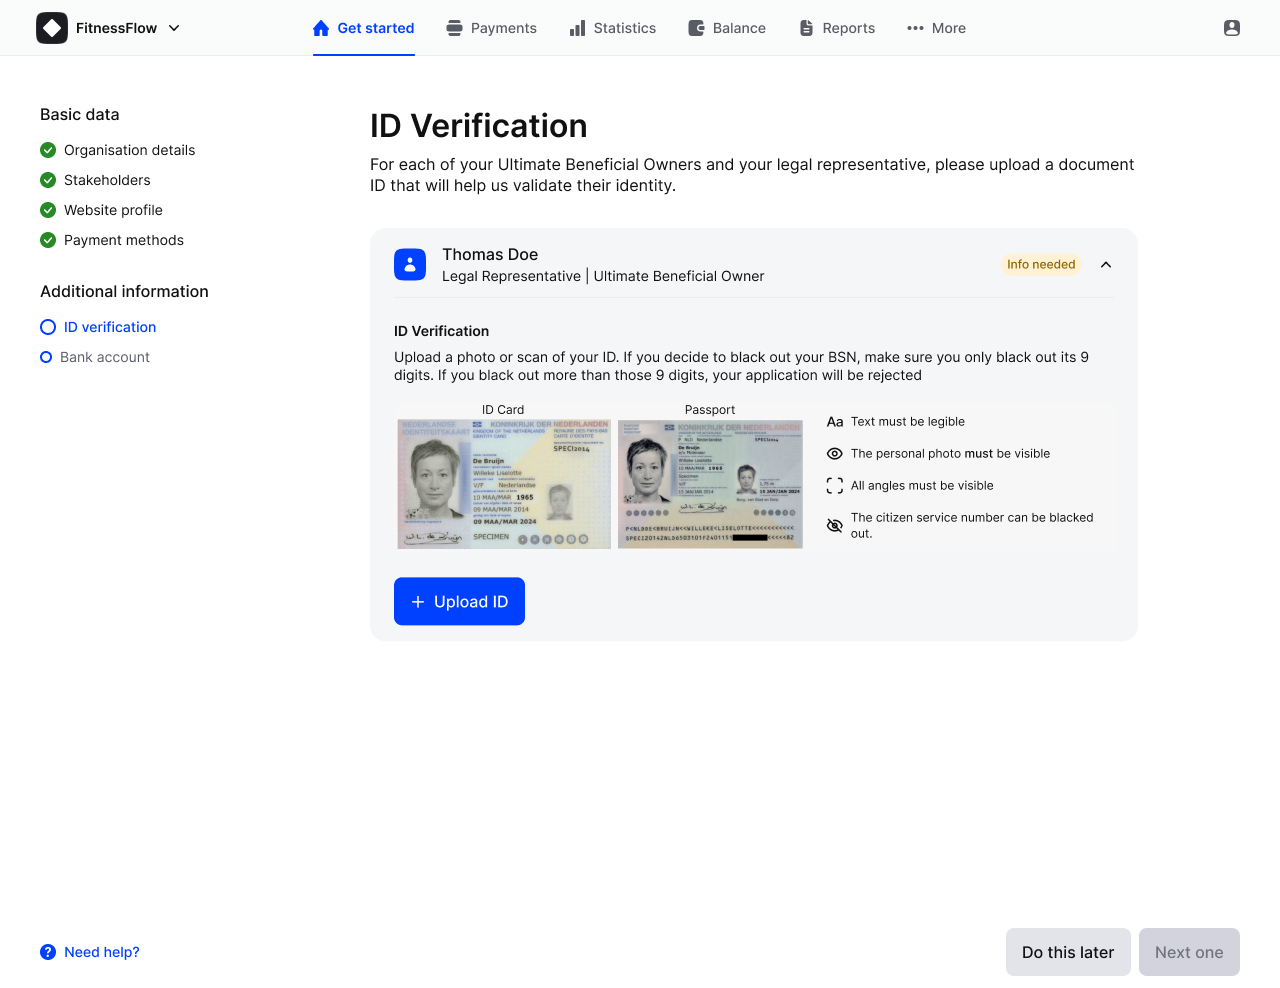
While waiting for your customer to complete the onboarding, use the Onboarding status endpoint response to display the appropriate message.
Possible statuses are needs-data, in-review, and completed. If needs-data is returned, Mollie requires more information and the API response contains a _links/dashboard deep link to the customer’s co-branded Getting Started wizard.
We recommend including the link in your application with a clear call-to-action.
Once canReceivePayments flag is true, you can test if everything is set up correctly by creating your first payment.
Step 4: Test your payments
Before going live, you can simulate payments in the test mode where no real money transfers occur.
- Use Mollie test credentials to test credit/debit cards
- Obtain a new
access tokenusing the storedrefresh tokento authorize the API calls on behalf of your customer.
For organization-level credentials (such as your OAuth access tokens), you can enable the test mode by setting the testmode parameter to true in your Create Payment API call.
{
    "amount":
    {
        "currency":"EUR",
        "value":"10.00"
    },
    "description":"This is a test payment",
    "redirectUrl":"https://circle.com/checkout/landing",
    "profileId":"pfl_zcfJRjkf6P",
    "testmode":true
}
Add Application Fee
With Mollie Connect you can monetize payments by charging Application fees on your customers' payments by passing a parameter applicationFee when creating payments via Payments API.
For example, in the API call below, the consumer pays 10.00 EUR to your customer with an added 1.50 EUR Application fee.
Once the transaction is successful, Mollie will move 1.50 EUR to the partner’s balance and will settle the amount minus transaction fee to the customer's balance.
{
    "amount":
    {
        "currency":"EUR",
        "value":"10.00"
    },
    "description":"I can accept payments now",
    "redirectUrl":"https://circle.com/checkout/landing",
    "profileId":"pfl_zcfJRjkf6P",
    "applicationFee":
    {
        "amount":
        {
            "currency":"EUR",
            "value":"1.50"
        },
        "description":"This is Application fee"
    },
    "testmode":true
}
Step 5: Go live
Before going live and starting processing transactions, make sure that:
- Your customer finished the onboarding and their account is verified.
- You are done with testing your setup and everything works as expected.
- You enabled payment methods you plan to offer and they are activated in your organization.
If you checked all of the above, you can now go live and start accepting payments.
For organization-level credentials (such as your OAuth access tokens), you can enable live mode by setting the testmode parameter to false or simply omit the parameter.
For example, in the API call below, we are processing a transaction of 10.00 EUR with the added Application fee of 1.50 EUR and we are doing it in the live mode:
{
    "amount":
    {
        "currency":"EUR",
        "value":"10.00"
    },
    "description":"This is an actual payment",
    "redirectUrl":"https://circle.com/checkout/landing",
    "profileId":"pfl_zcfJRjkf6P",
    "applicationFee":
    {
        "amount":
        {
            "currency":"EUR",
            "value":"1.50"
        },
        "description":"This is Application fee"
    }
}
Now the setup is complete and you are ready to process payments on behalf of your customers!
Updated about 1 year ago