
Connect for Platforms: Onboarding customers
Next, we need to link new or existing customers to your OAuth app using Mollie Connect.
Onboarding customers
Note
Mollie offers a Postman collection covering the latest version of the Mollie API. You can import this collection into your own Postman application to simplify your explorations of the Mollie API:
If your platform needs to connect new or existing customers without pre-filling their business information, choose our standard OAuth implementation:
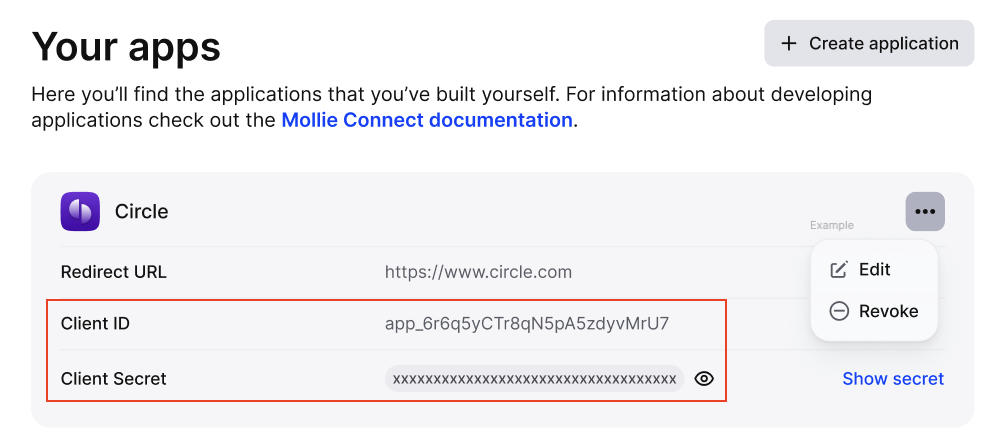
- Click More > Developers.
- Select Your apps tab and copy
Client IDandClient Secretof your application:
- Construct an authorization URL with the parameters such as
clientId,scope,stateetc following the URL parameters section of the Authorize article.
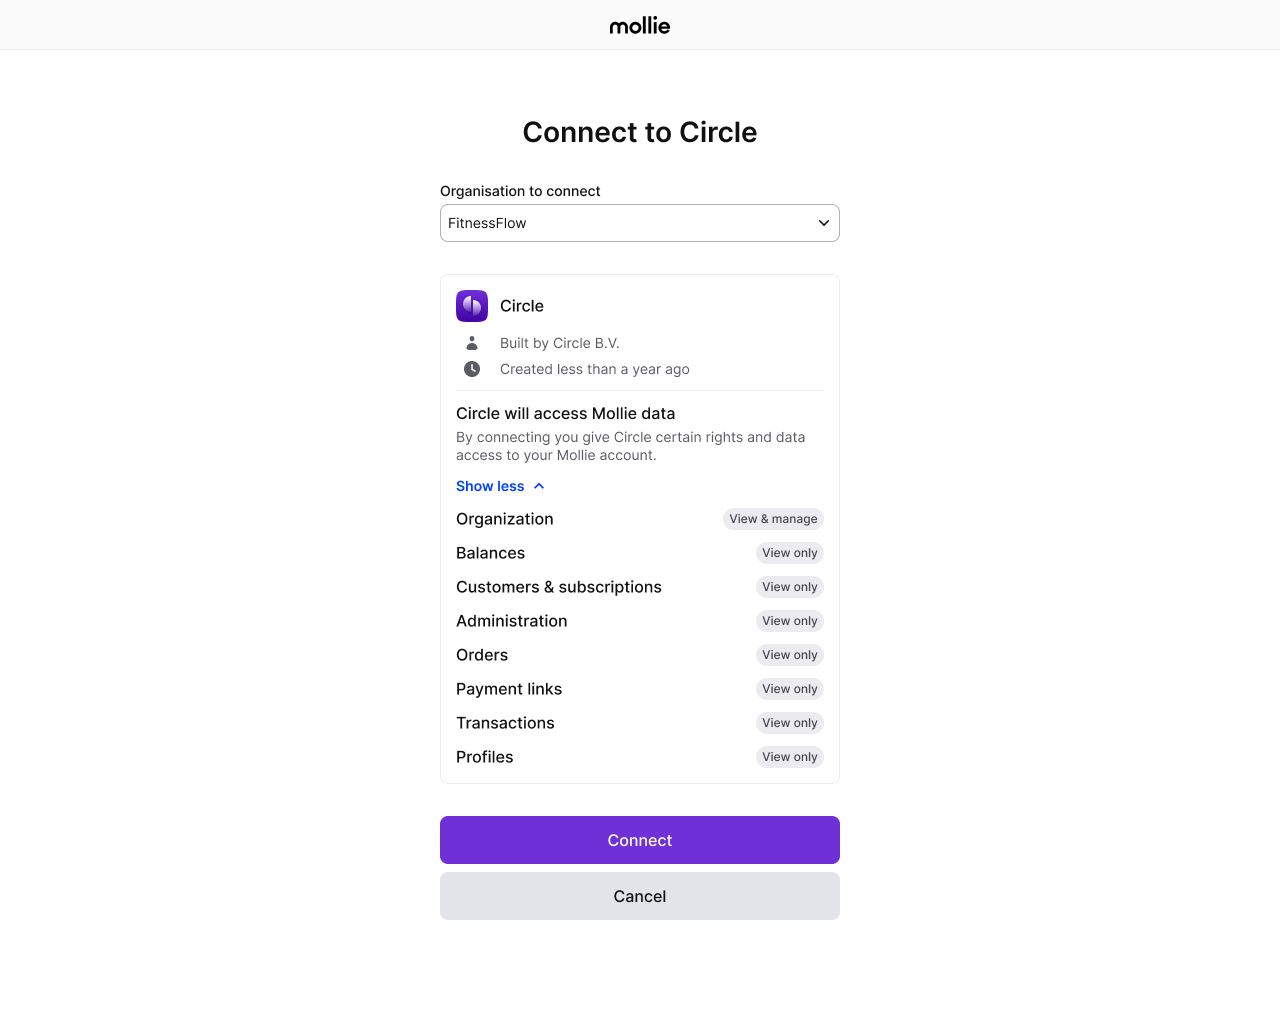
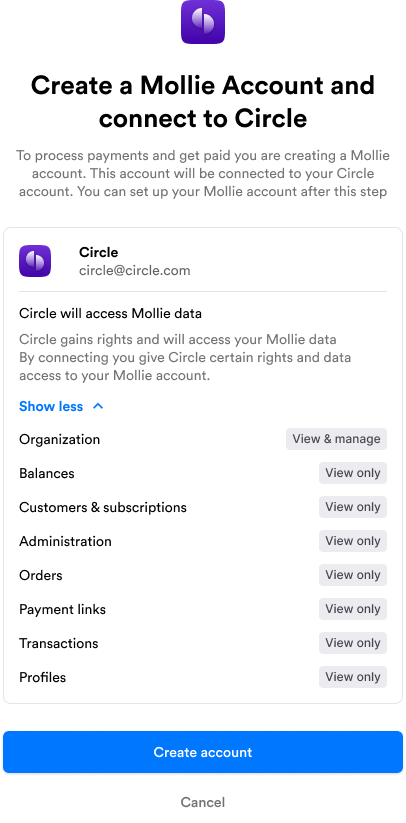
Then, you can send your customer to that URL to take them to the authorization screen (typically this redirect sits behind a Connect with Mollie button). - Once they follow the URL, the OAuth authorize screen pops up and asks your customers to connect to Mollie and grant the necessary permissions:
- After your customers finish the authorization steps, they are redirected back to the
redirect URLyou specified, which includes thecodeparameter with theauthorization_code. This code expires after 30 seconds. - You need to fetch the
authorization_codefrom the client's request, and use it to send a request to the Tokens API to generate a pair of credentials allowing you to create API requests on behalf of your customers:access_tokenandrefresh_token.- The
access_tokenyou receive is temporary and expires after 60 minutes. - The
refresh_tokenis persistent, so make sure you encrypt and store it securely on your device.
- The
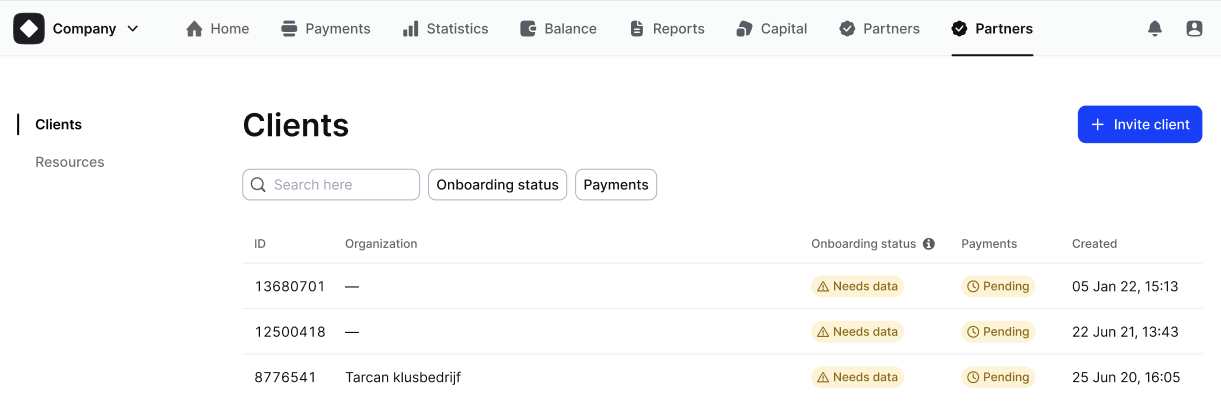
- Once your customers click the link and connect to your OAuth app, they appear under the Partners > Clients tab in your partner dashboard.
You can check out each organization to see more details about the account, such as onboarding steps remaining, website profiles created, along with the payment methods enabled for those profiles etc.
Automating customer onboarding
Create an organization for your customer
For a seamless and automated Mollie onboarding experience of new customers, we will be using the Client Links API built on Mollie’s OAuth.
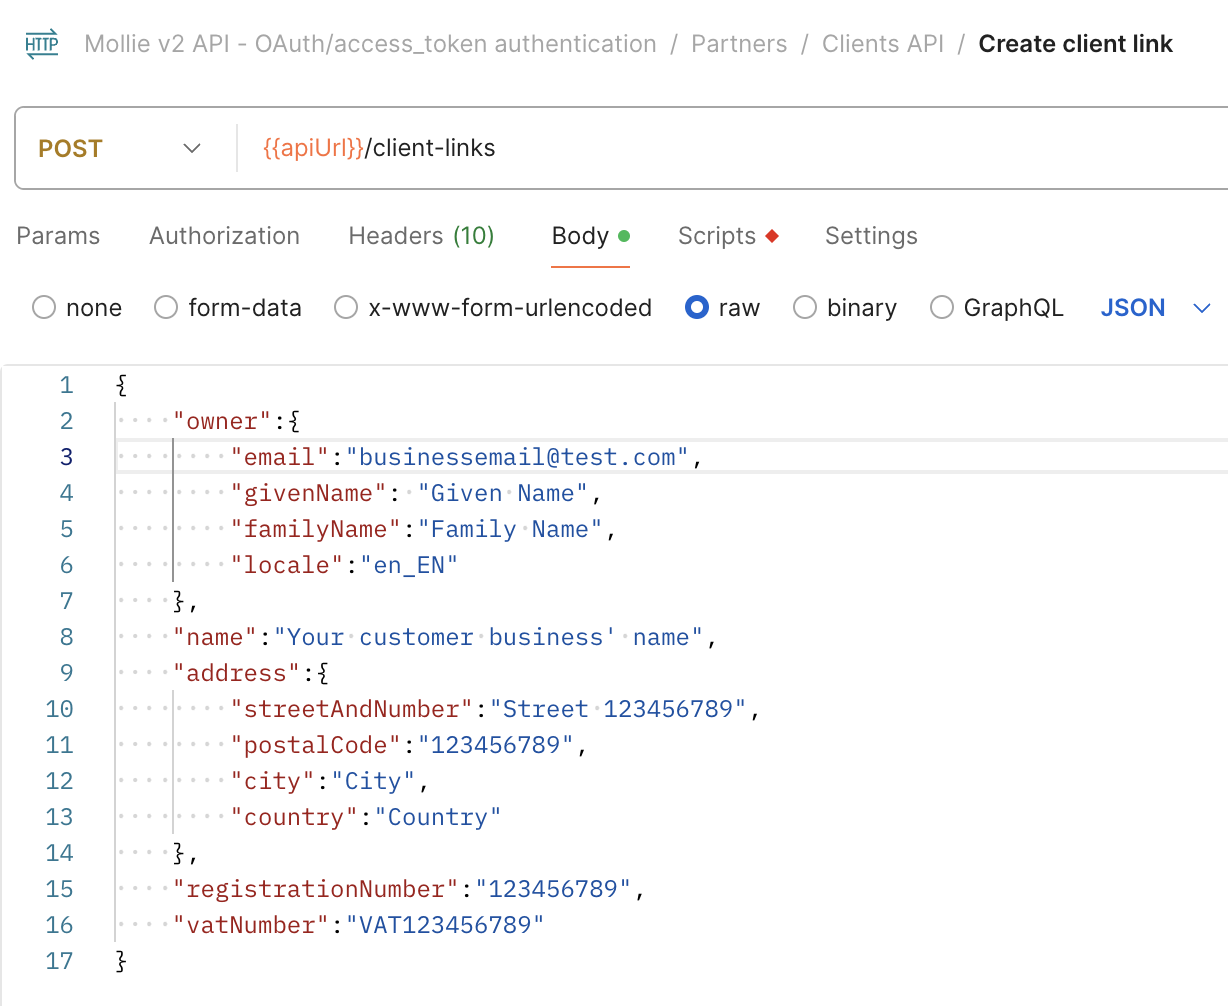
- Send customer's information to the Create Client Link endpoint, with their business details. Pre-fillable data includes:
- Personal data of your customer:
EmailGiven NameFamily NameLocale
Organization nameAddressRegistration numberVAT number
-
The API returns a
clientLinkin the response, which you will need to add additional URL parameters to before sharing it with your customer. This includesclientId,scope,stateetc following the URL parameters section of the Authorize article.
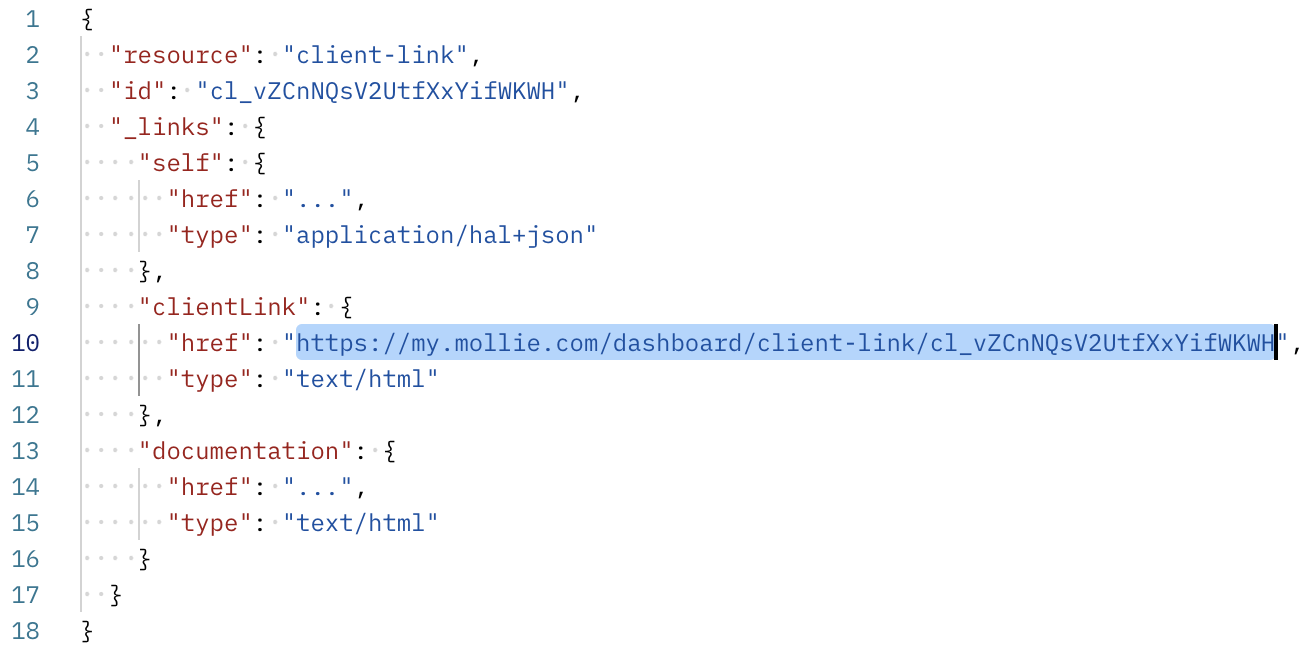
Once they follow the link, an organization is created with the prefilled information about their business:
-
After your customer clicks the link and creates an account, they are redirected back to the
redirect URLyou specified, which includes thecodeparameter with theauthorization_code. This code expires after 30 seconds.When the link is opened, Mollie sends an email to the specified address asking for email verification and password creation. After that, the user is logged into the Mollie Web app to finish any remaining onboarding steps.
-
You need to fetch the
authorization_codefrom the client's request, and use it to send a request to the Tokens API to generate a pair of credentials allowing you to create API requests on behalf of your customers:access_tokenandrefresh_token.- The
access_tokenyou receive is temporary and expires after 60 minutes. - The
refresh_tokenis persistent, so make sure you encrypt and store it securely on your device.
- The
-
Once your customers click the link and connect to your OAuth app, they appear under the Partners > Clients tab in your partner dashboard.
Configure your customers' profiles
As your customers continue onboarding at Mollie, they will configure one or more website profiles.
Profiles represent customer storefronts, allowing for multiple trade names or markets within one account. Payment methods and transactions are always associated with specific profiles.
For customers who already have a Mollie account, they may have already created and configured one or more profiles. We recommend asking them to select the profile that they wish to use to process payments through your platform. You can fetch a list of existing customer profiles via the Profiles API, or you can create and configure a new profile on your customer's behalf:
- Send data to create a new profile for your customer using the Create profile endpoint.
- Enable payment methods through the API (some methods may require additional activation steps).
Wait for your customers to complete the onboarding
While waiting for your customers to complete their onboarding, use the Onboarding status endpoint response to display the current status.
Possible statuses are needs-data, in-review, and completed.
If needs-data is returned, Mollie requires more information and the API response contains a _links/dashboard deep link to the customer’s onboarding wizard. We recommend including the link in your application with a clear call-to-action.
Two milestones, canReceivePayments and canReceiveSettlements, indicate progress during onboarding. Display the following onboarding status messages:
| Status | Payments enabled | Settlements enabled | Message you can show to your customer |
|---|---|---|---|
needs-data | false | false | Before you can receive payments, Mollie needs more information. |
needs-data | true | false | You can start receiving payments. Before Mollie can pay out to your bank, you need to provide some additional information. |
in-review | false | false | Mollie has all the required information and is verifying your details. |
in-review | true | false | You can start receiving payments. Mollie is verifying your details to enable settlements to your bank. |
completed | true | true | Setup is complete! |
Once canReceivePayments flag is true, you can create your first payment to test your integration.
You can also use the Capabilities API to verify if payments and settlements have been enabled.
Example
Updated 5 days ago
