Apple Pay
Apple Pay is a digital wallet service by Apple Inc. that allows shoppers to make purchases with credit or debit cards stored on their Apple devices. See more on Apple Pay's functionality here.
Apple Pay is only available in a limited number of countries. This limitation applies to the shopper’s country and not the merchant’s.
Accepting Apple Pay via Mollie
In order to accept Apple Pay via Mollie, you need to enable both credit card and Apple Pay on your website profile in your Mollie Web app.
Shoppers using an Apple device with Apple Pay configured will automatically be offered Apple Pay in the Mollie Checkout. Additionally, limited support for integrating Apple Pay in your own checkout is available.
Using the Mollie Checkout
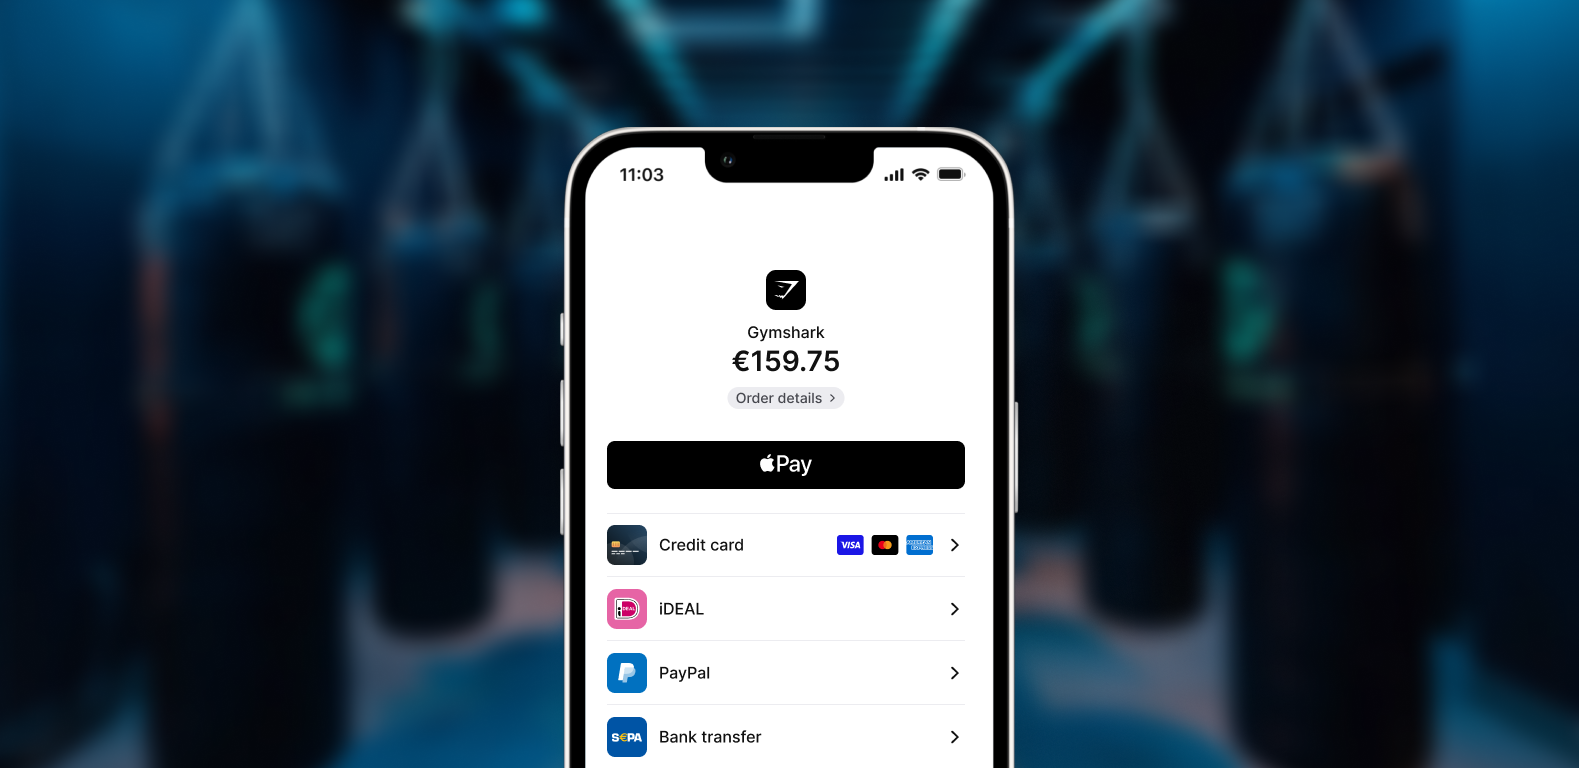
If you are using the Mollie Checkout and the Create payment endpoint without the method parameter, the Apple Pay button will be shown in the checkout during method selection:
Adding Apple Pay to the method selection
An easy way to integrate Apple Pay is by adding Apple Pay to the payment method selection. The “Checkout with Pay” button will then be shown in the Mollie Checkout.
First, you must indicate to the List methods endpoint on the Methods API which wallets you support in your checkout by adding the includeWallets=applepay parameter.
curl -X GET https://api.mollie.com/v2/methods?includeWallets=applepay \
   -H "Authorization: Bearer test_dHar4XY7LxsDOtmnkVtjNVWXLSlXsM"
<?php
require_once 'vendor/autoload.php';
$mollie = new \Mollie\Api\MollieApiClient();
$mollie->setApiKey("test_dHar4XY7LxsDOtmnkVtjNVWXLSlXsM");
$methods = $mollie->methods->allActive([
"includeWallets" => "applepay"
]);If Apple Pay is enabled on the website profile, a method with the id applepay will be returned in the list of payment methods. Apple Pay can be enabled in the Web app.
Then, during checkout, you should check if the Apple Pay method is available on the shopper’s device by using the canMakePayments method on the window.ApplePaySession object. Apple requires you that you only show the Apple Pay option when it is actually supported by the device. For more details, see the article by Apple.
if (window.ApplePaySession && window.ApplePaySession.canMakePayments()) {
  // Add ApplePay to the method selection in your checkout
}
Finally, when the shopper selects Apple Pay from your method selection, you should use the Create payment endpoint to create a payment with the method parameter set to applepay and redirect the shopper to the _links.checkout URL returned.
When the shopper authorizes the payment, Mollie will create a payment with the method creditcard. We will then call your webhook and redirect the shopper back to your website as normal.
Examples
Option 1. Adding Apple Pay client-side with JavaScript
When using a <select> dropdown or equivalent, we recommend handling adding Apple Pay to your checkout entirely with JavaScript. This prevents you from having to edit your HTML or CSS.
If you need a more control or have complex HTML, see Adding Apple Pay server-side.
<form>
  <!-- Other checkout fields like billing address etc. -->

  <select class="js-select-method">
    <option value="creditcard">Credit card</option>
    <option value="ideal">iDEAL</option>
    <option value="paypal">PayPal</option>
    <option value="banktransfer">Bank transfer</option>
  </select>
</form>

<!--
Only load this script if Apple Pay is enabled on your website profile.
For example with PHP:

<?php if ($applePayEnabled) : ?>
-->
<script>
   if (!window.ApplePaySession || !ApplePaySession.canMakePayments()) {
     // Apple Pay is not available
     return;
   }

   // Create Apple Pay option
   const option = document.createElement('option');
   option.value = 'applepay';
   option.textContent = 'Apple Pay';

   // Find the payment method dropdown in the document, this depends on your HTML
   const select = document.querySelector('.js-select-method');

   // Add Apple Pay to dropdown
   select.prepend(option);
</script>
<!--
<?php endif; ?>
-->
For more details on detecting the support of Apple Pay on a device, see Apple’s documentation.
Option 2. Adding Apple Pay server-side
If you use a more complex HTML structure, or you need data which is only available server-side, your best option is to add Apple Pay to the DOM and hide it both visually as well as from screen-readers.
<html>
  <head>
    <style>
      /* You should probably add this block to an existing stylesheet instead of inlining it. */
      .payment-methods > [aria-hidden="true"] {
        display: none;
      }
    </style>
  </head>
  <body>
    <form>
      <!-- Other checkout fields like billing address etc. -->

      <ul class="payment-methods">
        <!--
        Only show this method if Apple Pay is enabled on your website profile.
        For example with PHP:

        <?php if ($applePayEnabled) : ?>
        -->
        <li class="js-apple-pay" aria-hidden="true">
          <label>
            <input name="method" value="applepay" type="radio">
            Apple Pay
          </label>
        </li>
        <!--
        <?php endif; ?>
        -->
        <li>
          <label>
            <input name="method" value="creditcard" type="radio">
            Credit card
          </label>
        </li>
        ...
      </ul>
    </form>

    <!--
    Only load this script if Apple Pay is enabled on your website profile.
    For example with PHP:

    <?php if ($applePayEnabled) : ?>
    -->
    <script>
        if (!window.ApplePaySession || !ApplePaySession.canMakePayments()) {
          // Apple Pay is not available
          return;
        }

        // Find the hidden Apple Pay element
        const applePay = document.querySelector('.js-apple-pay');

        // Remove the aria-hidden attribute
        applePay.removeAttribute('aria-hidden');
    </script>
    <!--
    <?php endif; ?>
    -->
  </body>
</html>
For more details on detecting the support of Apple Pay on a device, see Apple’s documentation.
Direct integration of Apple Pay
Integrating Apple Pay in your own checkout is available. See our full guide.
Updated 8 months ago