
What is Postman
Postman is a collaborative API development platform that simplifies building, testing, and documenting APIs.
It provides an intuitive interface to send HTTP requests and inspect responses without having to write extensive code.
Developers use Postman to test the endpoints, share collections with teammates and streamline API integration. Its powerful features and ease of use make it a popular choice for improving the speed and quality of API development.
Mollie collection
Mollie offers a Postman collection covering the latest version (v2) of the Mollie API.
You can import this collection into your own Postman application to simplify your exploration of the Mollie API and start making your own requests:
The structure of the collection follows the structure of our API documentation and each request is pre-populated with a specific endpoint and contains at least one example (in the Body tab).
WarningNever include confidential information such as passwords, authentication keys, or OAuth tokens in publicly accessible Postman workspaces or collections.
Creating environment
Start by creating a sandbox environment where you can test your API calls. We recommend creating one environment per Mollie account. To create an environment:
- Open Postman.
- In the left sidebar, click Environments (the gear ⚙️ icon) or the Environment dropdown, then select Manage Environments.
- Click Add (or Create Environment).
- Enter a name for your environment (Tip: match the name with your Mollie account's name).
- Click Save.
Done! You can now use this environment to make your requests.
Forking collection
When you fork a collection or an environment, you create a copy of it in a different workspace.
See full instructions in the Fork collections and environments in Postman article.
So after you fork Mollie's API collection, it appears in your private workspace. You can then modify the requests as needed and run them directly in your test environment.
Setting up variables
Next, let's populate the Variables - these are the placeholders that can be set to specific values and that are re-used across all your future requests.
For most users, we recommend populating:
accessTokenorapiKey- unique credentials to authenticate your API requests.profileId- Profile ID of your Mollie account.
Required if you are using an organization access token to authenticate requests.redirectUrl- URL that users are redirected to after completing a transaction.
For users testing Mollie Connect, we also recommend the following:
refreshToken- refresh token generated.clientId- client ID of your OAuth app.clientSeceret- client secret of your OAuth app.
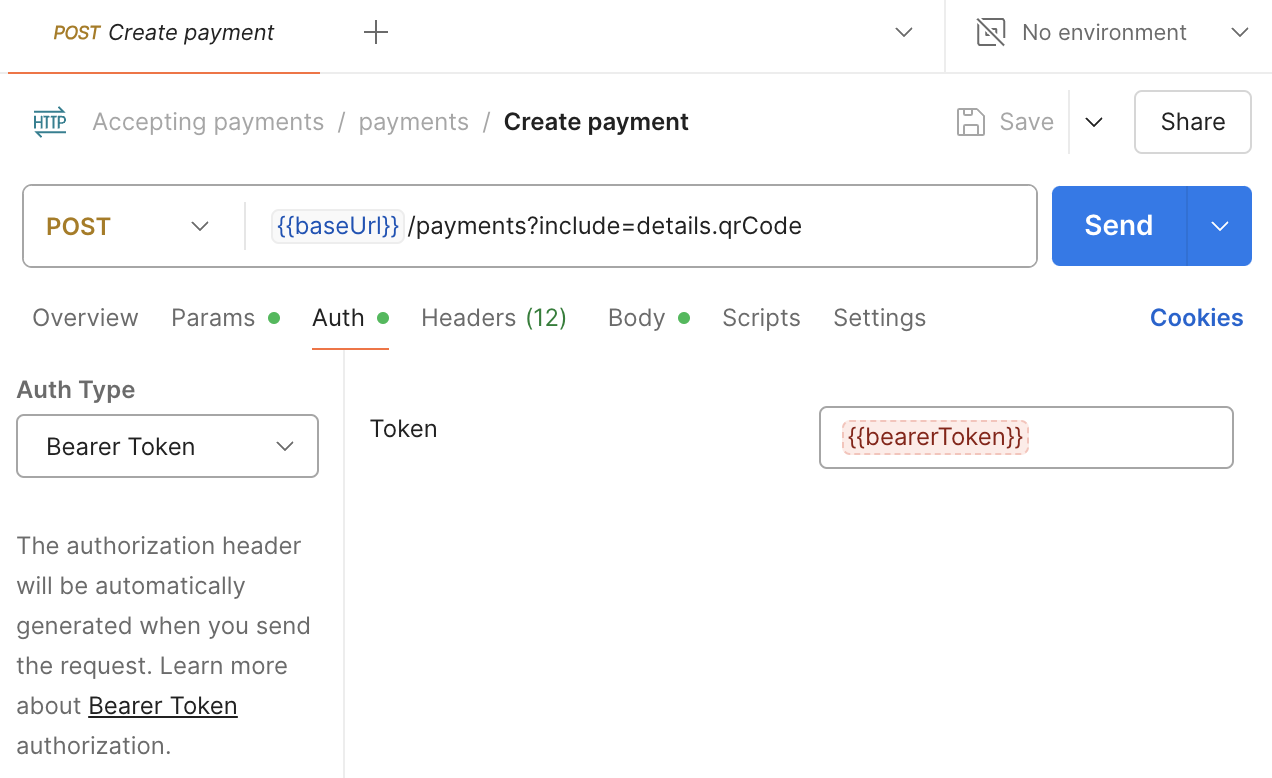
Also, make sure that you set the Auth Type to Bearer Token - this is the authentication method used for the majority of API requests. Read more about this in our Authentication article.
Making an API call
Once you set up the above, you are ready to make your first API call. We recommend starting by creating a payment using the test mode:
-
In your forked Mollie collection navigate to Accepting payments > Create payment:
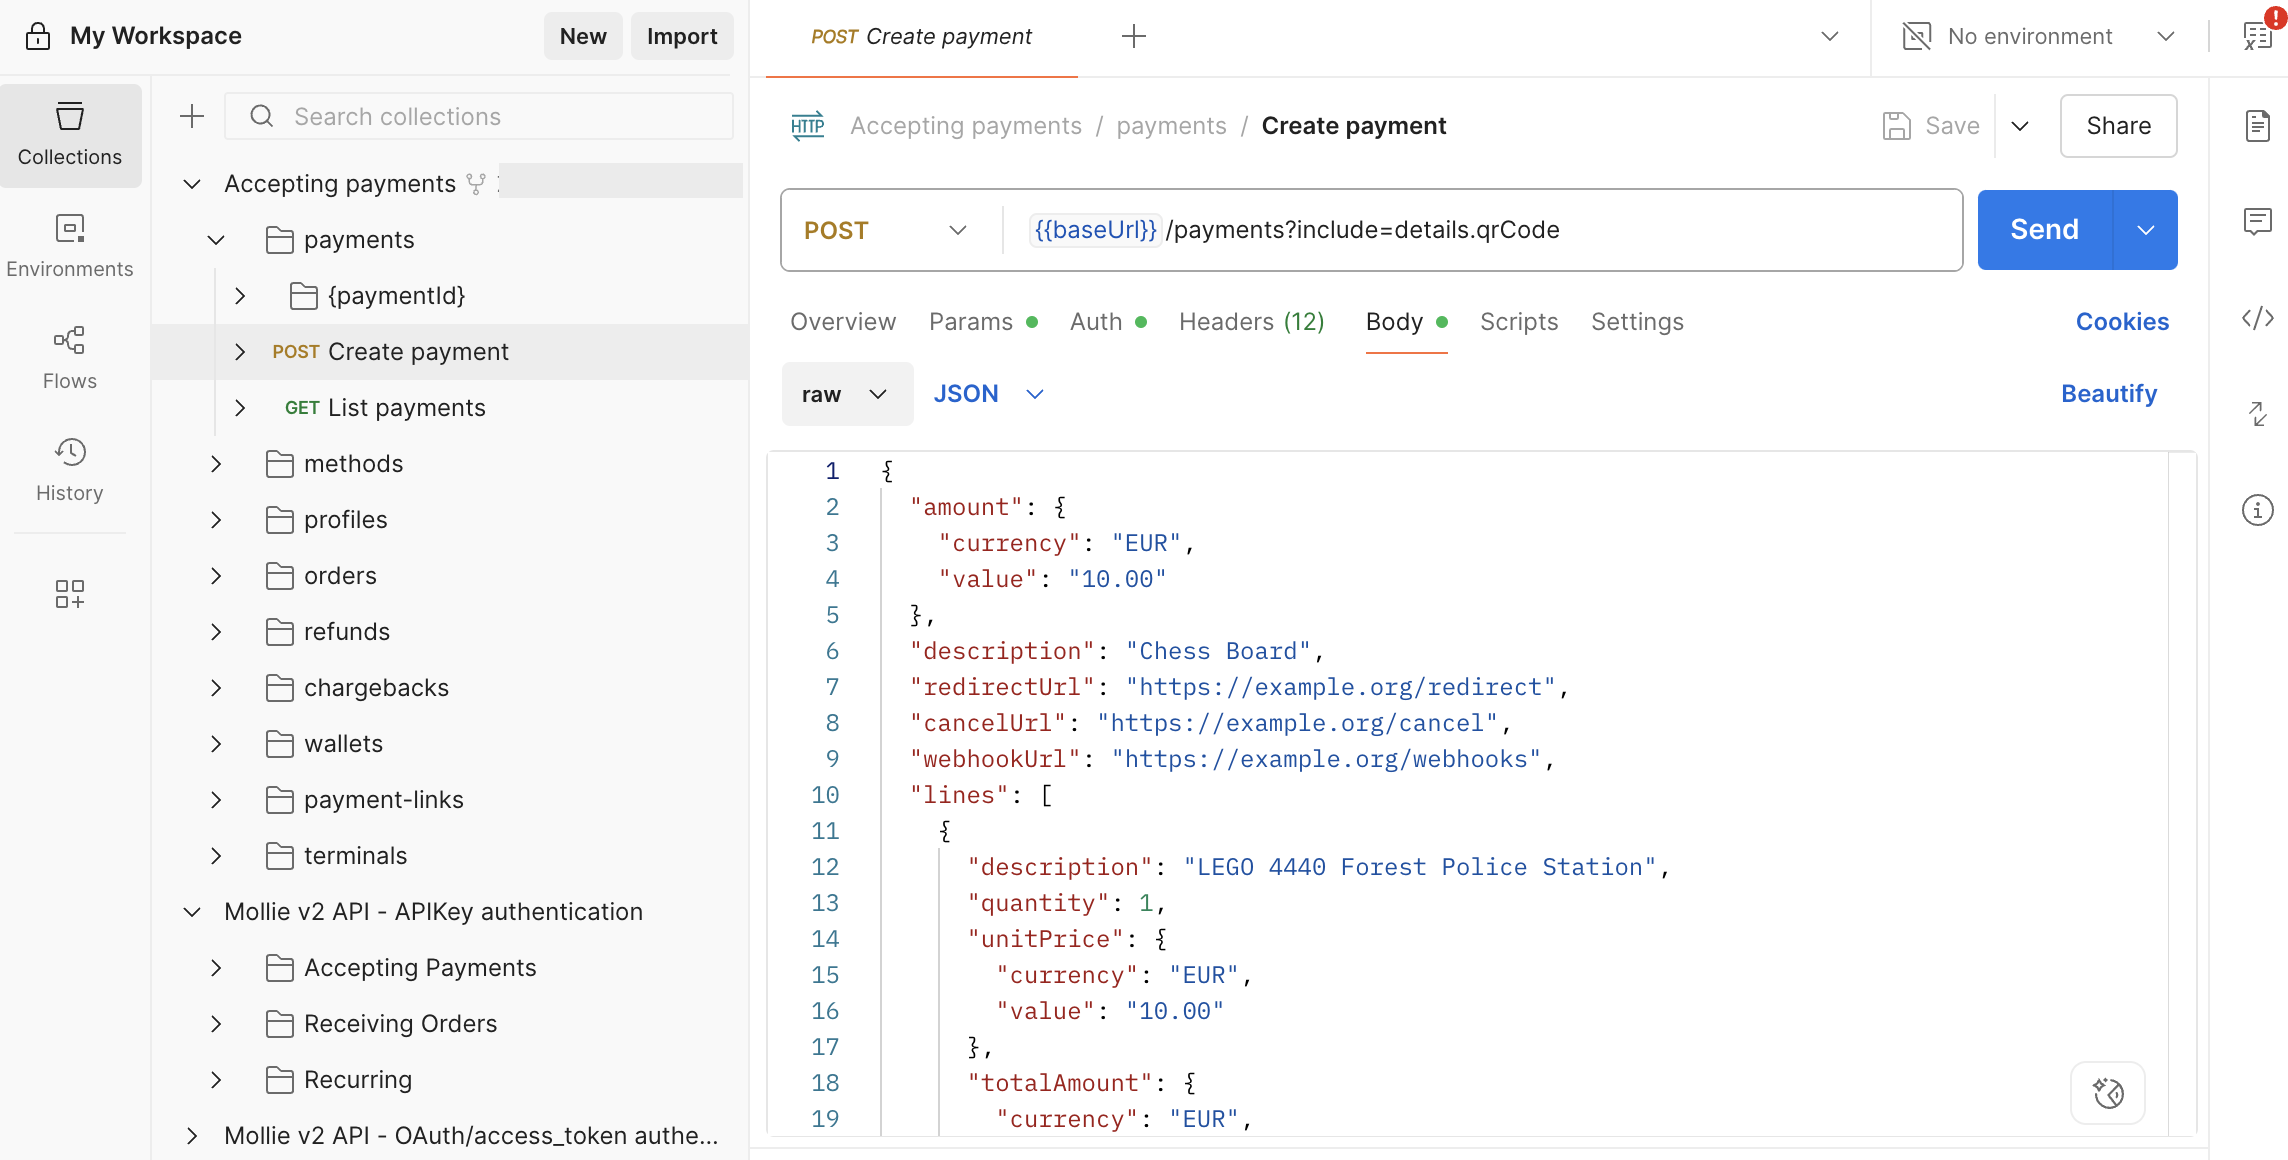
-
Ensure the URL is targeting the right endpoint:
https://api.mollie.com/v2/payments -
Set the Authentication to use the right auth method (Bearer Token)
-
In the Body tab, you can select raw, JSON and set your fields to the desired values:
{
  "amount": {
    "currency": "EUR",
    "value": "10.00"
  },
  "description": "Order #12345",
  "redirectUrl": "https://yourwebshop.example.org/order/12345/",
  "metadata": {
		"order_id": "12345"
  }
}- Click Send to send the API call and create your test payment.
You can examine a response that comes back along with the fields it returns here.